Brake Pad DIY
#1
Thread Starter
Registered User
iTrader: (1)
Joined: May 2005
Posts: 124
Likes: 0
From: Displaced New Yorker
Brake Pad DIY
I did a DIY for M45 Brakes on G35NYC here is a copy if any of yallz are interested or need pictures of the brakes for any reason
Everytime I get back from school - i get a laundary list of work to be completed. For the M45 - it was front pads, oil change and air filter
Iam not responsible for anything that happens to either you or your vehicle! This is for reference!
Note: Some of the photos are not entirely in order - Some of em are of the drivers side and some are of the passanger side.
Note: G35 Brake Pad change is entirely alike
on to it.
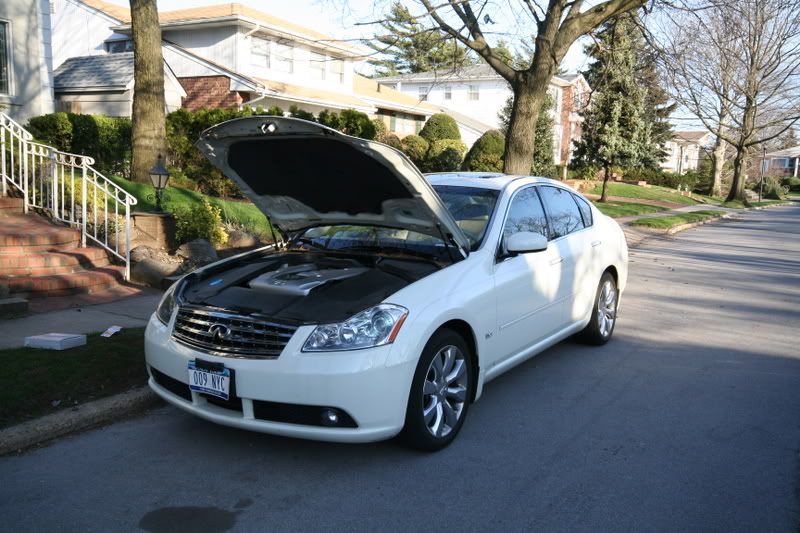
two ways to check if you need new pads.
first method is obvious...if the caliper is dangerously close to the rotor.
second - brake fluid is low AND the calipers are awfully close to the rotor
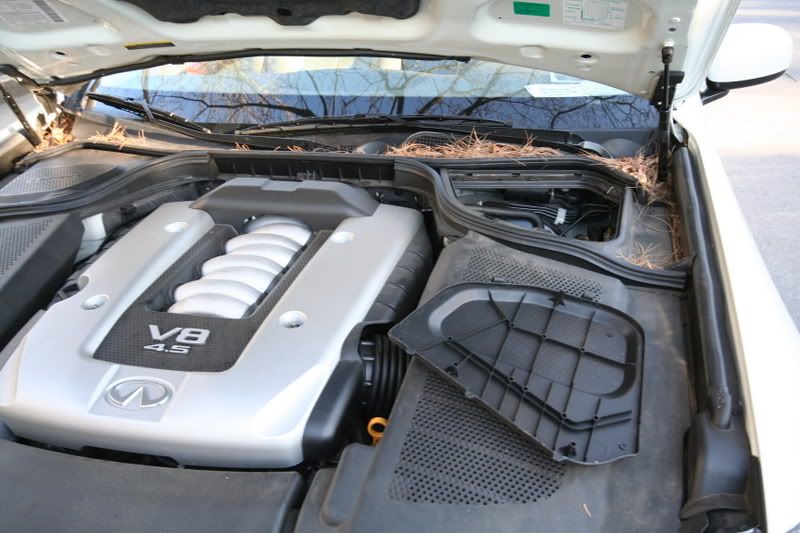
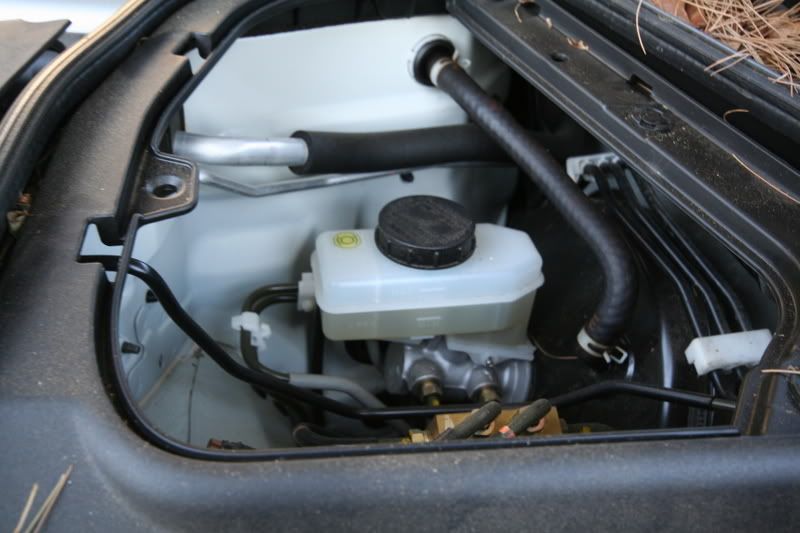
looks like it is low (plus the caliper was fairly close to the rotor)
well, its not THAT low...but I wont be home when my mother wears them out completely..so I will replace them now.
here are the tools you need

besides the basics - you need a C Clamp, Brake Greese (4 small packets is good enough for all four calipers) the new pads themselves, and some disposable gloves.
Best place to get pads are at your local auto store. they will usually have them in stock for NYC - and if they dont they can always order you a set next day. usually 1/2 the price of a dealers set.
1) Break Lugs, Jack up car, Remove wheel. Reattach a Lug to a Stud to hold rotor in place
2) Study and inspect the Caliper
Note: The Lug reattached to the Studs...you can only see it in this photo but make sure you always have it in while you are changing the pads. Makes life much easier.
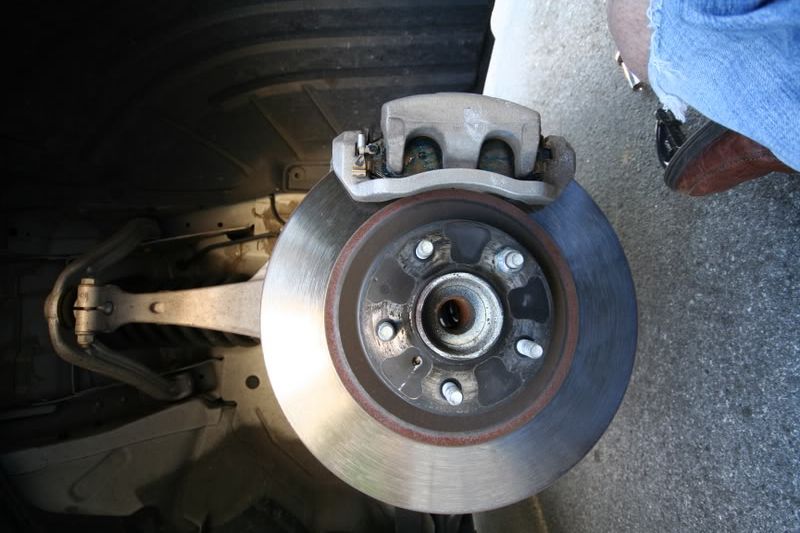
- your going to pivot the caliper upwards by removing one bolt on the bottom.
3) Remove bolt
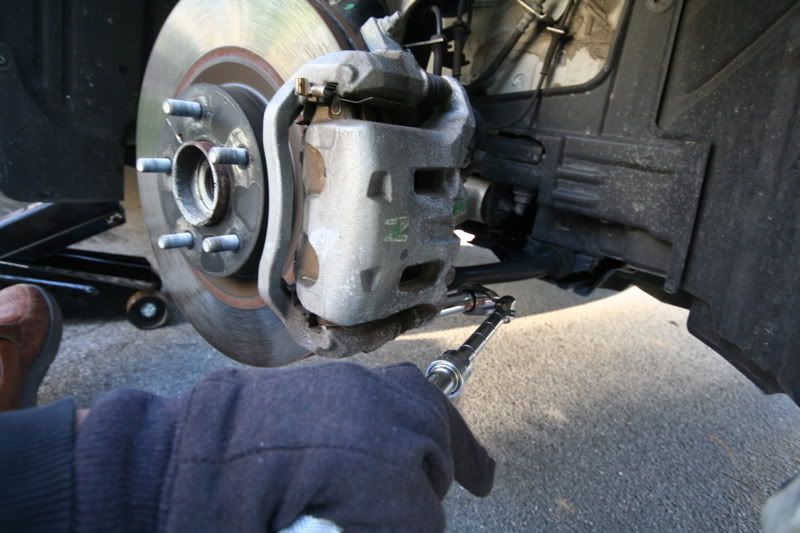
^^^thats the bolt!
4)Pivot Caliper upwards. Make sure that the caliper is not placing pressure on that brake line! on this M45 (and on my G) the caliper rests on the rotor w/o putting any strain on the line. if it does put strain on the line...either support the caliper with a bungee cord or with a scissor jack
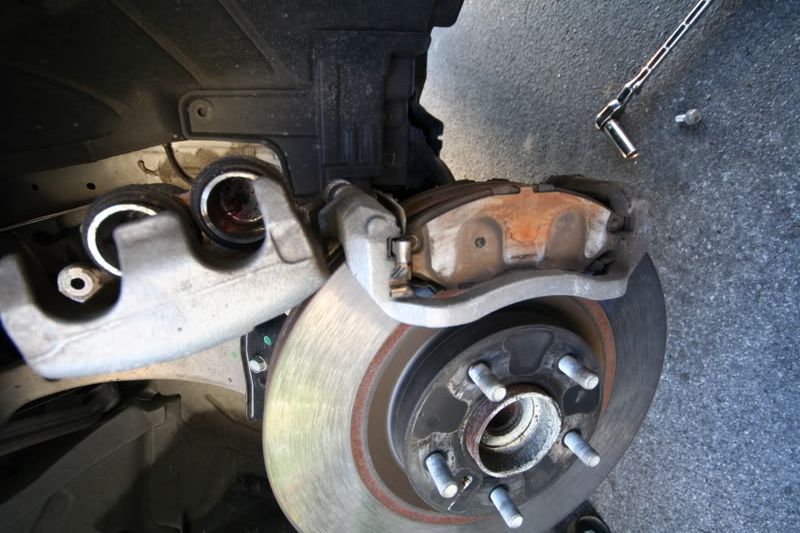
5) Remove pads
- They will be clipped on...but if your careful enough, you will be able to take them out without too much difficulty.
- There will be a few "shims" on the pads. you want em...so dont loose em.
6) Take Pads to your work bench. remove shims gently with flat head screw driver (if they havent fallen off already) and try your best to clean them (you dont have to go crazy) with brake cleaner or another type of disolving cleaner.
if you do want to go crazy, you can also...
-clean caliper with wire brush
-place a oil catch can under the rotor, and liberally spray brake cleaner on caliper and rotors to remove crud.
-dont inhale the friggin cleaner!!! Ive tried, and it doesnt get you high, it gets you sick!
7) lay out NEW pad and SPREAD an even coat of the brake lube on back of new pad
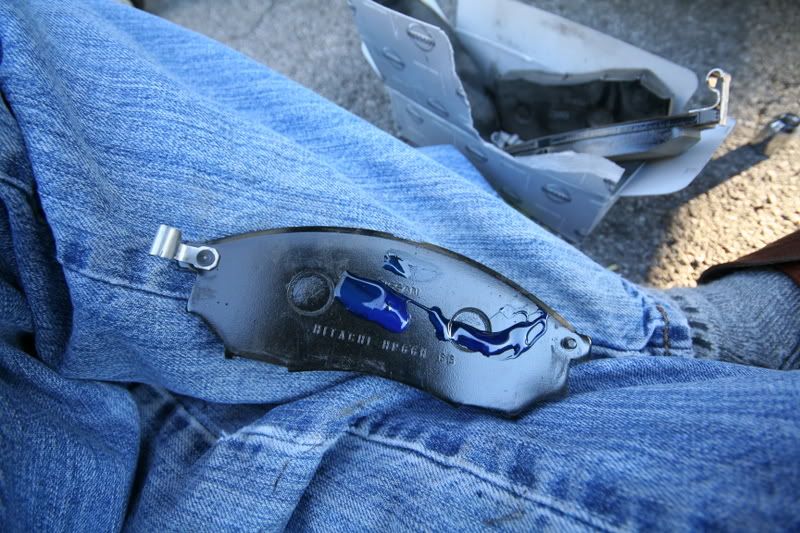
this greese is blue...they come in all sorts of colors tho
note: you must spread the greese evenly on the back of the pad. When you put the pad back on the rotor, it will be squezed by the piston...so make sure that you dont put so much greese that it spills over on to the rotor when it is squezed
8) After you spread your Cream Cheese, Install the first shim on back of pad...and apply greese on back of that shim...than install the second shim...and apply greese on back of that shim
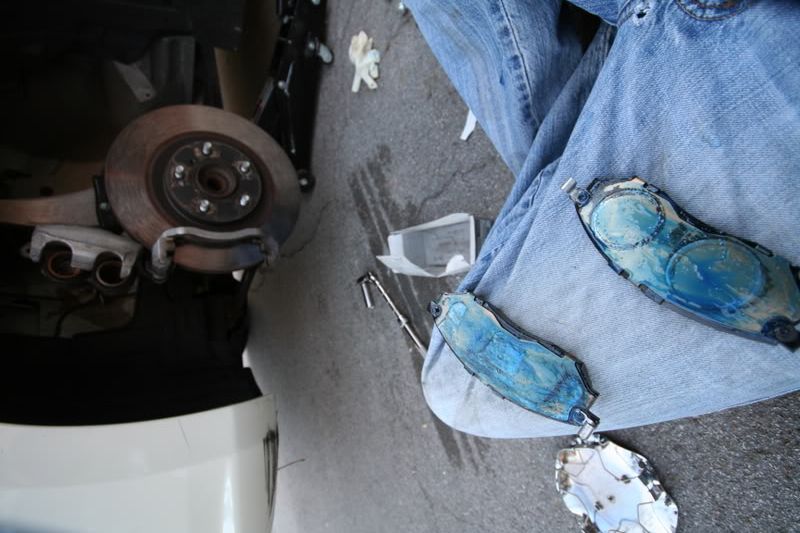
NOTE: Some aftermarket pads, such as the Hawk HPS, come with the shims built into the pads. In that case, you dont really need the shims. The Shims are there to protect the pistons from a spontanious nuclear explosion IF you COMPLETELY wear out your pads
9)your new pads wont fit if you dont compress the caliper pistons. The pistons have adjusted to your older, thinner, worn out pads - now you need to adjust the pistons to accommodate your larger newer pads!
Place one of your OLD pads in the caliper
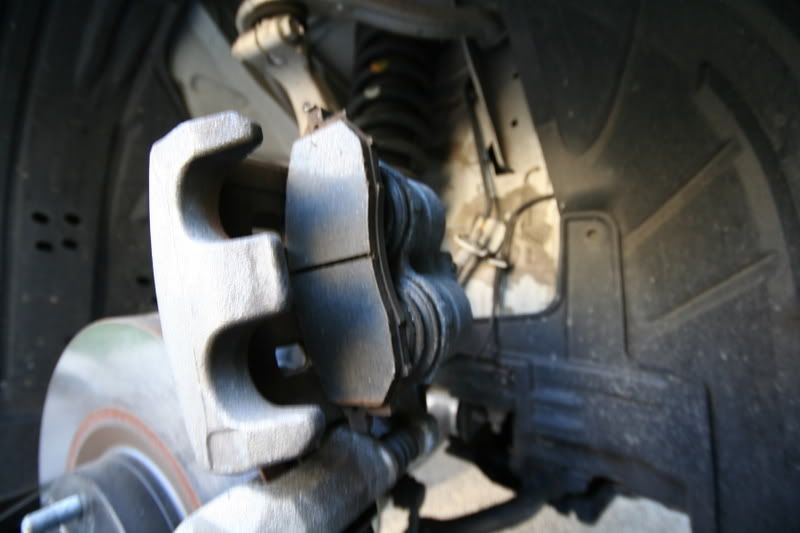
and use the C Clamp to squeeze each piston one at a time back into the caliper
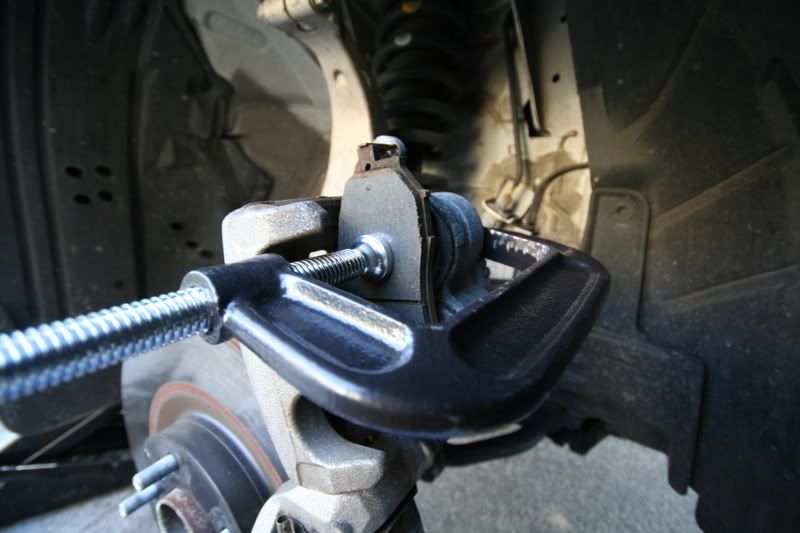
WATCH the brake fluid in the engine compartment...sometimes it might spill over or seep above the MAX line as you squeeze in the piston (in that case...which will only happen if someone overfilled your brake fluid resivour, suck out some brake fluid with a turkey baster)
10) after squeezing the pistons back into the caliper, install your pads. it might take some time since your working in a tight space, but you will eventually get it. Clip them in as well.
11) Slide Caliper Back down...once again, your gonna have to move the caliper a bit to get it to fit right. it should slide in with ease once everything is lined up properly.
12) tighten that bolt you removed before...Dont go crazy!!! just hand tight - and a little than some. I THINK its like 30 ft/lbs - will check lter

13) now repeat on all other wheels
Note: the rear brakes might be a little different. You might have to remove the top bolt instead and than support the hanging caliper with a jack or bungee cord. Same principles remain tho...remove bolt - dont place pressure on line and support caliper - remove old pads and old shims - install new ones with old shims and new greese - squeeze pisons - etc etc
After I replaced all the pads, my fluid reservoir rose to the proper level now
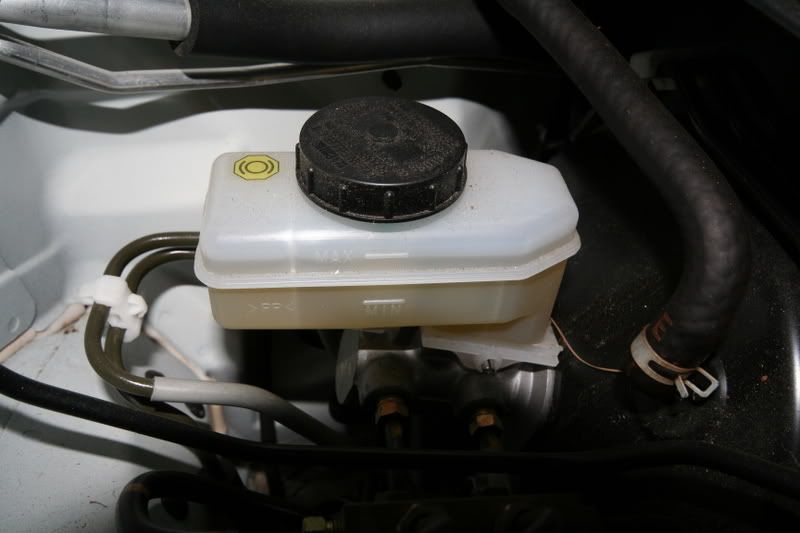
if you still think your brakes feel funky, its prob time to bleed em. that will return a nice firm pedal
14) Clean up your workspace and go for a testdrive.
Listen for any weird noises. If it squeels...you dun have enough greese, if it "clicks" ...the pads might not be seated in the hardware correctly.
now go spend the money you saved on a tank of gas!
BTW - if there is something i missed, or something anyone wants to add - please comment below and I will slap it in.
Everytime I get back from school - i get a laundary list of work to be completed. For the M45 - it was front pads, oil change and air filter
Iam not responsible for anything that happens to either you or your vehicle! This is for reference!
Note: Some of the photos are not entirely in order - Some of em are of the drivers side and some are of the passanger side.
Note: G35 Brake Pad change is entirely alike
on to it.

two ways to check if you need new pads.
first method is obvious...if the caliper is dangerously close to the rotor.
second - brake fluid is low AND the calipers are awfully close to the rotor


looks like it is low (plus the caliper was fairly close to the rotor)
well, its not THAT low...but I wont be home when my mother wears them out completely..so I will replace them now.
here are the tools you need

besides the basics - you need a C Clamp, Brake Greese (4 small packets is good enough for all four calipers) the new pads themselves, and some disposable gloves.
Best place to get pads are at your local auto store. they will usually have them in stock for NYC - and if they dont they can always order you a set next day. usually 1/2 the price of a dealers set.
1) Break Lugs, Jack up car, Remove wheel. Reattach a Lug to a Stud to hold rotor in place
2) Study and inspect the Caliper
Note: The Lug reattached to the Studs...you can only see it in this photo but make sure you always have it in while you are changing the pads. Makes life much easier.

- your going to pivot the caliper upwards by removing one bolt on the bottom.
3) Remove bolt

^^^thats the bolt!
4)Pivot Caliper upwards. Make sure that the caliper is not placing pressure on that brake line! on this M45 (and on my G) the caliper rests on the rotor w/o putting any strain on the line. if it does put strain on the line...either support the caliper with a bungee cord or with a scissor jack

5) Remove pads
- They will be clipped on...but if your careful enough, you will be able to take them out without too much difficulty.
- There will be a few "shims" on the pads. you want em...so dont loose em.
6) Take Pads to your work bench. remove shims gently with flat head screw driver (if they havent fallen off already) and try your best to clean them (you dont have to go crazy) with brake cleaner or another type of disolving cleaner.
if you do want to go crazy, you can also...
-clean caliper with wire brush
-place a oil catch can under the rotor, and liberally spray brake cleaner on caliper and rotors to remove crud.
-dont inhale the friggin cleaner!!! Ive tried, and it doesnt get you high, it gets you sick!
7) lay out NEW pad and SPREAD an even coat of the brake lube on back of new pad

this greese is blue...they come in all sorts of colors tho
note: you must spread the greese evenly on the back of the pad. When you put the pad back on the rotor, it will be squezed by the piston...so make sure that you dont put so much greese that it spills over on to the rotor when it is squezed
8) After you spread your Cream Cheese, Install the first shim on back of pad...and apply greese on back of that shim...than install the second shim...and apply greese on back of that shim

NOTE: Some aftermarket pads, such as the Hawk HPS, come with the shims built into the pads. In that case, you dont really need the shims. The Shims are there to protect the pistons from a spontanious nuclear explosion IF you COMPLETELY wear out your pads
9)your new pads wont fit if you dont compress the caliper pistons. The pistons have adjusted to your older, thinner, worn out pads - now you need to adjust the pistons to accommodate your larger newer pads!
Place one of your OLD pads in the caliper

and use the C Clamp to squeeze each piston one at a time back into the caliper

WATCH the brake fluid in the engine compartment...sometimes it might spill over or seep above the MAX line as you squeeze in the piston (in that case...which will only happen if someone overfilled your brake fluid resivour, suck out some brake fluid with a turkey baster)
10) after squeezing the pistons back into the caliper, install your pads. it might take some time since your working in a tight space, but you will eventually get it. Clip them in as well.
11) Slide Caliper Back down...once again, your gonna have to move the caliper a bit to get it to fit right. it should slide in with ease once everything is lined up properly.
12) tighten that bolt you removed before...Dont go crazy!!! just hand tight - and a little than some. I THINK its like 30 ft/lbs - will check lter

13) now repeat on all other wheels
Note: the rear brakes might be a little different. You might have to remove the top bolt instead and than support the hanging caliper with a jack or bungee cord. Same principles remain tho...remove bolt - dont place pressure on line and support caliper - remove old pads and old shims - install new ones with old shims and new greese - squeeze pisons - etc etc
After I replaced all the pads, my fluid reservoir rose to the proper level now

if you still think your brakes feel funky, its prob time to bleed em. that will return a nice firm pedal
14) Clean up your workspace and go for a testdrive.
Listen for any weird noises. If it squeels...you dun have enough greese, if it "clicks" ...the pads might not be seated in the hardware correctly.

now go spend the money you saved on a tank of gas!
BTW - if there is something i missed, or something anyone wants to add - please comment below and I will slap it in.
#3
Thread Starter
Registered User
iTrader: (1)
Joined: May 2005
Posts: 124
Likes: 0
From: Displaced New Yorker
Originally Posted by excluesiveonez
if i was changing rotors as well... how much different is it to remove the caliper? or does it just slide of?
Thread
Thread Starter
Forum
Replies
Last Post
timc00k
Body Interior Exterior Lighting
1
02-15-2017 10:15 AM


