When you click on links to various merchants on this site and make a purchase, this can result in this site earning a commission. Affiliate programs and affiliations include, but are not limited to, the eBay Partner Network.
I know that dark rims always look better close up and in person. These look good, IMO. A narrow 12-spoke design is classy, while the dark finish is agressive and tough looking. Fitment is conservative, perhaps even a little tucked 5-10mm.
Lots of effort and agita to make this happen... Glad it worked out.
Yes, I would not recommend trying to re-drill rims. That was a pain in the ****! And now I noticed it is a tight fit to get an impact socket on the lugs.
Looking at these pictures again it has become clear that I am not a professional photographer. It is hard to tell from the pics that it is a really metallic anthracite color. Looks cool in person.
I did not take the right angles for the flush look, but they are much closer to flush than the duckfeet, especially up front where the rims are an inch wider. Even though I am not into the whole "hellaflush" movement I did notice the duckfeet were set back a bit after dropping the car on the Teins. Overall, it is a nice improvement over the stock rims and plenty nice for my snow tires.
Very nice build. Lots of great parts you put together.
Did you ever get or (need) a camber kit with those coilovers ?
Thanks! I will be adding some more parts soon. Yes, I recently picked up some rear camber arms so I can get the back in spec once I get the summer tires on. The front camber is within reason right now.
Originally Posted by MerakiAutoworks
Car looks good, the **** also looks fun to shift with.
-Josh
Thank you! The B&M shift kit is really nice once it breaks in
I got the DC ceramic coated headers and Z1 high flow cats installed not that long ago and they sound great and free up quite a lot of power. I also put on new gaskets all around. The Z1 gaskets for the cats are pretty beefy.
We had air tools and a lift and the cats and the passenger side header were not too difficult. The driver's side header was a PITA. I would pay a tech to do that side as it is quite involved.
The exhaust sounds great. No complaints.
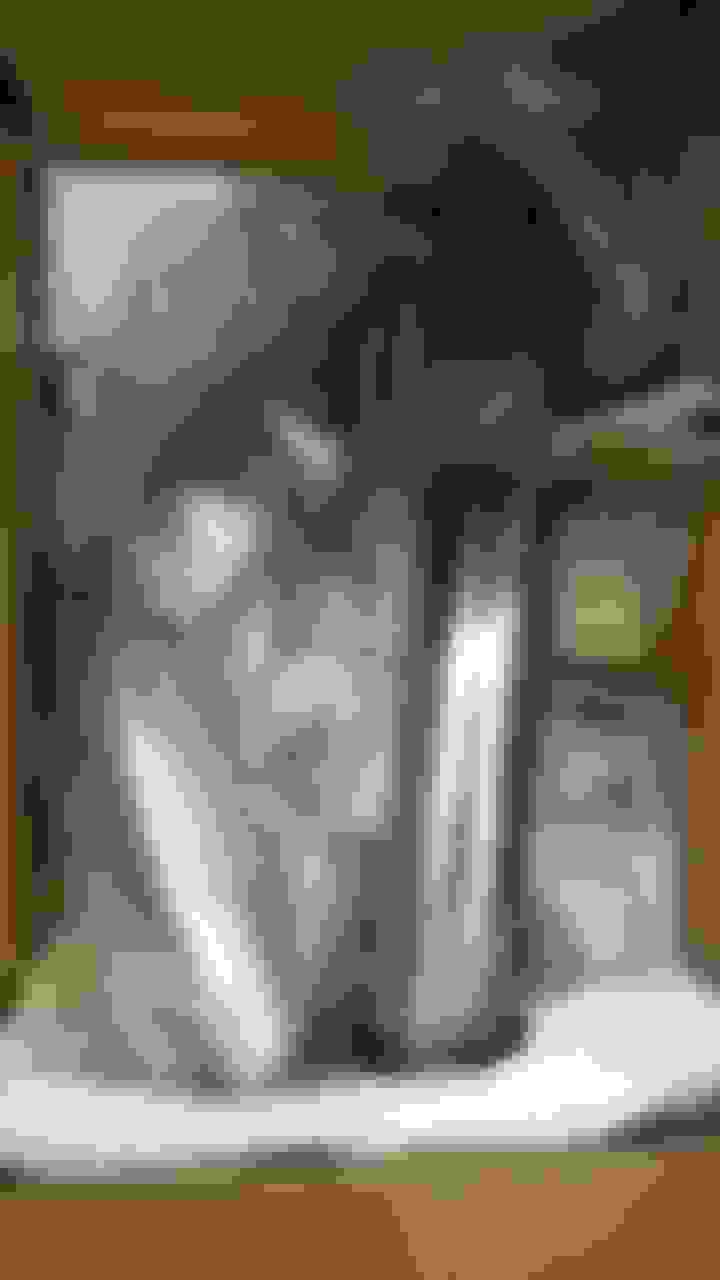
Cats waiting to be installed
Cat installed and discolored after a fair amount of driving
Headers still in the box
About the best picture you can get of the headers installed
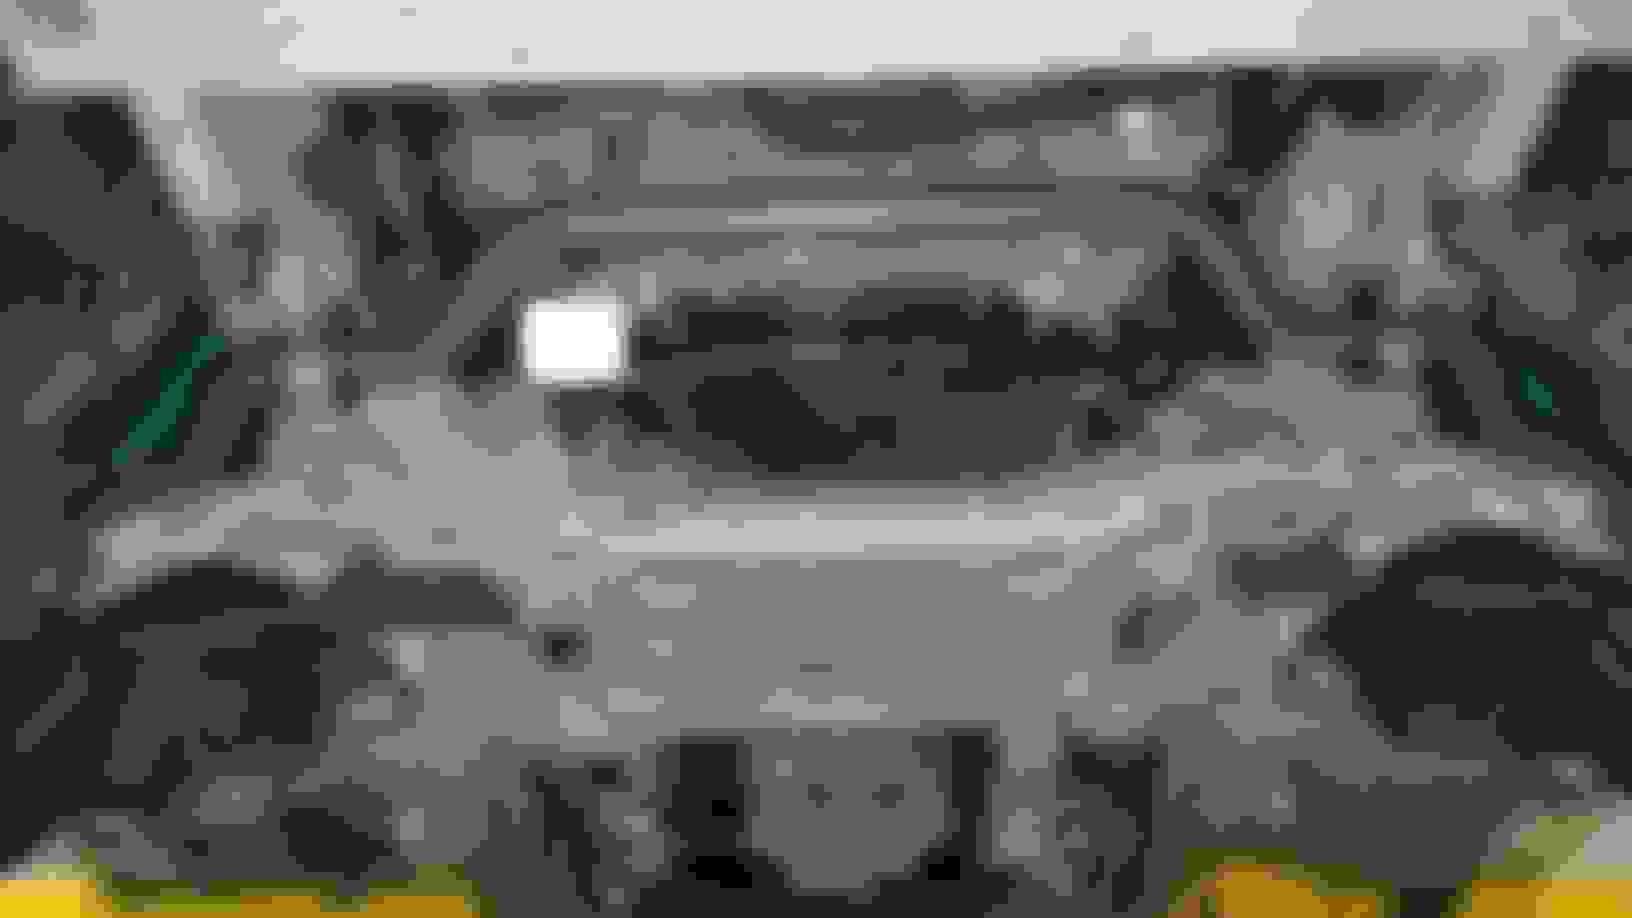
So I installed some Hotchkis sway bars and Vodoo 13 rear camber arms the other day. The install was pretty straight forward and everything went well.
The sway bars even have grease fittings on them- just remember to have them facing out. The front sway bar is gigantic- it looks bigger than a Nissan Titan sway bar and to date that was the largest I had seen on any vehicle.
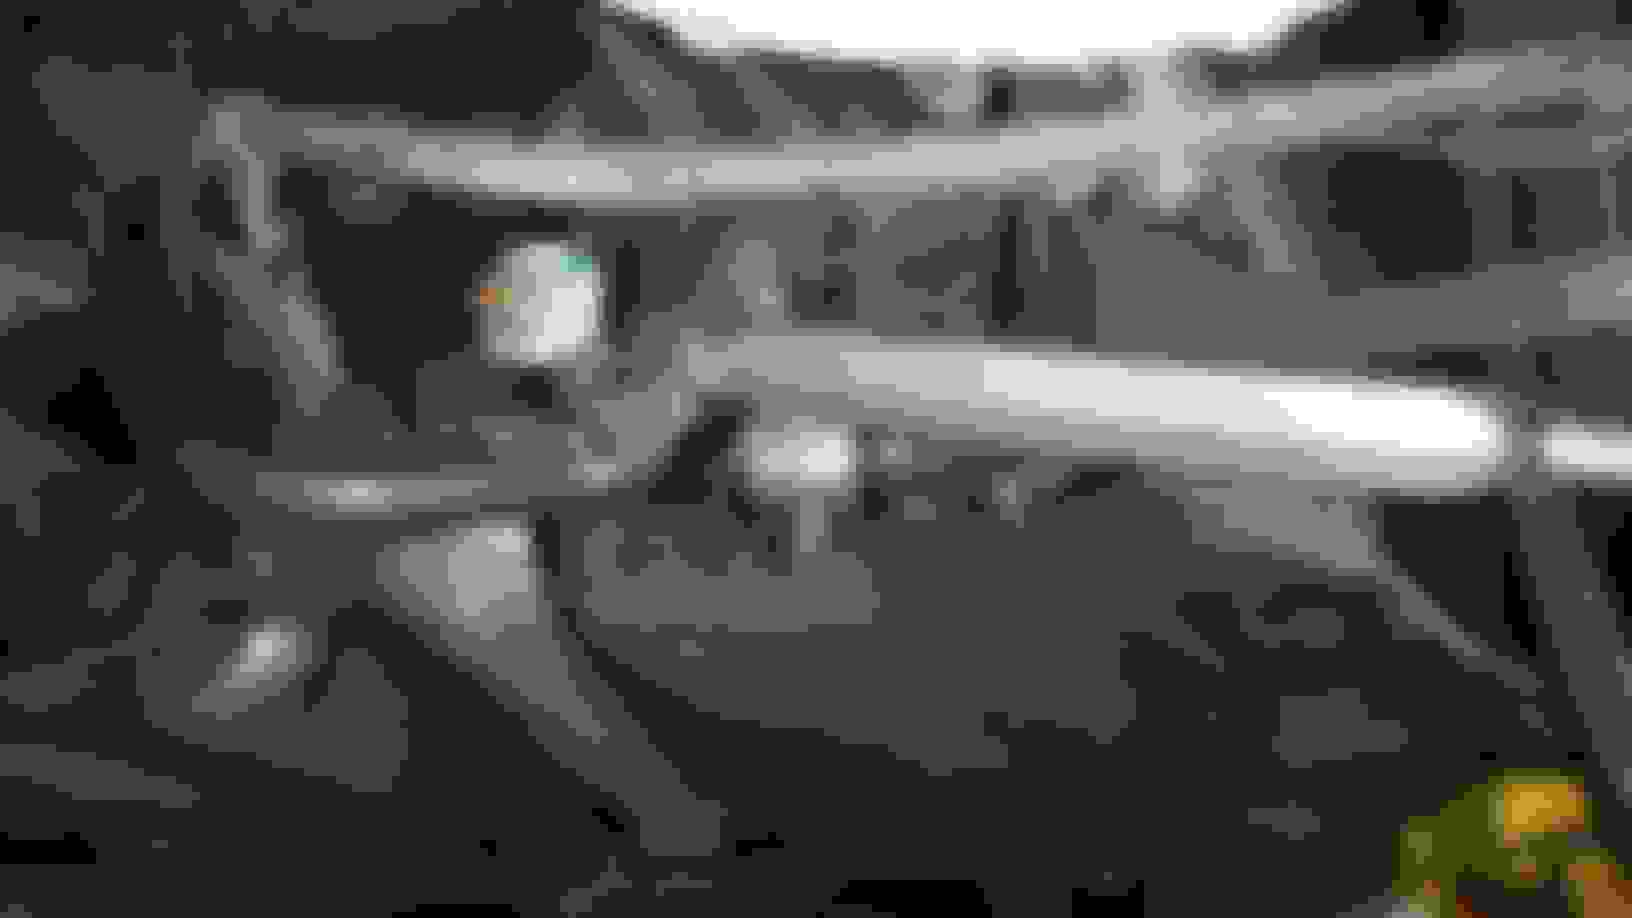
You will have to detach the midpipe at the Y-pipe connection and release the two closest exhaust hangers to get the rear sway bar in and out. Not a bad idea to do the rear sway bar and exhaust at the same time.
The rear camber arms are easy enough to do and will make it super easy for alignments adjusting the rear camber once I get the summer tires on. Not a bad idea to do these with sway bars as I think I remember it being easier to do the camber arms with the rear sway bar out of the way.
Right away I noticed that the steering was a lot more responsive and the chassis feels more solid. My butt dyno says the handling is improved, but I cannot be certain how much yet as I am still on gummy snow tires.
Here is the monster front sway bar. This is heaver than the stock bar so I think I may have actually reduced my center of gravity. Note the grease ports are facing in since I was not paying attention. Whoops! Easy 1 minute fix.
Here you can see most of the rear sway bar and parts of the camber arms. You can clearly see why you will want to disconnect the midpipe from the Y-pipe. However, you do not need to disconnect it from the mufflers- just release it from the exhaust hangers.
Here is a close up of the camber arm and part of the rear sway bar. Here again you will see that I had the grease port facing in instead of out. Whoops! Much easier to do the camber arms after you remove the rear sway bar.


 02-26-2016, 07:18 AM


 It is hard to tell from the pics that it is a really metallic anthracite color. Looks cool in person.


 Note the grease ports are facing in since I was not paying attention. Whoops! Easy 1 minute fix.