When you click on links to various merchants on this site and make a purchase, this can result in this site earning a commission. Affiliate programs and affiliations include, but are not limited to, the eBay Partner Network.
I ordered 10 nuts to use the 2 extra for the rear ball joints. The max height I can go is 12.35mm so I reduced the flange thickness from 4 to 2.5mm and cut them down on a lathe and finished them down smoothly to that height.
I used one of the brake caliper bolts and some other nuts as a mandrel to hold it.
Now I have 12 point nuts for the rear to match the front ones.
A test fit confirms the cotter pin fits nicely without dragging. The front ones are about .8mm taller the OE and the pins fit also without dragging, these are about 1.2mm taller than the originals and fit similarly.
Epic. Never would have thought to have custom hardware made. That would cost a pretty penny.
He says he wants to seek others to buy them, I have told him to list them on ebay. It was around $500 just for 10 nuts but I was putting up the die mold cost to create them, they should sell for less, but he kind if charges a lot as it is, for example the M16's he has listed along with a 24mm socket for some reason for $30 w/free shipping, I got them requested without the socket for those but he still charged 30, before it was 6 extra for shipping though I think.
These may have a similar cost each so that may run $300 for a set of ten, but he hasn't listed them yet. Pricey. You only really need 8 for just the sub frames, but I wanted to modify 2 of them for the rear joints. The vendor is pmg.jerry It says the location is in KY, but they are comming from Taiwan.
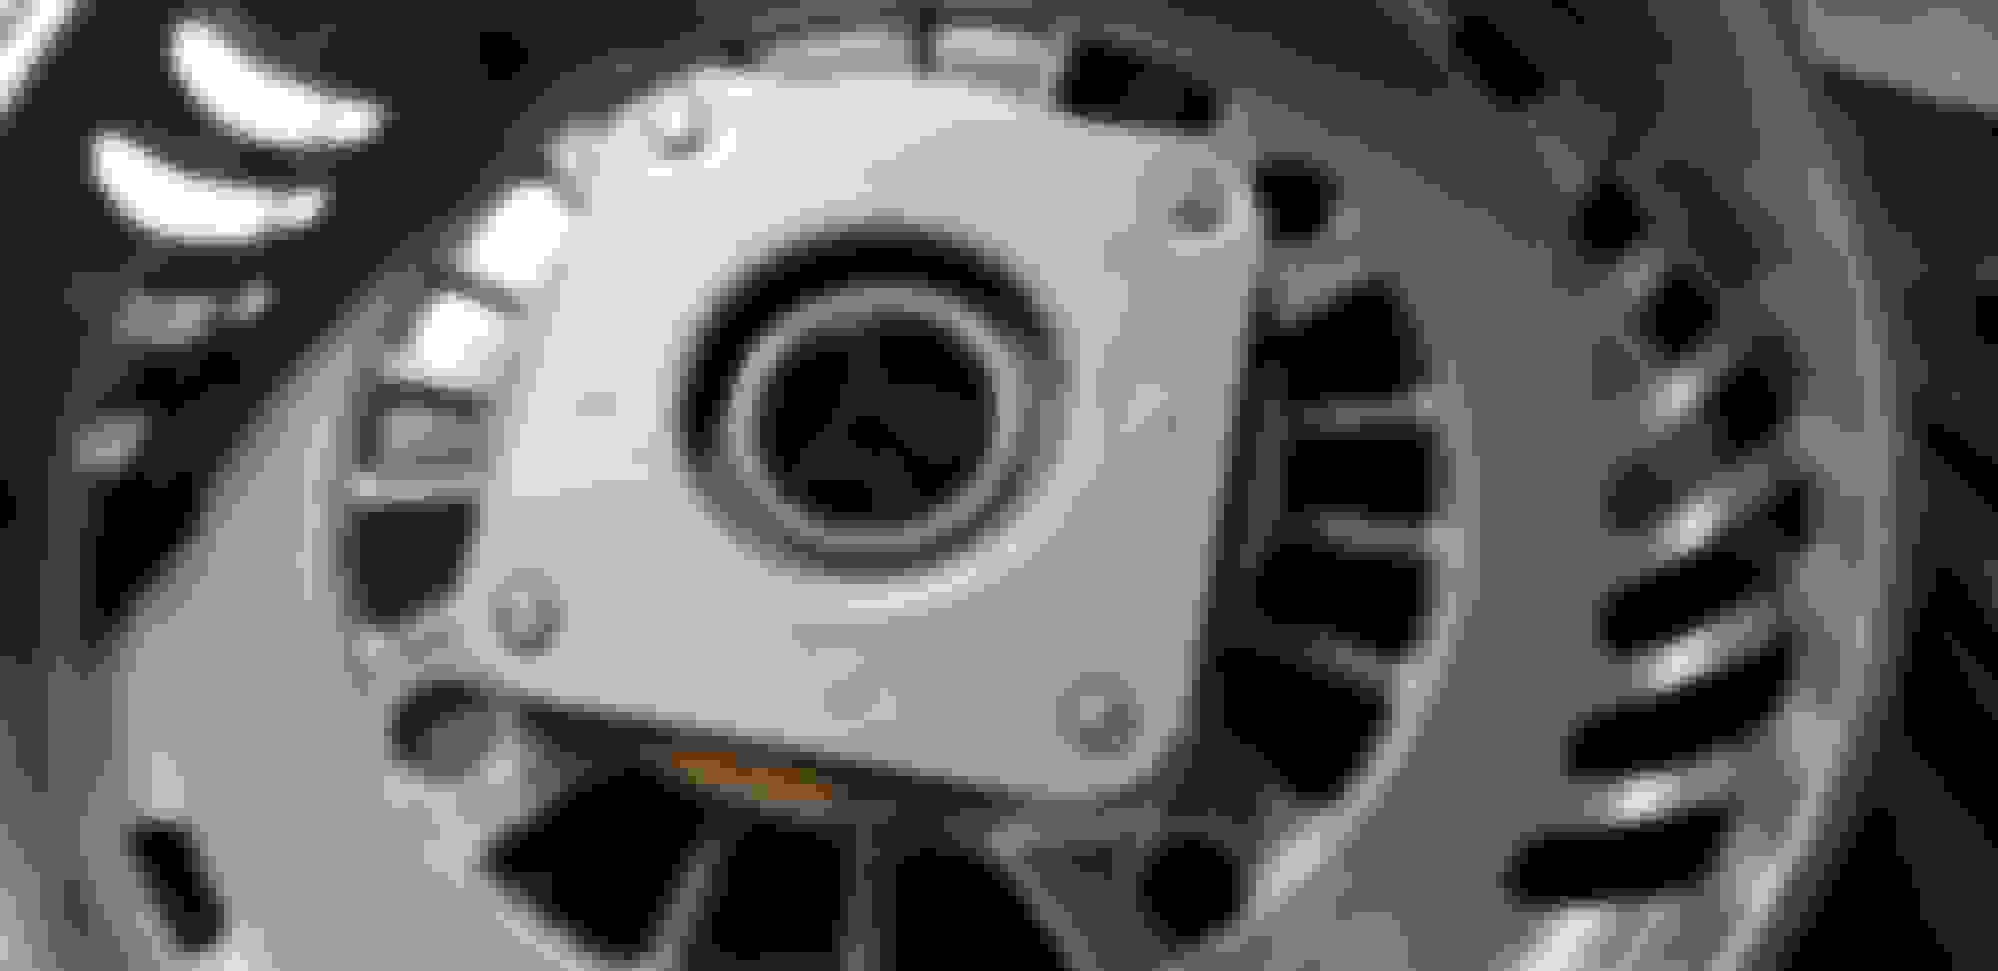
I disassembled the alternator and rust remover soaked the outside winding ring and painted a dark grey rust seal.
I spun this in a lathe to paint it silver rust seal. I was thinking about aluminum pulley, but just painted this one.
Choose some ti replacement fasteners. They are mostly M5, the long outside case bolts are 60mm length, have a smaller head but will work, I could have gotten allen head but they would have had an even smaller surface. Some of the other ones are from pro bolt, but I had to reduce the head diameter of three of them.
There are 4 screws in the front that I found some torx head for. I'm not sure if I will polish the case or paint it yet.
There is a square piece they thread into inside that I also de-rusted and painted galvanized rust seal color. The next picture shows this was mocked up backwards here, it's good to have the picture to refer to.
Here is the before picture, I also soaked the rotor without submerging the bearing and then re did it with some black rust seal and galvanized on the fan.
Lower left is the OE pulley nut, It has an odd M17 x 1.5 thead. Luckily at first I found the same in Ti on ti64 (lower right), but when I got it I found it to fit with a ton of play. Decided to look for a tap and modify the M16 thread on one of my intended front ball joint nuts. I ordered another one to replace it later.
I found a "step" set of taps where one is slightly undersized to run first, then it has a final finishing tap to get it to size. It followed the original thread on the nut very well since it had the same pitch, but I used the lathe chuck and a drill chuck to align the tap to start it, then walked through it in the vise. It turned out really well, squarely aligned and a very good thread fitment. The tap is made by Volkel - a german maker, I'd like an assortment set of theirs one day.
So I basically enlarged the thread from M16 to M17 with the same 1.5 pitch, but also shortened the height from 14 to 12, and reduced the flange diameter from 32 to 30mm.
Last edited by Justin Bailey; 07-27-2019 at 12:27 AM.
I'm kind of leery of removing these solenoids but when I get closer to it, I may take them out if I can to clear coat and also paint the rusty part of them, does anyone know if that is a big no no? I have to possibly get new O rings to reinstall I am thinking.
I thought it would take a puller but with the bolt gone, I could easily wiggle the crank pulley off, and there was no leak before hand. Some oil came out behind the bolt though only about an oz.
If you've ever seen Nivea men Q10 face lotion, I had one that I hardy used, but the cap fit well into the oil seal. Just wrapped some teflon tape to get a snug fit, but not so tight so as to stretch or deform the seal, to block it off from everything. I cut off and very tightly wedged a silicone stopper into the dipstick guide hole also, it will need to be pryied or dug out or perhaps a screw led into it and a vise grip to yank it then.
Places like this have 'spiders or spider webs'' from the casting, it will take a lot of removal and leveling out of the material to polish it away completely.
More of that here.
Other places have a surface void right in a corner that is also difficult to blend in but it can be done with some effort, may need to get additional dremel sanding flap wheels from McMaster that are skinny to get into tight areas.
So far I removed the two little protrusions on the small outer covers. Removed the solenoids, nothing to it but I did get new o rings for reinstallation.
Red checks on these 3 places, the lower one was a date/time indication place I thought it was easier to just soothen it out as well.
This area is tight but want to polish deep into those pockets. They bottom out into a thin knife edge, but I expanded the bottom to about an eigth inch width just so it has a rounded more polish able bottom.
Cleaned up the casting roughness with small burrs just to get a level initial start on the surfaces there.
These small 320 grit disks use a quick twist 1/4" mandrel for a drill or grinder but wanted to mount them to the dremel, so I just drilled a hole in the ends and used a screw mandrel to mount them on this tool instead.
Last edited by Justin Bailey; 07-30-2019 at 10:07 AM.
My God. Subscribing for sure. You should change the title to G37S AWD Coupe drive line restoration since this is where it's at and heading.
I too hate rust especially on a white car, I live in Florida so the amount we see is nowhere near.
Check American Auto Export in Ft. Lauderdale, these guys are one of the top Infiniti recyclers down here and almost all the parts they recycle come from low mileage Gs Floridian cars.
The hardware is out of this world, as you went into the exhaust I applauded the work however like most thought it was a wasted effort until you started moving down the line. The car is a very special car, not may AWD sports coupe out there so I see why you're doing this.
I love that you have the knowledge/Money/Time and most importantly the resources. You had me at the skateboard to wheel the engine out, hats off. Another part I loved was the engine suspension beam you made to hold the engine.
Keep going, in time this thread will generate a ton of feedback. To my knowledge you're the only one doing something like this and in my opinion the only one capable!
My God. Subscribing for sure. You should change the title to G37S AWD Coupe drive line restoration since this is where it's at and heading.
Yes it kind of evolved into more than just the exhaust, not sure what should be done there.
Originally Posted by BULL
The hardware is out of this world, as you went into the exhaust I applauded the work however like most thought it was a wasted effort until you started moving down the line. The car is a very special car, not may AWD sports coupe out there so I see why you're doing this.
I don't know if I would ever go aftermarket on anything, most people are interested in that kind if thing. I just wanted to preserve or stop the clock on what I have for a few years at least.
Originally Posted by BULL
I love that you have the knowledge/Money/Time and most importantly the resources. You had me at the skateboard to wheel the engine out, hats off. Another part I loved was the engine suspension beam you made to hold the engine.
I wasn't sure about those skate wheels or where the trucks had those little screws holding them to the deck but they are pretty tough. People jump down large drops and they tolerate it, just think that it might have the same 350 lb exerted on it when people do that. Idk.
Originally Posted by BULL
Keep going, in time this thread will generate a ton of feedback. To my knowledge you're the only one doing something like this and in my opinion the only one capable!
Thanks for the compliments and support, it will be some kind of achievement for me if I can actually manage to get it all back together without any problems.
I'm not sure about other AWD vehicles, but mine has these threaded points for two small dampeners to mount but my car came without them. I'm going to polish these and probably will cut them off. Perhaps it was for the 5AT or non sport models, Idk. At first I thought they held some wiring support, but the M8 thread is corroded in a way that you could tell they was nothing there. I searched around and found the dampeners but $70 a piece, plus they may get in the way to install the engine accessories. They don't seem to me to really reinforce the mount holes so removing them is neutral to the purpose of the bracket.
I'm not sure about other AWD vehicles, but mine has these threaded points for two small dampeners to mount but my car came without them. I'm going to polish these and probably will cut them off. Perhaps it was for the 5AT or non sport models, Idk. At first I thought they held some wiring support, but the M8 thread is corroded in a way that you could tell they was nothing there. I searched around and found the dampeners but $70 a piece, plus they may get in the way to install the engine accessories. They don't seem to me to really reinforce the mount holes so removing them is neutral to the purpose of the bracket.
I think you're right about these being from earlier 5A/T models...Infiniti seemed to put a bunch of dampers in random places on the early 2nd Gen G's to help with NVH, mine included. I had a problem with one once and tried to do away with it cause it wasn't used on newer models but found it was actually very necessary...yours being a later one you are probably fine as it doesn't appear to be structural...was probably just cheaper for Nissan to not change the castings.
One other peice of the alternator for the threaded post, it has a sleeve or spacer.
You can have custom spacers made through McMaster for $32 but got a hex thread adapter M6 to M8 in 304 SS. I rounded the one side and drilled the threads out to duplicate the spacer for the alternator as exactly as I could.
I think you're right about these being from earlier 5A/T models...Infiniti seemed to put a bunch of dampers in random places on the early 2nd Gen G's to help with NVH, mine included. I had a problem with one once and tried to do away with it cause it wasn't used on newer models but found it was actually very necessary...yours being a later one you are probably fine as it doesn't appear to be structural...was probably just cheaper for Nissan to not change the castings.
Are the factory mounts fluid filled like the rear diff bushing? I'm doubting the effectiveness of those dampener locations aside from just having mounts that are in good condition.

 07-26-2019, 10:11 AM


 !! Insane amount of work.