When you click on links to various merchants on this site and make a purchase, this can result in this site earning a commission. Affiliate programs and affiliations include, but are not limited to, the eBay Partner Network.
Refinished seat looks great, iCrap. Too bad it looks like you lost the contrasting stitching in the process.
If you do your passenger's seat to match then your probably going to want to do your back seats, then the door panels, and maybe even redye the carpet too... it could be endless... LOL
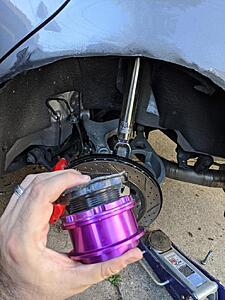
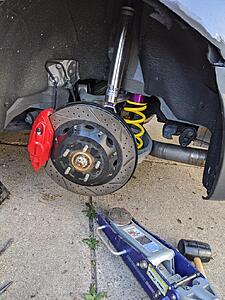
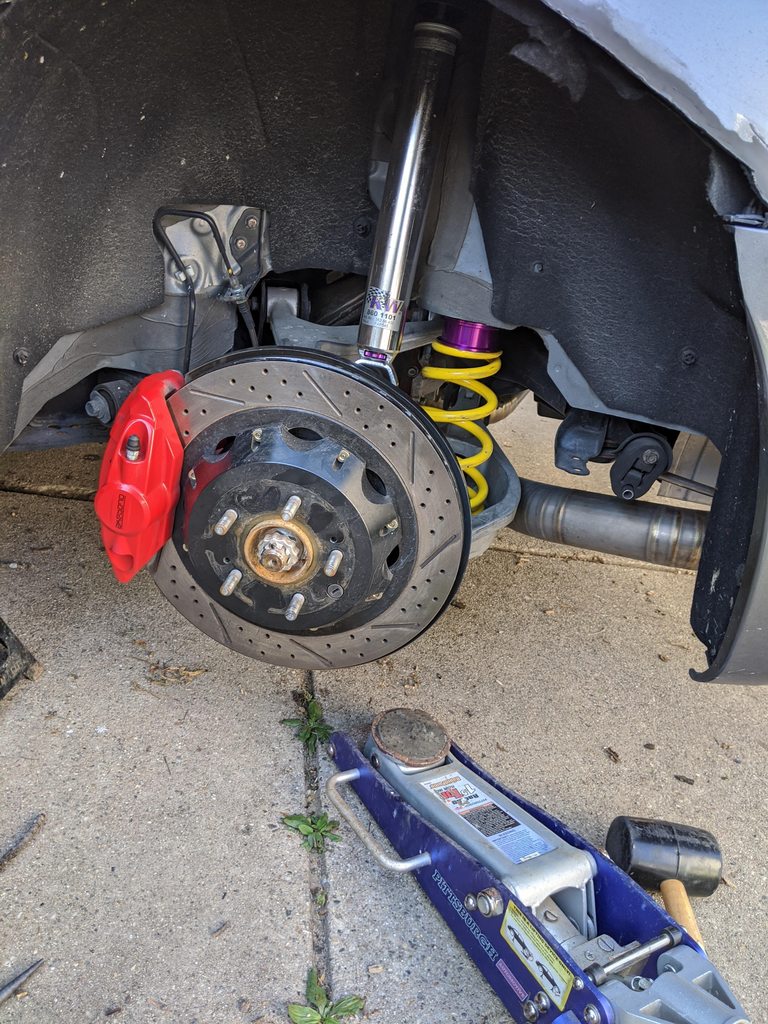
I'll have to write a long term review of these KW V3's vs Tien Street Basis vs Stance XR1 since I have more experience than most soon. My initial install and height settings for the KW is a bit disappointing. Rear as at full high and it's pretty low.
Nice job with the brake ducts. Please post pictures once completed... I'm curious to see how those turn out once you've got the flexible hose running from the front bumper to the brake ducts. I added similar brake ducts to my Porsche when I added a set of front Brembo's from a Cayenne Turbo.
Originally Posted by iCrap
It's the narrower 8000lb Atlas lift - went with the narrower one for more space on the sides. It's great, super easy to use and works really well. The only downside like I said is the ramps, I need some longer / less steep ones for my car to get on easily. I haven't tried to get the S2000 on it yet but I'm guessing I'll have to do the same thing with the wood under the ramps. Haven't checked yet to see if i can just buy longer ones.
I was looking at one that is very similar from Benpak. Their HD-7P, which is a narrow 7K LB 4-post lift. How long are the approach ramps on your Atlas lift? The Benpak comes with extended ramps that are 48" long, which say they are designed for lowered vehicles. They also offer the extended 48" ramps in aluminum as an accessory. https://www.bendpak.com/car-lifts/ac...pproach-ramps/
Refinished seat looks great, iCrap. Too bad it looks like you lost the contrasting stitching in the process.
If you do your passenger's seat to match then your probably going to want to do your back seats, then the door panels, and maybe even redye the carpet too... it could be endless... LOL
That's actually the passenger seat, but yeah I did lose the contrasting stitching. Although, I don't know if I really mind it that much. I'm going to install it in the car tomorrow potentially and see how it looks. I think it might make the driver seat look old / out of place..... in which case I have to dye that one also. We'll see. I would rather not redo the entire interior lol. The color of the new dye is actually an EXACT match for the stock infiniti black, but it has a new / matte look to it. Maybe I also just need to clean the old seats really well.
Also, I did already dye the stitching on the driver seat black but i left the INFINITI logo / text the silver, so i might have to either do that black to match or figure out how to get the text on the passenger seat silver again.... paint pen? I don't know if that would work.
My carpets are actually still in really good shape, along with the door panels, Im gonna try to leave those alone lol.
Seat is in. Color is spot on but it makes the other one look old, so i might end up doing that one also. At the very least i have to black out the stitching on the other one to match.
Also keep in mind the other seats have some leather protectant on them which makes it look glossy, i need to remove that or do it to the new one.
Well I finally got around to installing (with help at shop) the F.I. RHFC. Overall, it took about 4 hours from start to finish, but at least 1.5 hours were spent on demon bolt. Lots of shop talk (cussing) and 2 different air guns later, they finally gave up. Believe it or not, no broken bolts on this project. I still currently have stock exhaust from the cats back, but I can tell they added a little subtle noise when I accelerate a little harder than normal driving, but besides that, normal driving is no different.
I am really looking forward to what they will help the Ark Grip catback sound like when I find a good deal on a used one.
^^^
You installed the FI RHFC, but kept the OEM catback? I did that exact same thing years ago. Slightly deeper tone, just a hint louder, with a noticable add to power. That little added grunt was just enough to make you smile.
Started a budget to get the FI catback a year later, but genuinly enjoyed the cats upgrade during that time. Kind of a stealthy mod.
Slightly deeper tone, just a hint louder, with a noticable add to power. That little added grunt was just enough to make you smile.
Kind of a stealthy mod.
You were kind of the inspiration for this as I had read through your thread and saw you did this (as well as I dont have a current budget for full catback....yet. 3 year plan). Only been installed for about a week, but love the slight differences already.
Tried to clean my Z1 velocity stacks today. I read just pull out the grill, which would definitely work, but idk who�s hand is small enough to get between the pipe and horn, or the smaller gap underneath. The two top nuts were easy, but bottom passenger was bad enough. I gave the driver's side 5mins before I just started removing the bumper lol
So pulled the bumper off, decided to upgrade my fogs, clean my radiator fins, and give it all a nice cleaning. Also removing that pos plastic underneath, aluminum undertray on the way. Lightweight pulley, new belt, thorough radiator/cooling job, then reassemble tomorrow.
Hope to finish it off tomorrow assuming parts get here. She�s a 10� and I�ve rode her for 5.
Thought the last pic looked kind of cool with the reflection.


 06-23-2020, 06:20 PM

 .
.