
Sedan Chat Thread
 09-29-2015, 09:26 AM
#7816
Administrator

iTrader: (9)
Thank you for the detailed response.
One of the things I'm toying with is the idea of going over the stitching with white thread that I bought years ago just for this intent. I completely forgot about this idea, and it came back to me while thinking of shift boots because of your mod.
However, to do this correctly, I would need to mimic the sewing machine stitch, which is a two-threaded approach, with a front-threaded needle on the top and a bobbin on the bottom. Otherwise, a basic "straight" stitch will look goofy, even if doubled-up for each alternating loop. And to do this by hand... hoo boy, that takes some stitching skills. So IDK if I'm going to take that on.
At this point, it feels like dis-assembly for research and familiarization with the components, with a few possibilities:
- Modding the stitching on the OEM boot.
- Replacing the boot with leather.
- Shrugging my shoulders and walking away.


 09-29-2015, 12:07 PM
#7818
Premier Member

iTrader: (7)
Thank you for the detailed response.
One of the things I'm toying with is the idea of going over the stitching with white thread that I bought years ago just for this intent. I completely forgot about this idea, and it came back to me while thinking of shift boots because of your mod.
However, to do this correctly, I would need to mimic the sewing machine stitch, which is a two-threaded approach, with a front-threaded needle on the top and a bobbin on the bottom. Otherwise, a basic "straight" stitch will look goofy, even if doubled-up for each alternating loop. And to do this by hand... hoo boy, that takes some stitching skills. So IDK if I'm going to take that on.
At this point, it feels like dis-assembly for research and familiarization with the components, with a few possibilities:
One of the things I'm toying with is the idea of going over the stitching with white thread that I bought years ago just for this intent. I completely forgot about this idea, and it came back to me while thinking of shift boots because of your mod.
However, to do this correctly, I would need to mimic the sewing machine stitch, which is a two-threaded approach, with a front-threaded needle on the top and a bobbin on the bottom. Otherwise, a basic "straight" stitch will look goofy, even if doubled-up for each alternating loop. And to do this by hand... hoo boy, that takes some stitching skills. So IDK if I'm going to take that on.
At this point, it feels like dis-assembly for research and familiarization with the components, with a few possibilities:
- Modding the stitching on the OEM boot.
- Replacing the boot with leather.
- Shrugging my shoulders and walking away.
In hindsight I would have used a waxed thread but also have a second boot I can redo and take my time on. But I'm not certain I would do it again... I did just order a redline boot with the intention of installing that to go along with my AT/MT conversion kit.
But I just got the kit today and now I want to go home and install it immediately so I don't know if I'll be able to wait...
09-29-2015, 12:36 PM
#7819
Administrator
iTrader: (9)
Not sure where you're going with that, Chris. 
I'm trying the single-stitch approach, which means stitching each line twice. It's... painstaking.
After finishing a line, I'll have to reassess and see if I want to continue or undo it.
I'm trying the single-stitch approach, which means stitching each line twice. It's... painstaking.
After finishing a line, I'll have to reassess and see if I want to continue or undo it.
 09-29-2015, 01:06 PM
#7821
Premier Member
iTrader: (7)
Hey John, just that it is definitely painstaking and time consuming. The best advice I can offer is select your thread carefully so you don't have to redo it. I used a normal thread which has now... I don't know how to describe it really, become fuzzy in spots? No one but me notices it (only because I didn't go the sedan meet and let you see it) but it's there.
I have the ability to do it again, and have a spare boot so I can really take my time and get it right. But I decided to go with the Redline boot at this juncture. Perforated and quad stitched isn't something I desire to try on my own.
I have the ability to do it again, and have a spare boot so I can really take my time and get it right. But I decided to go with the Redline boot at this juncture. Perforated and quad stitched isn't something I desire to try on my own.
09-29-2015, 01:41 PM
#7822
Administrator
iTrader: (9)
I don't like where this is going. Stitching *over* stitches just looks sloppy, no matter how much I try real hard to line up the thread. Plus, these are straight stitches, which would have to be doubled up in order to complete each loop, further botching the look.
I'm crying "Uncle!", and shelving this idea before I invest any more time into it. Putting the boot back in the car now.

I'm crying "Uncle!", and shelving this idea before I invest any more time into it. Putting the boot back in the car now.
 09-29-2015, 08:35 PM
#7825
Registered User

Random find I came across today. We all know the hidden settings menu to adjust camera angles etc.. This one I came across after testing some more is holding the back button (not both like shown in the video) and rotating the **** 40 clicks whichever way (I think clockwise did the trick).
https://www.youtube.com/watch?v=2D-L...ature=youtu.be
The menu shows some information about the ECU and CAN BUS systems, also firmware versions of the software. There are a few menus that appear to not be clickable. There was one interesting option within the CONSULT info called "Cold Start" was afraid to touch it since it said something about deleting information.
Hopefully someone can offer some more insight into this
09-29-2015, 09:04 PM
#7826
Premier Member
iTrader: (7)
I don't want to post this in the B2 thread because they seem to be very supportive of the forum and the G's.
This is the kit I've been working with the guys over at Japan Auction Parts on specifically for the Tommykiara series *****. But with different spring rates it should work with about any **** I think. The next gen design has been designed for threaded Hebi Bebi ***** (this is an unthreaded **** and a bit of a unicorn). The bezel is being redesigned but has to be machined still. And the new shift boot was just ordered yesterday.
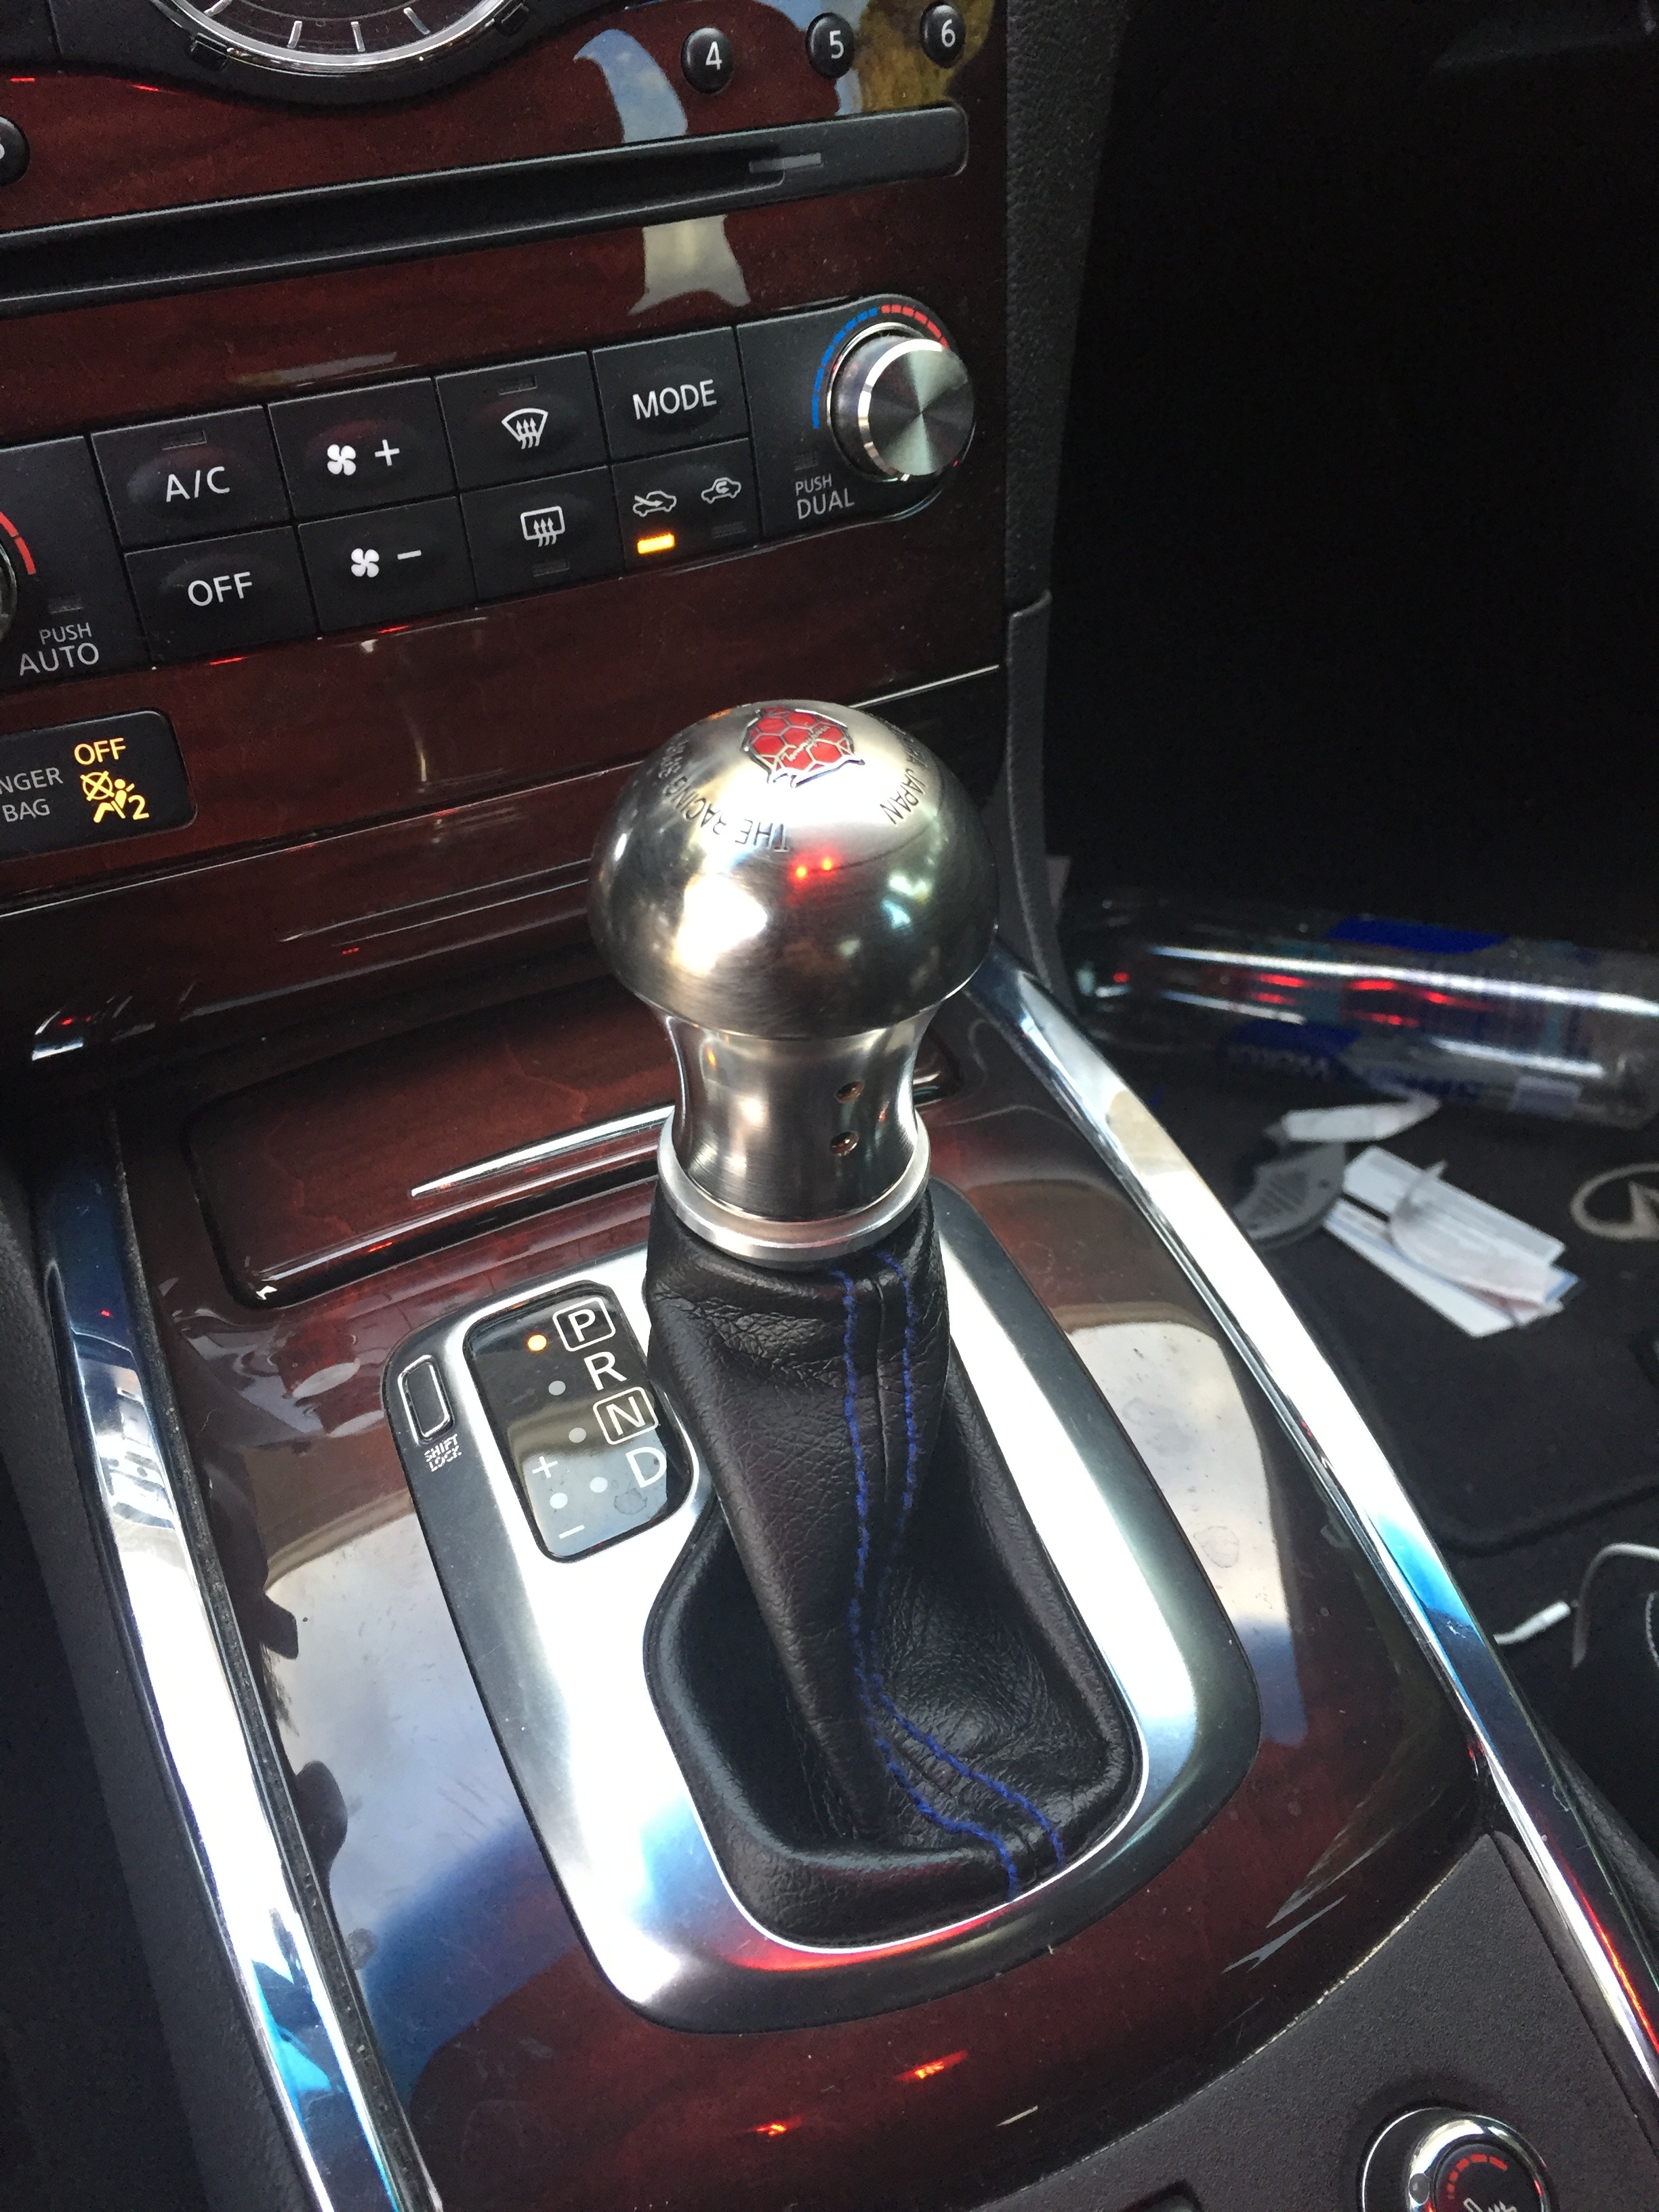
This is the kit I've been working with the guys over at Japan Auction Parts on specifically for the Tommykiara series *****. But with different spring rates it should work with about any **** I think. The next gen design has been designed for threaded Hebi Bebi ***** (this is an unthreaded **** and a bit of a unicorn). The bezel is being redesigned but has to be machined still. And the new shift boot was just ordered yesterday.
09-29-2015, 09:21 PM
#7828
Premier Member
iTrader: (7)
Right now the kits have been engineered for the Hebi Bebi but we were talking about using an Impul or other **** as well. PM Robbie or the JAP guys and see what their thoughts are. The weight of the **** and how it affixes will be the deciding factor on how it's built and assembled. I know Thomas wanted an Impul **** but may have changed his mind now I'm not certain.
If you were to get a **** of the same weight as the Hebi Bebi but not a Tommy **** the set up should still work for you. Just a thought. I was tempted to go with an ARC Titan at one point. Still may, who knows.
09-29-2015, 09:31 PM
#7829
I don't want to post this in the B2 thread because they seem to be very supportive of the forum and the G's.
This is the kit I've been working with the guys over at Japan Auction Parts on specifically for the Tommykiara series *****. But with different spring rates it should work with about any **** I think. The next gen design has been designed for threaded Hebi Bebi ***** (this is an unthreaded **** and a bit of a unicorn). The bezel is being redesigned but has to be machined still. And the new shift boot was just ordered yesterday.

This is the kit I've been working with the guys over at Japan Auction Parts on specifically for the Tommykiara series *****. But with different spring rates it should work with about any **** I think. The next gen design has been designed for threaded Hebi Bebi ***** (this is an unthreaded **** and a bit of a unicorn). The bezel is being redesigned but has to be machined still. And the new shift boot was just ordered yesterday.
