
07-08 ebay G Journey lip
 12-02-2013, 07:27 PM
#16
Registered User

Join Date: Oct 2011
Posts: 8
Likes: 0
Received 0 Likes
on
0 Posts
Thanks for the reply. That came to mind after I stare at those photos a little longer. It does look like that it will add another 2-3 in. to the front bumper. That's is definitely something to consider. But I am only on Eibach so I should be ok.
Looks great though, post up more photos when you have time. Your car is looking great!
Looks great though, post up more photos when you have time. Your car is looking great!

 12-04-2013, 12:55 PM
#18
Registered User

Looks great b-drizzy! I received my lip last week and it looks like it will fit on my '09 G37X. Did your lip come with any instructions? Mine came with a baggy that included several screws, 2 pins and some brackets, but no instructions as to where those brackets or pins go.
12-09-2013, 09:57 PM
#20

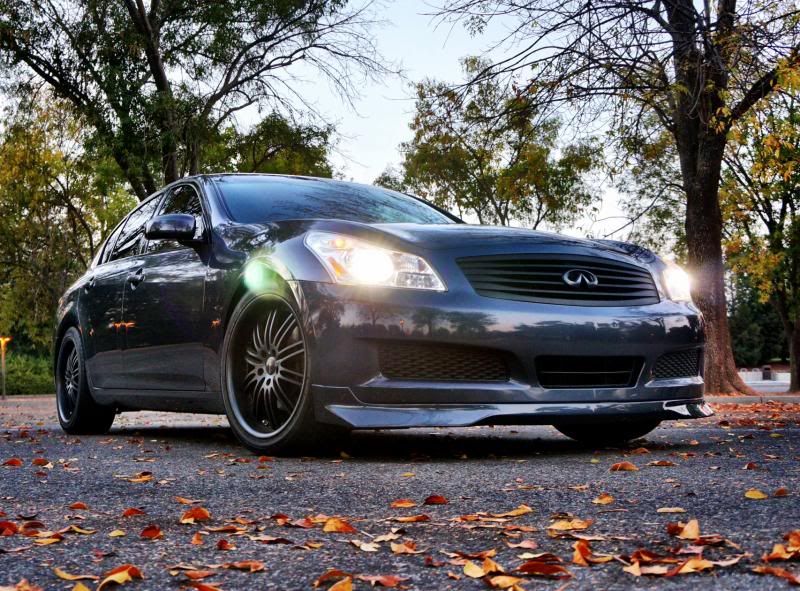
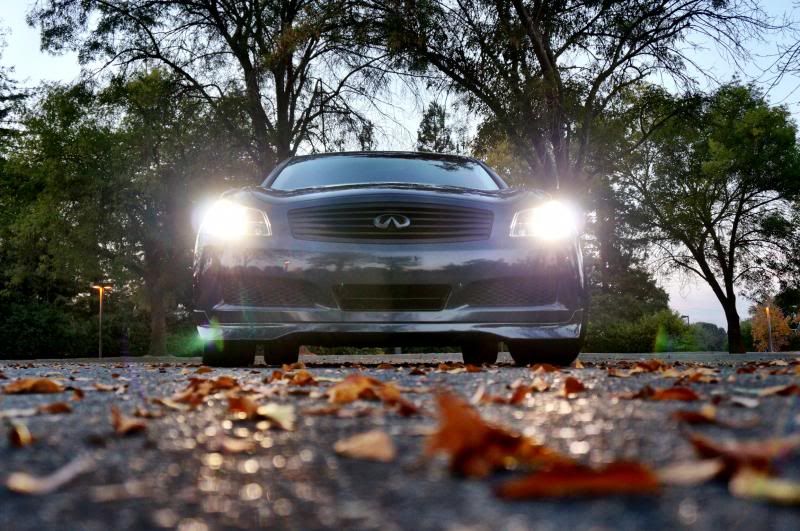
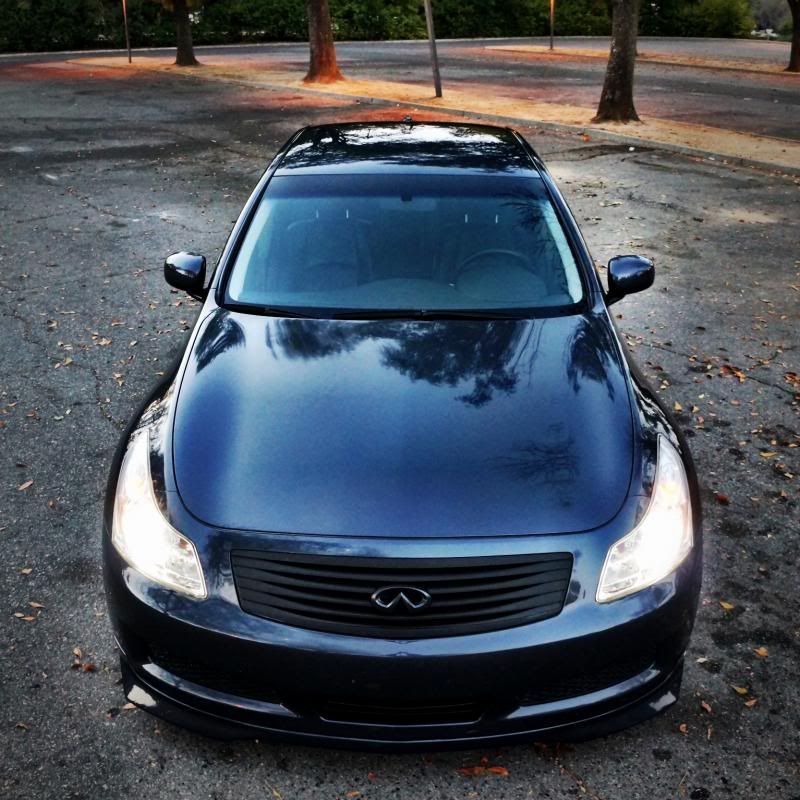
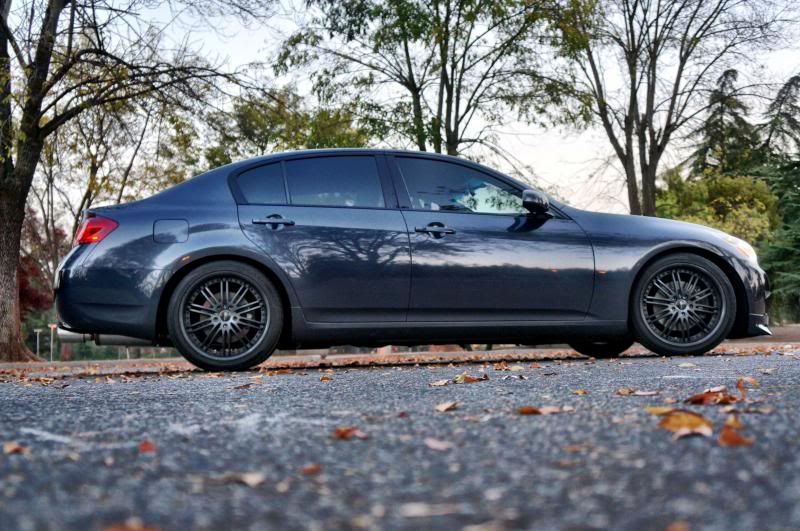
Here are a few pics of the lip on my G. The lip does sag the slightest bit as I wanted it to be flush with the bottom of the front bumper. I think some 3m tape would help with that or possibly a 3rd bracket holding up the middle section. To paint and install, cost me $250, a bit overpriced in my opinion but the paint job was great. Overall, I think it looks pretty good for what it's worth.
For those interested, here are some different angled shots. Sorry for the picture heavy post:


For those interested, here are some different angled shots. Sorry for the picture heavy post:


 12-10-2013, 12:10 AM
#22
Registered User
Join Date: Oct 2011
Posts: 8
Likes: 0
Received 0 Likes
on
0 Posts
Hey Ninjitsui, what spring are you dropped on? Eibach? Do you have the measurement of your front ground clearance? I am on eibach and just want to know how low this lip will bring the car to mounting it this way. Thanks!!!
12-10-2013, 12:46 PM
#23
 I'm dropped about about 1.30'' from stock all around which I think is pretty close to the eibach drop. If I recall correctly, its around 4.5" ground clearance, but I can take an exact measurement later today and get back to you.
Edit: Confirmed, its 4.5" from the lowest point (the edge of the two front flanges) to the ground. I clear most speed bumps except for big ones so be careful, however be prepared to scrap on driveways.
Last edited by ninjitsui1; 12-10-2013 at 01:48 PM.
12-10-2013, 03:40 PM
#24
 Great Looking Shots there bro I like and the color match looks on point, Glad to see more outhere rocking this lip.
Here are a few pics of the lip on my G. The lip does sag the slightest bit as I wanted it to be flush with the bottom of the front bumper. I think some 3m tape would help with that or possibly a 3rd bracket holding up the middle section. To paint and install, cost me $250, a bit overpriced in my opinion but the paint job was great. Overall, I think it looks pretty good for what it's worth.
For those interested, here are some different angled shots. Sorry for the picture heavy post:
For those interested, here are some different angled shots. Sorry for the picture heavy post:
The following users liked this post:
ninjitsui1 (12-26-2013)
12-11-2013, 02:40 AM
#25

I think b-drizzy installed his lip slightly a bit different. You were suppose to use the brackets and rivets that came with the lip to mount the bottom. ninjiteui1 did it the way that I did mine. But I fixed the problem with the front sagging. Instead of just the 2 brackets that came with it, I made my own brackets for the middle portion of the lip. Theres a total of 5 brackets and bolts underneath my lip to ensure maximum sturdiness and security. did the install myself and painting it only cost me $80.
12-11-2013, 08:48 AM
#26
I think b-drizzy installed his lip slightly a bit different. You were suppose to use the brackets and rivets that came with the lip to mount the bottom. ninjiteui1 did it the way that I did mine. But I fixed the problem with the front sagging. Instead of just the 2 brackets that came with it, I made my own brackets for the middle portion of the lip. Theres a total of 5 brackets and bolts underneath my lip to ensure maximum sturdiness and security. did the install myself and painting it only cost me $80.

