GTM Performance Engineering: PROJECT VQ42VHR S/C
 05-29-2012, 01:30 PM
#1

We would like to share this amazing project,Christopher brought his gorgeous G37 Sedan to us to create the ultimate torque monster supercharger build to complement his impeccable aesthetic. To get massive torque, we suggested our 4.2L stroker engine as the basis with 11:0 compression ratio to maintain as much torque throughout the power band as possible. Riding that wave of Christopher brought his gorgeous G37 Sedan to us to create the ultimate torque monster supercharger torque is our Stage 2 Supercharger Kit to give an extra wallop of power up top. As a result, this G42 sedan feels like a big V8 was swapped in…only better.
Here is the list of the upgrades
GTM Stage 2 Supercharger-600HP
GTM Stage 5 Short block - 4.2 L
GTM Stage 1 Cylinder Heads
GTM Micro Surface Treatment
GTM 2.5" Cat-back exhaust
GTM 2.5'' Test Pipes
GTM Competition 70 MM Radiator
GTM Thermostatic oil cooler
GTM Return fuel system
GTM ECU reflash via Osiris uprev
GTM Race logic Traction Control System
OS Giken Twin Plate Dampened clutch/flywheel kit
Aquamist Meth Injection HSF-4
HKS KNOCK AMP
HKS CAMP 2 System
Results
With our GTM Stage 2 Supercharger Kit and GTM Stage 5 4.2L Longblock and supporting modifications, we were able to make 546whp and 411ft-lbs of torque.
Taking a look at the graph below, you can see that this setup has an extremely nice torque curve for a centrifugal supercharger with 90% of peak torque from 3900rpm to 7600rpm with substantially more torque than stock even below that. With this setup, we were able to max out the intake design of our Stage 2 Supercharger system. Since we found the limit of what the intake system can flow, and we know that the supercharger unit itself can flow more, we are in the process of developing Stage 3! Our goal is to break the 600whp mark on our supercharger system. Stay tuned for more information on that development.

As with most car projects, this isn’t over until it’s over. This car will be returning to us for some more tweaking after this year’s car show season comes to a close. Stay tuned for more updates on this project later on this year/early next year.
Now to fun part, Here are all the pics of the project by category


Here is the list of the upgrades
GTM Stage 2 Supercharger-600HP
GTM Stage 5 Short block - 4.2 L
GTM Stage 1 Cylinder Heads
GTM Micro Surface Treatment
GTM 2.5" Cat-back exhaust
GTM 2.5'' Test Pipes
GTM Competition 70 MM Radiator
GTM Thermostatic oil cooler
GTM Return fuel system
GTM ECU reflash via Osiris uprev
GTM Race logic Traction Control System
OS Giken Twin Plate Dampened clutch/flywheel kit
Aquamist Meth Injection HSF-4
HKS KNOCK AMP
HKS CAMP 2 System
Results
With our GTM Stage 2 Supercharger Kit and GTM Stage 5 4.2L Longblock and supporting modifications, we were able to make 546whp and 411ft-lbs of torque.
Taking a look at the graph below, you can see that this setup has an extremely nice torque curve for a centrifugal supercharger with 90% of peak torque from 3900rpm to 7600rpm with substantially more torque than stock even below that. With this setup, we were able to max out the intake design of our Stage 2 Supercharger system. Since we found the limit of what the intake system can flow, and we know that the supercharger unit itself can flow more, we are in the process of developing Stage 3! Our goal is to break the 600whp mark on our supercharger system. Stay tuned for more information on that development.
Now to fun part, Here are all the pics of the project by category
Project featured components


Before pics


Car tear down


Before pics
Car tear down
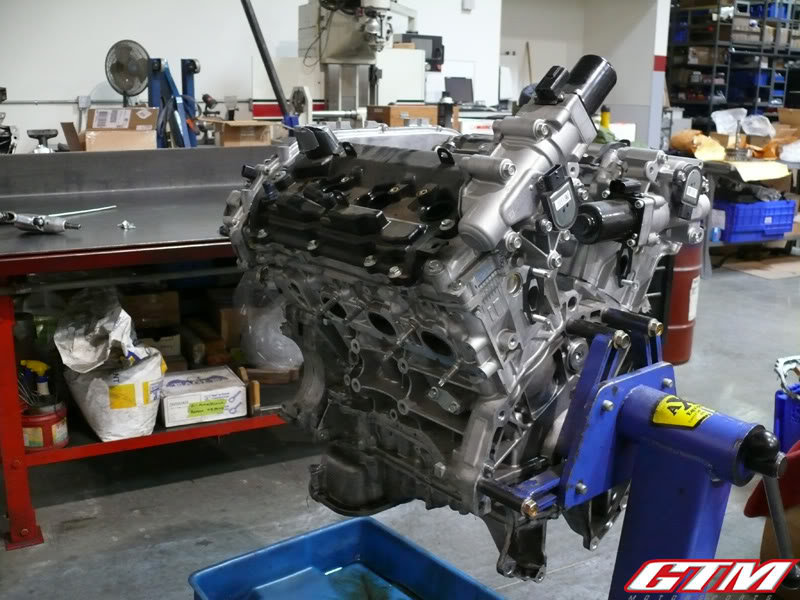
Engine tear down
Last edited by Sam@GTM; 05-29-2012 at 01:42 PM. Reason: fixed videos
 05-29-2012, 01:32 PM
#2
Engine Build
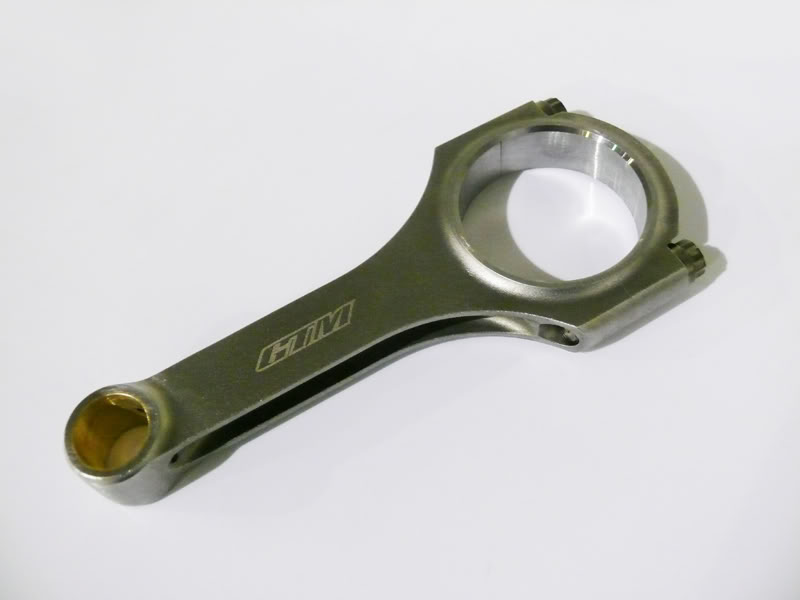
At the core of our Stage 5 engine build is our GTM 4.2L Stroker Kit with our billet chromoly 4340 stroker crankshaft, our billet chromoly H-beam rods and GTM spec Arias pistons with 11:0 compression. The engine block is fully prepped and blueprinted to ensure all clearances are dead nuts where we want them to be.
Standard OE clearances are all over the place with some being slightly tight and others being overly loose. We line hone the block to set a straight line for the crankshaft and use this critical step as part of setting main bearing clearances. While our high speed oiling crankshaft ensures consistent oil pressure to the rod bearings, setting the main bearing clearances to be consistent across the board spreads the loads and oil flow evenly. Controlling bearing clearances controls oil flow and oil pressure throughout the engine. The more oil that flows between the journal and bearing, the less friction there is and the oil stays cooler as a result. However, if the clearances are too loose, oil pressure drops and oil is unable to reach all the locations it needs to be with sufficient force to prevent metal to metal contact on moving parts. One thing to bear in mind is that we set clearances according to how much power the engine will be making as well as the intended use of the motor. We at GTM don’t just assemble engines; we build them right according to the application.
In addition to the blueprinting, this engine received our full GTM Micro Surface Treatment on all moving components. This is a surface treatment, not a coating and unlike a coating, does not wear off. This involves firing microscopic particles at the surface of a part at extremely high speeds. The impact of the particles does several things. First, it generates a small amount of heat that permanently changes the surface of the part, making it harder and more durable. The second thing it does, is create tiny dimples in the surface and removes the microscopic ridges and imperfections in machined surfaces. As a result, parts that receive the GTM Micro Surface Treatment are stronger and most importantly have lower friction as the surface no longer has ridges. In addition, the dimples retain oil more effectively and allow for a more persistent oil film to reside on friction surfaces.
Due to the microscopic size of the treatment media, parts that require tight tolerances such as engine bearings and piston rings can be treated in this manner without changing the dimensions of the part. When the main and rod bearing are treated, they become harder and retain oil better. Treating the piston compression rings has another benefit. Due to the micro-dimples and the elimination of micro-ridges, the rings seat faster and seal better. With treated piston rings, we noticed the vast improvement of engine performance during break-in (which was much, much shorter than non-treated rings). Out of the gate, we had more engine vacuum and there was none of the blow-by normally associated with freshly built engines.
We also treated the rod journals, main journals and piston wrist pins. With both the bearings and journals treated, friction is greatly reduced (freeing up additional horsepower) as well as increased longevity. Race teams that have treated bearings and journals together have discovered that they can double the time between overhauls as the bearings show very little wear.
The same improvements can be had with treating the pistons. This enables the skirts to retain a better oil film and reduces friction with the cylinder walls. Due to the microscopic size of the treatment media, it is able to get into the tight grooves in the ring lands and strengthen that area as well. Also, with the micro-dimpled piston crowns, the surface is able to distribute heat more evenly and most importantly, resist the formation of hot spots that micro-ridges left over from machining can create. This increases the detonation threshold and was also used on the combustion chambers and valve faces. When the treatment is performed after a multi-angle valve job, the valve seat becomes harder and is able to retain its precision shape better for improved performance over the life of the engine.
Since this engine expects to see high revs, oiling becomes a critical aspect and treating the oil pump gears increases their strength, fatigue resistance and improves their ability to move oil more effectively without undo increases in temperatures thanks to the reduction in friction. The increased fatigue strength imparted on the gears by the micro treatment will help the pump withstand higher rpms than an untreated oil pump.
With the Short Block assembled with our treated GTM Race Bearings, ARP 8740 main studs, new GTM Treated and blueprinted Oil Pump and OE main seals, we turned our attention to the cylinder heads.
The heads were fully disassembled, cleaned and pressure tested before they received a 5 angle valve job with radiused valve pockets smooth out airflow into the combustion chamber. To prevent the possibility of valve float at high rpm, we employed our GTM Valve Springs with our Titanium retainers, locators and keepers. Sealing the deal between the short block and the heads are a set of ARP L19 11mm head studs crushing a pair of Cosworth head gaskets.
Here are the pics of the complete process .....
05-29-2012, 01:35 PM
#3
Stage 2 supercharger installation


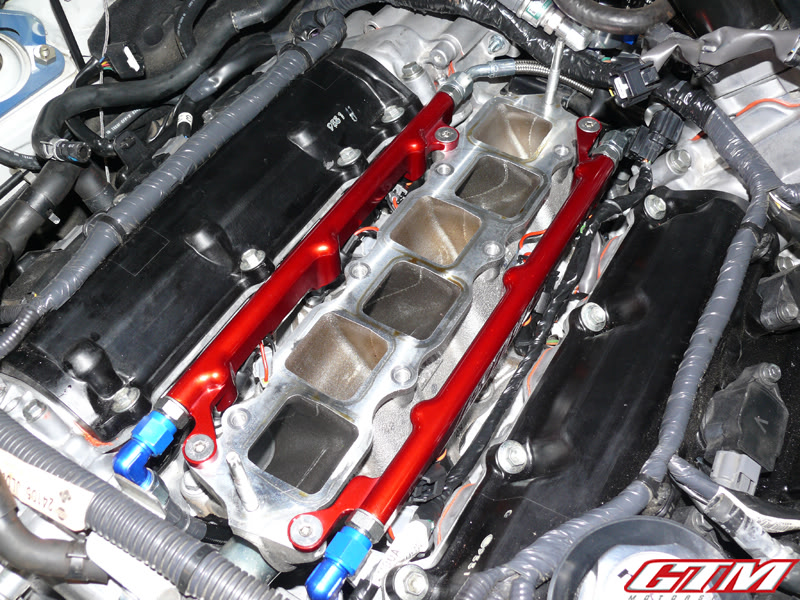
Return Fuel System
With the extra displacement and the addition of our Stage 2 Supercharger, the OE returnless fuel system would be overly taxed. To resolve this, we installed our GTM Return Fuel System that includes our GTM Billet Fuel Rails, fuel lines, and a Turbosmart Fuel Pressure Regulator to keep the fuel pressure on target. Working in concert with our Return Fuel System is a set of six 760cc/min EV14 Bosch fuel injectors.
Here are pics of the install
05-29-2012, 01:35 PM
#4
Stage 2 supercharger installation


Return Fuel System
With the extra displacement and the addition of our Stage 2 Supercharger, the OE returnless fuel system would be overly taxed. To resolve this, we installed our GTM Return Fuel System that includes our GTM Billet Fuel Rails, fuel lines, and a Turbosmart Fuel Pressure Regulator to keep the fuel pressure on target. Working in concert with our Return Fuel System is a set of six 760cc/min EV14 Bosch fuel injectors.
Here are pics of the install
05-29-2012, 01:36 PM
#5
Direct Port Meth Injection HSF-4
Extracting maximum power from our Stage 2 Supercharger with 11:0 compression requires serious detonation resistance that 93 octane pump gas simply can’t provide on its own. As a result, we did a direct methanol injection system that has one nozzle on each intake runner on the lower intake manifold plus a seventh nozzle in the intercooler inlet. By injecting water/methanol directly at the ports, the intake ports and valves are kept cooler, thereby transferring less heat to the incoming air as it is ingested. Not only is the intake air charge as cool as possible, but the water/methanol injection’s octane boosting properties gives this setup the detonation resistance it needs to make monster torque and solid power reliably and consistently.
Pics of the install
05-29-2012, 01:37 PM
#6
Exhaust System
Going for big power means seeking out and eliminating restrictions wherever possible. To this end, this monster exhales through a set of GTM test pipes and our GTM 2.5” cat-back exhaust. While one would expect a lot of drone with test pipes, our cat-back exhaust keeps the volume at a tolerable level while delivering a nice low rpm growl that transitions to a tight howl at high rpm with a signature VQ soundtrack. Constructed completely of stainless steel with an X-pipe that excels at scavenging the VQ’s exhaust gasses, this exhaust complements the supercharged VQ very well.
Pics of the system ...
05-29-2012, 01:38 PM
#7
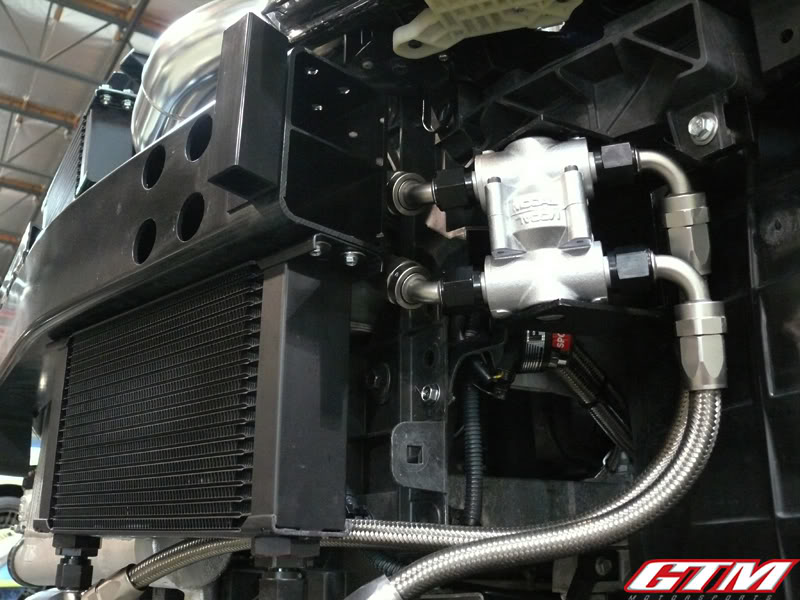
Competition Radiator
Battling the heat generated by the big displacement motor with a big supercharger strapped to it is our GTM 70mm Competition Radiator and fan shroud for the factory fans. With its extra capacity and massive cooling ability, this car has no problem keeping cool even on the hot and humid summer days of its Southeastern home. By setting the fans to come on at a lower temperature, we are able to prevent the system from trying to play catch up with high coolant temperatures when the car is pushed hard for long periods of time. Even with the big radiator, the threat of high oil temperature still looms when pushed to the limit. To make that worry disappear, we’ve added our GTM Oil Cooler and supplement kit with an inline thermostat to ensure quick oil warm up in cold weather
Pics of the system
Trending Topics

 05-29-2012, 01:39 PM
#9
HKS CAMP2
While it’s all good and well to have the best setup in town, it is always a good idea to keep tabs on the health and performance of a high powered build. The HKS CAMP2 combined with the HKS Knock AMP’s air/fuel readings were installed to monitor engine vitals and display them on the factory navigation screen. Another nice feature of the Knock Amp is it’s knock warning system that alerts the driver to detonation.


Traction Control
With a mountain of torque at the driver’s disposal only a jab of the pedal away, something had to be done to prevent the car from violently shredding its tires. With our GTM Plug and Play Traction Control System in the mix, wheelspin is minimized while allowing for maximum acceleration without the bogging the factory VDC causes.


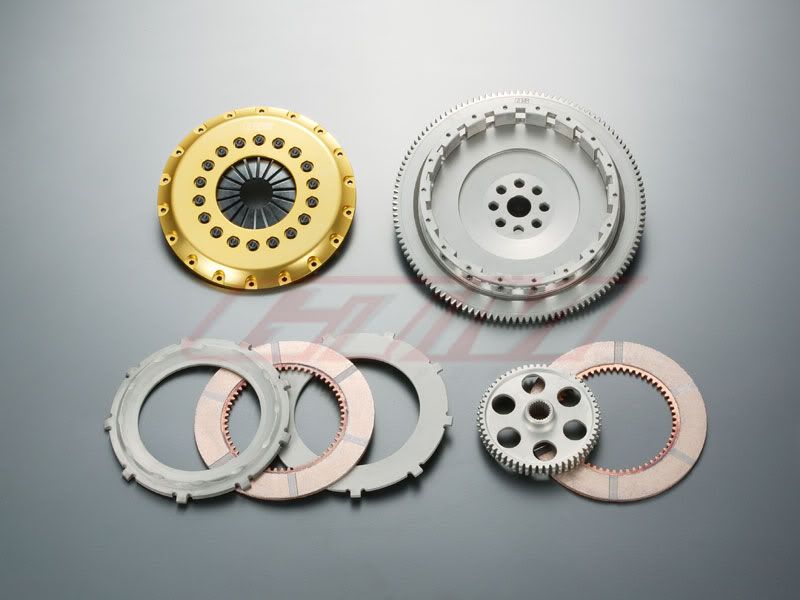
Clutch
Even though the factory clutch can hold a lot of power surprisingly well, the 4.2L engine in this car really needs extra clamping force to get that torque to the rear wheels. Making that connection is an OS Giken Twin Disk Clutch and Heavy Duty Concentric Slave Cylinder.


While it’s all good and well to have the best setup in town, it is always a good idea to keep tabs on the health and performance of a high powered build. The HKS CAMP2 combined with the HKS Knock AMP’s air/fuel readings were installed to monitor engine vitals and display them on the factory navigation screen. Another nice feature of the Knock Amp is it’s knock warning system that alerts the driver to detonation.
Traction Control
With a mountain of torque at the driver’s disposal only a jab of the pedal away, something had to be done to prevent the car from violently shredding its tires. With our GTM Plug and Play Traction Control System in the mix, wheelspin is minimized while allowing for maximum acceleration without the bogging the factory VDC causes.
Clutch
Even though the factory clutch can hold a lot of power surprisingly well, the 4.2L engine in this car really needs extra clamping force to get that torque to the rear wheels. Making that connection is an OS Giken Twin Disk Clutch and Heavy Duty Concentric Slave Cylinder.