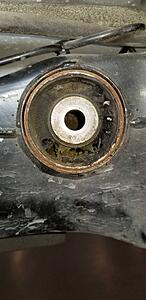
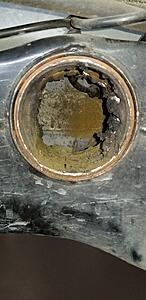
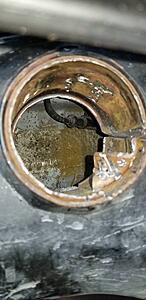
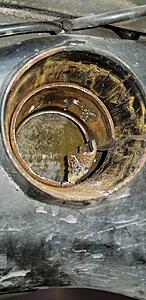
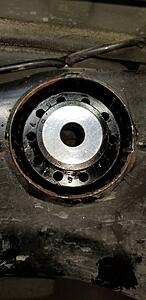
DIY: Whiteline Differential bushings
#166
The repair is difficult but not impossible for a DIY'er. Just be prepared and have tools handy for different situations and what helped me through the process was before the job, I ensured I was able to loosen my exhaust bolts. If they're in 'ok' condition but their seized up, have an impact handy to break them loose.
I listed a number of thoughts on the repair on the post above yours. Ask me questions and I'll try to answer them to the best of my ability.
I listed a number of thoughts on the repair on the post above yours. Ask me questions and I'll try to answer them to the best of my ability.
#167
I appreciate the offer, but looks like I got a stay of execution. Yesterday I found out that this repair is covered under my extended warranty, so I will let the stealership take care of it. Unfortunately the stealership won't install non-OEM bushings, so I will have to tackle this job eventually. I need to make a PDF of these directions so I will have them at the ready when that time eventually comes.
I had mine done at 35K miles, and there wasn't even a problem (yet). But it seemed like a good thing to do while the diff was down.
#168
Sooo...my extended warranty denied my claim. My warranty covers bushings, but it does not cover suspension components. Being that the differential bushing is in the subframe (and Infiniti replaces the entire subframe rather than just the bushing) it is considered to be a suspension component. Looks like I will be taking on this challenge after all.
#169
Sooo...my extended warranty denied my claim. My warranty covers bushings, but it does not cover suspension components. Being that the differential bushing is in the subframe (and Infiniti replaces the entire subframe rather than just the bushing) it is considered to be a suspension component. Looks like I will be taking on this challenge after all.
We have a video in post production that shows how to fix the diff bushing for $20 in 20 minutes. Testing over the last month has been positive.
#170
Update: I quickly Google'd differential bushing fixes for $20 bucks and I turned up someone's solution to inject "Windo-Weld" into the bushing. Is this your solution?
#171
Most definitely! Please let us know when the video is available.
#172
So I have called a few places. One being Z1. They recommend their bushing as opposed to whiteline (not too much of a surprise). Supposedly handles the heat better.
I called this transmission place that claimed that Poly would melt in that application and they have seen a lot of poly melt. I don't even know if there is another option between solid and Poly bushings.
I have been asking for a recommendation for a so-cal shop to replace the bushings. I have seen a lot of people on here have had it done. A lot of other cars seem to have two rear bushings, I don't know why ours only got one.
#173
Don't know why the poly would melt in this application.  But if that's a concern and you buy into Z1's argument, then get Z1's bushing kit. I don't think there's any wrong choice here.
It's possible the one shop you called isn't familiar with swapping these in the Z/G, or they know the swap is a PITA and would rather not do it. But that's just one place... keep searching. Where you live, you've got all of LA there to choose from.
 But if that's a concern and you buy into Z1's argument, then get Z1's bushing kit. I don't think there's any wrong choice here.
It's possible the one shop you called isn't familiar with swapping these in the Z/G, or they know the swap is a PITA and would rather not do it. But that's just one place... keep searching. Where you live, you've got all of LA there to choose from.
#174
I am 70 miles from LA. I just have to keep looking. The one place said that they are close to the exhaust and that is why they would melt. I don't know why Rubber wouldn't melt, but Poly would. From what I have seen, a lot of people have done this change and not complained about melting.
A mechanic that I trust told me 380 for the job, will have him do the diff fluid at the same time. Might even have him flush the brake fluid with the stuff I have.
A mechanic that I trust told me 380 for the job, will have him do the diff fluid at the same time. Might even have him flush the brake fluid with the stuff I have.
Last edited by ezbme; 11-13-2017 at 04:03 PM.
#175
I just installed a 3.692 diff in my 2011 G37S and installed these KDT911 Whiteline bushings while at it.
The 2 "ear" bushings on the differential itself came out easily using a 34MM axle nut socket and a 2.5lb hammer.
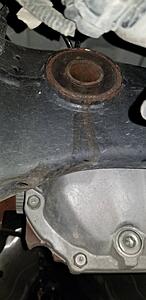
OP said he got the rear subframe bushing out in 2 minutes?! This was the most pain in the *** part for me. Between drilling the entire core out and using a sawzall with a old 24T blade it took me maybe 45 minutes. I even had the car up on the lift lol. I blame the blade. It was a old worn out diablo 24T and wouldn't cut for ****.
Whiteline bushing install was easy. I put the Whiteline subframe bushing in a plastic sandwich bag and put it on ice over night. When it was time to install it I lubed it and used my puller and it went in fast and easy.
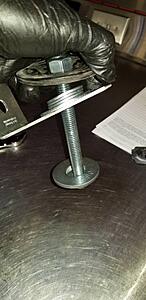
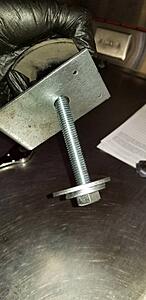
Prior to installing this I watched plenty of videos and read threads on people giving the advice of going to a hardware store and simply buying parts to make your own puller.
Not a single thread made a list of what size washers they used so I'll do someone else a favor and post what I bought.
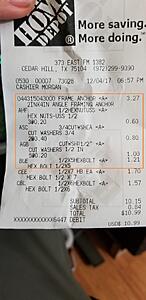
Home Depot
$3.27 - Frame Anchor - 2in x 4in angle framing anchor (1)
$0.20 - 1/2" Hex nut (1)
$1.21 - 1/2" x 5" Hex bolt (1)
$0.80 - 3/4" washers (2)
$1.00 - 1/2" washers (5)
All these parts ~$6.50 total. Use a 3/4" or 19mm wrench to hold the bolt and the same size socket or ratchet wrench to turn the nut which will pull the bushing into the subframe.
I'll post pictures later on the puller setup and a picture of the receipt.
I bought 5", 6" and 7" hex bolts because I was unsure the length that would be required, but than I ended up just using the 5".
They were about $1.xx each so I figured I would be safe buying numerous lengths.
Last edited by qmantran; 12-17-2017 at 03:23 AM.
The following users liked this post:
Gio37 (12-10-2017)
The following users liked this post:
krazzyborri (01-27-2018)
#177
I forgot to mention I installed the thick bushing up top and did not use the black washers. Thinner bushings on bottom.
No driveline vibration noticed yet. Will report back if things change. Did this @ 75k miles.
No driveline vibration noticed yet. Will report back if things change. Did this @ 75k miles.
Last edited by qmantran; 12-17-2017 at 03:26 AM.
The following users liked this post:
rctstdroid1 (05-28-2018)
#180
But 5 minute epoxy is cheap and easy to get.
See the post above, motorvate.ca or motorvate DIY on YouTube.


