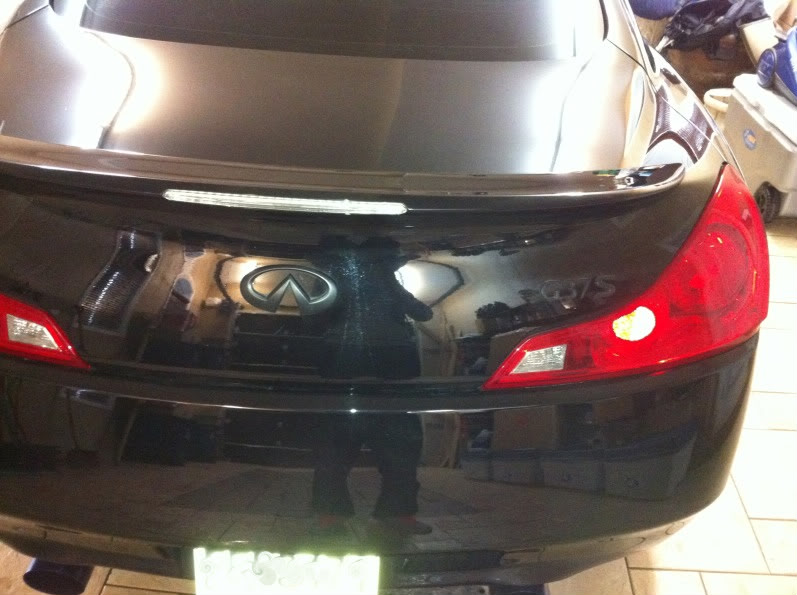
DIY: How to BLACK OUT rear emblems w/ Plastidip
#1
Thread Starter
Former Sponsor
iTrader: (15)
Joined: Sep 2006
Posts: 1,443
Likes: 24
From: Brooklyn, NYC
How to BLACK OUT rear emblems w/ Plastidip
Just realized I never posted this here... I did this for the first time on my CLS55 back in Nov. 09, and wrote up this DIY several months later, but never got a chance to post it here... so here you go guys.
You can pick up a can of plastidip from the paint department of any home building store (Lowes, Home Depot, etc.)
In case you don't know what plastidip is... it's rubberized paint originally used to coat the grip of tools, until it was made in a spray form and fell into the hands of a car guy... and well the possibilities are endless. This stuff will peal off on demand with no issues as long as the coats are thick enough.
Sorry for the cell phone quality pics.
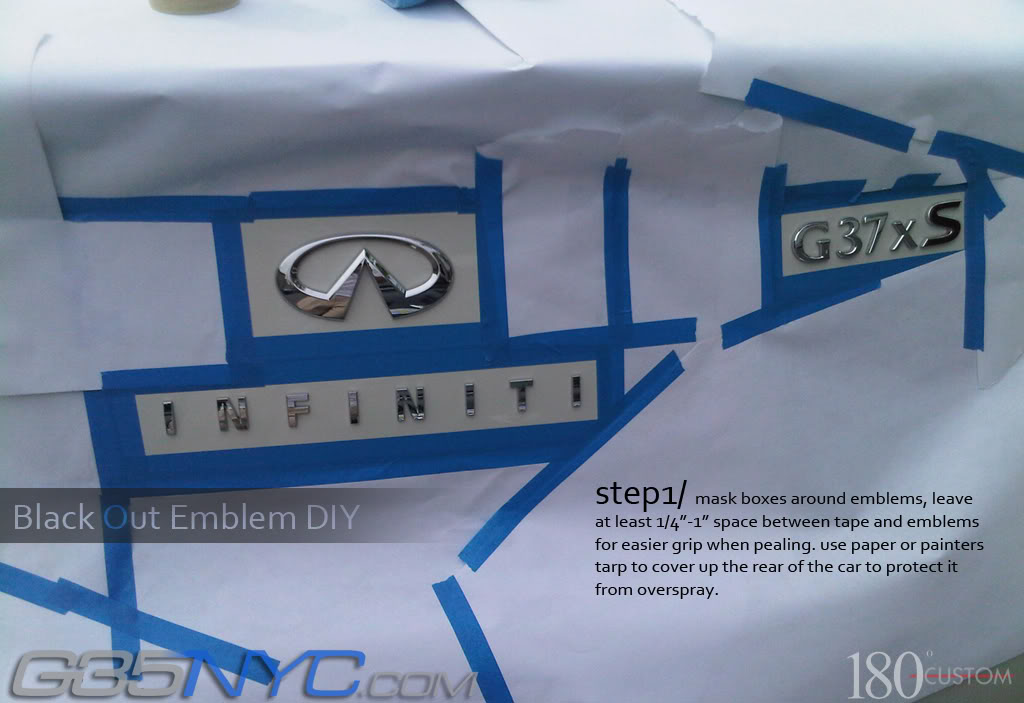
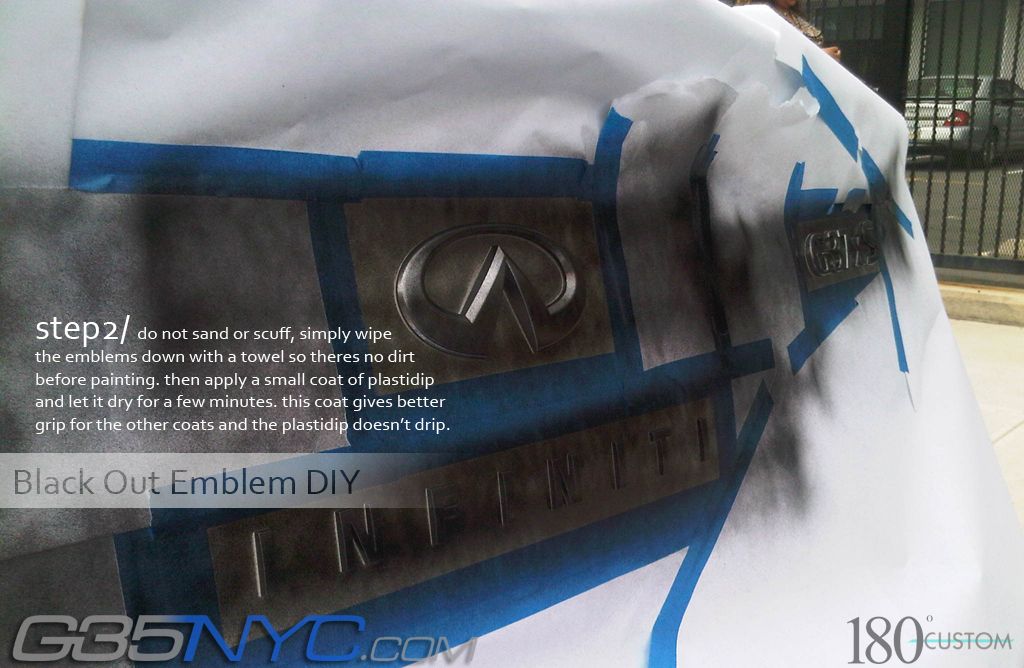
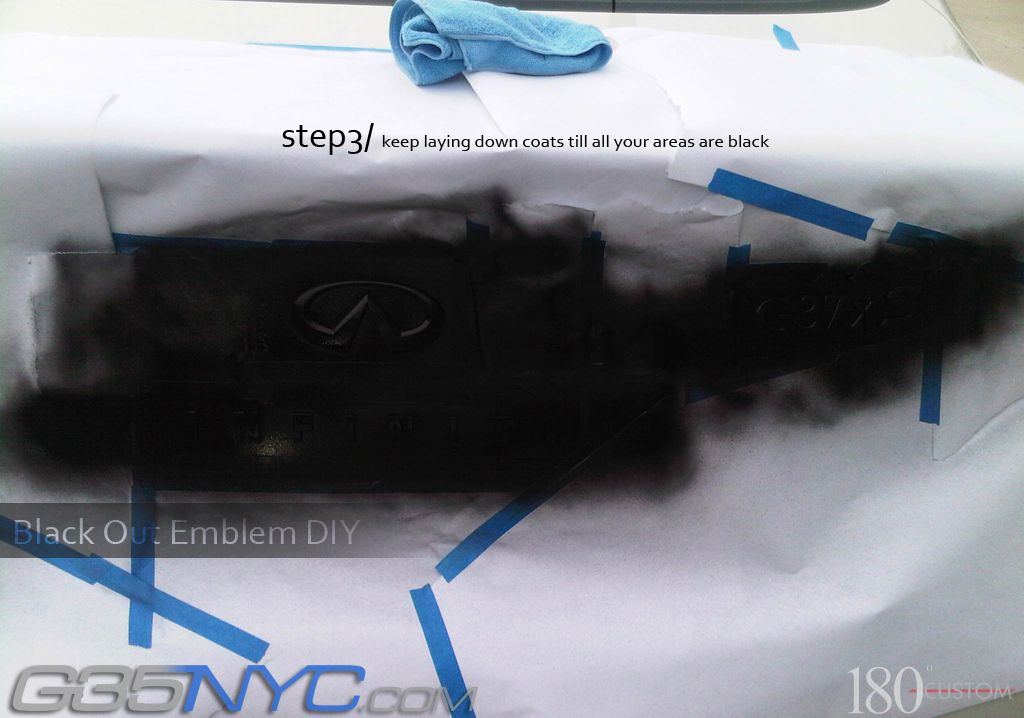
Here's the steps:
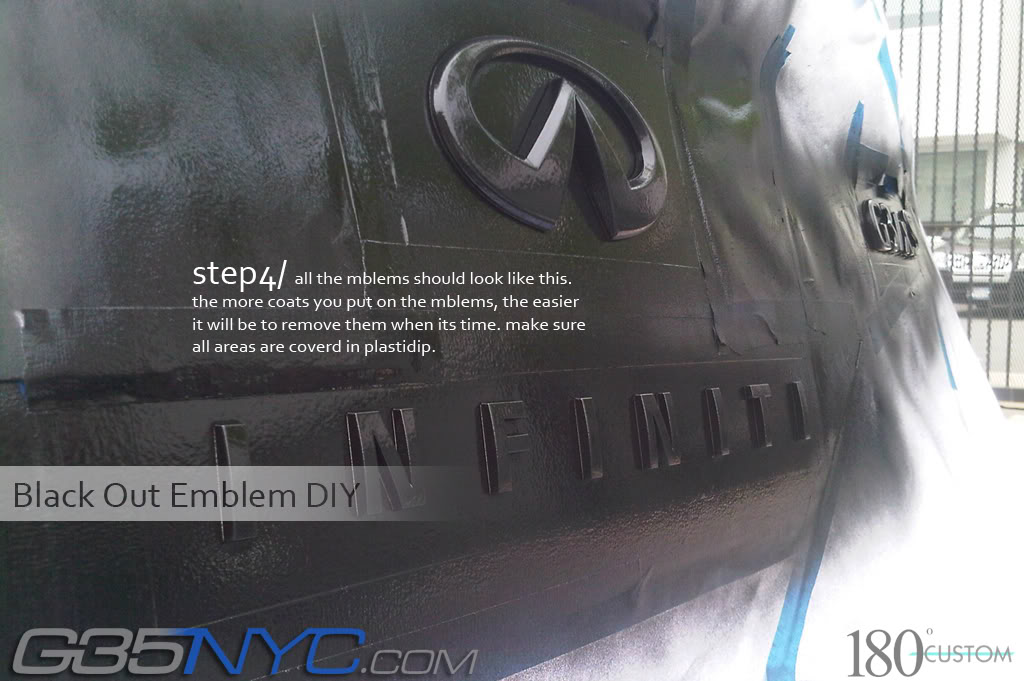
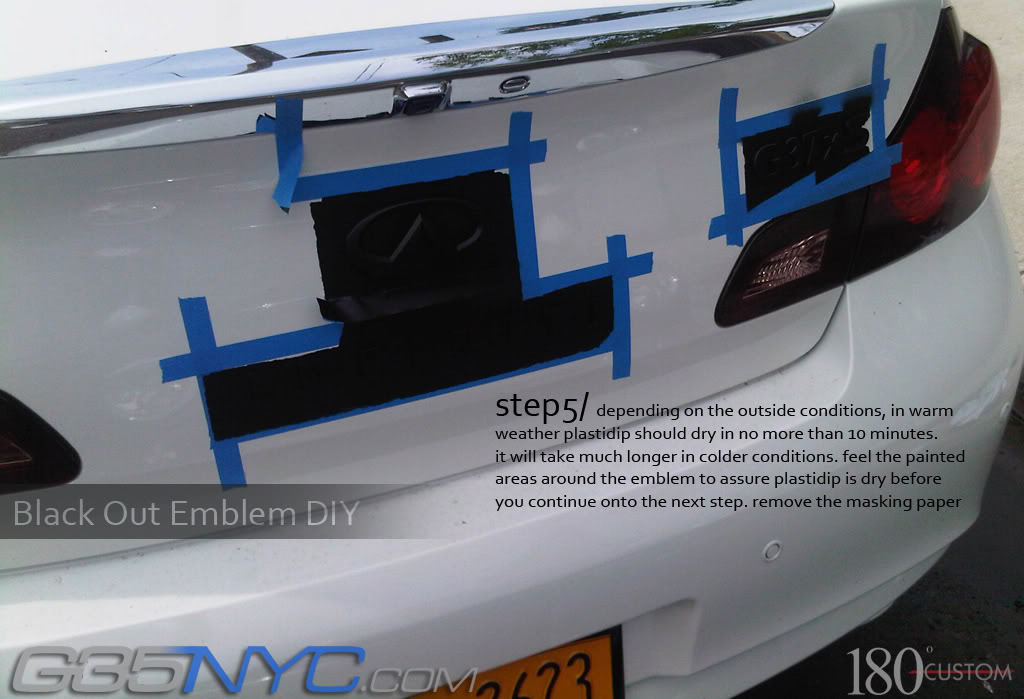
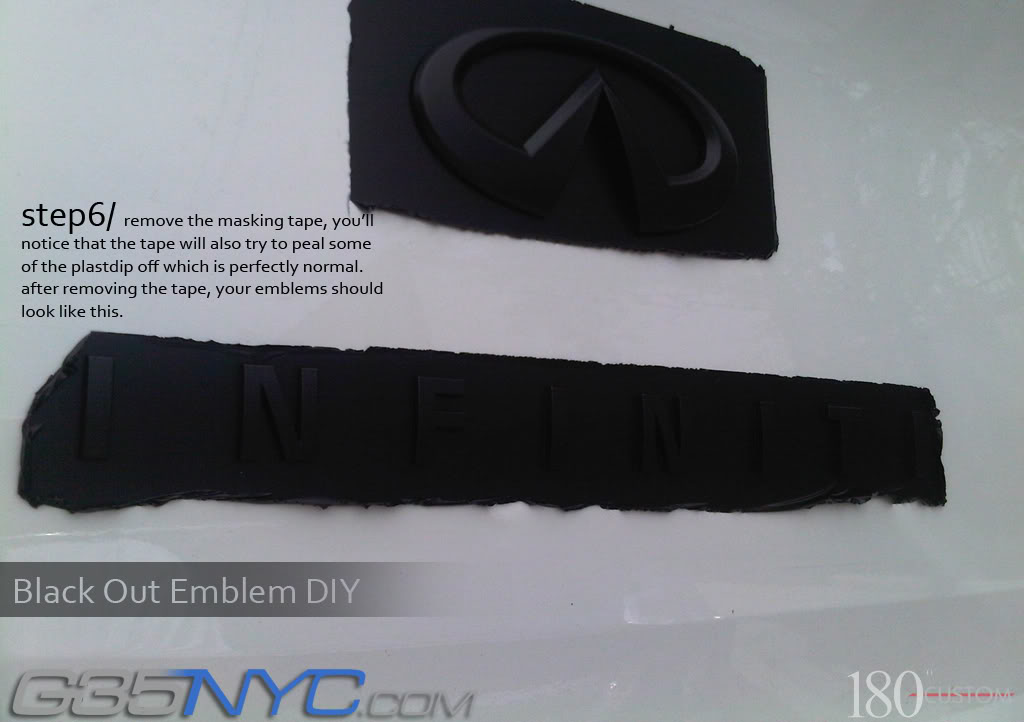
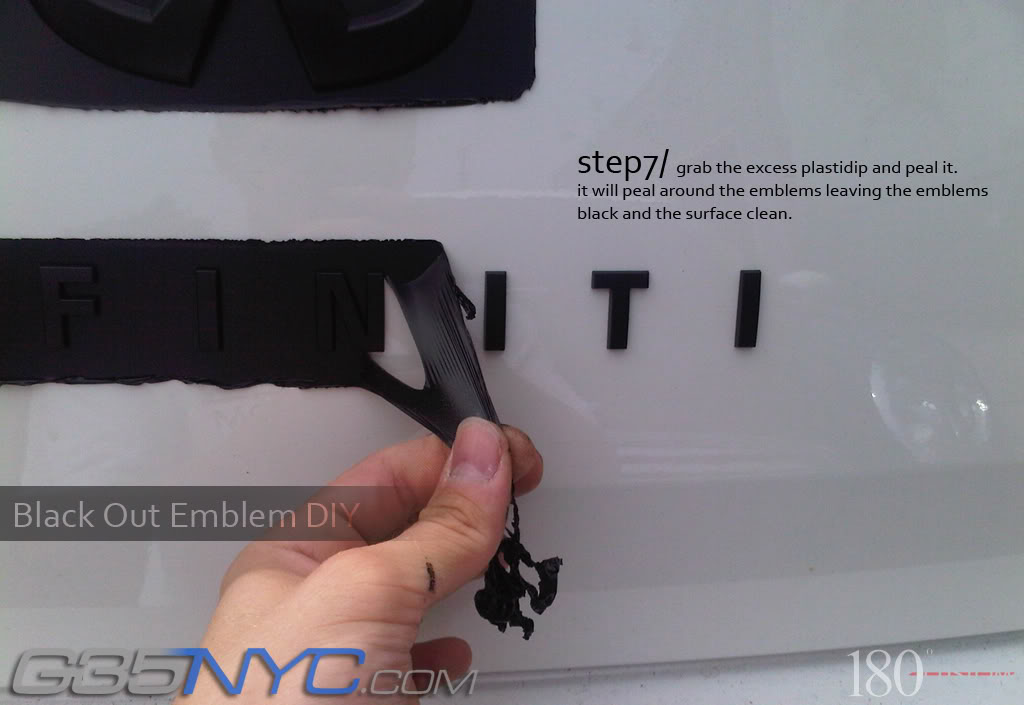
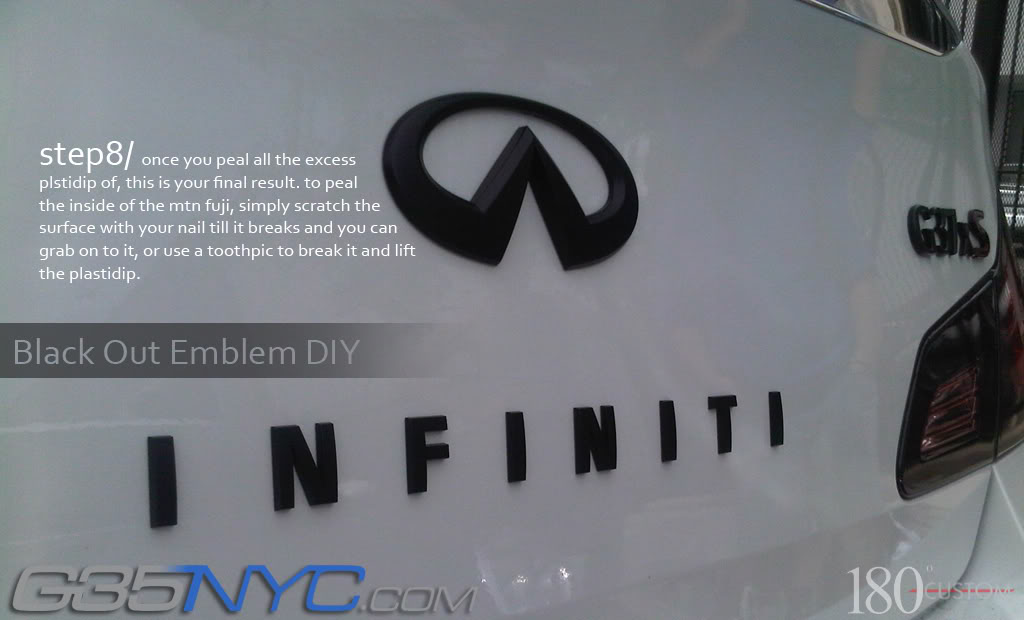
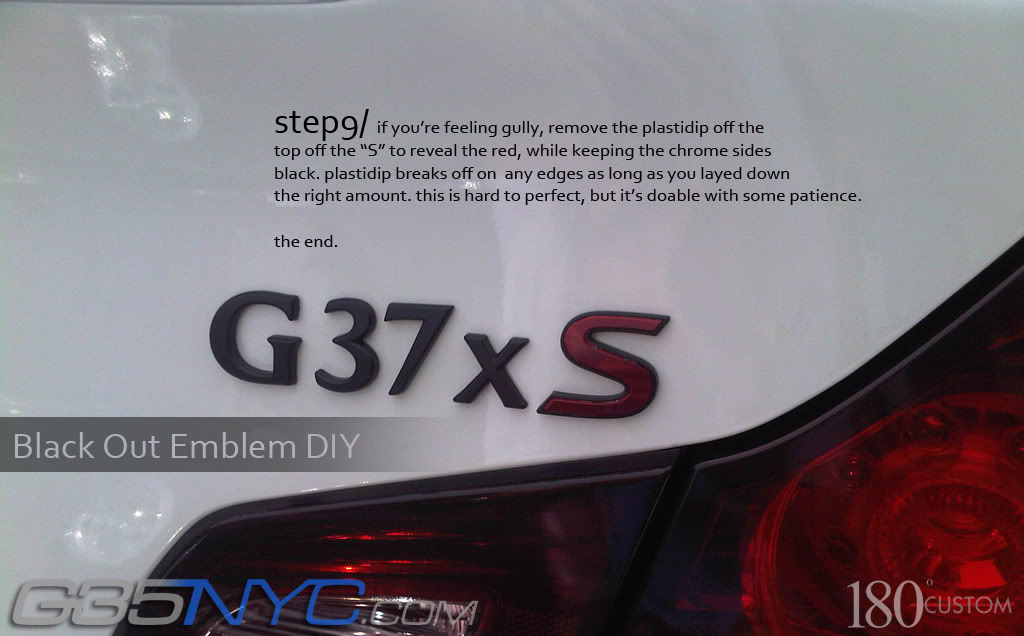
Enjoy
You can pick up a can of plastidip from the paint department of any home building store (Lowes, Home Depot, etc.)
In case you don't know what plastidip is... it's rubberized paint originally used to coat the grip of tools, until it was made in a spray form and fell into the hands of a car guy... and well the possibilities are endless. This stuff will peal off on demand with no issues as long as the coats are thick enough.
Sorry for the cell phone quality pics.
Here's the steps:


Enjoy

The following users liked this post:
bikezilla (06-10-2016)
#2
Hmmm, I used these same pics when I did mine. Must have found a link on here somewhere to do it that led me to G35NYC.com
Either way, it's in its rightful place. Ridiculously easy to do, although I would recommend redoing it every few months. Or maybe I'm just bad at waxing and drying my car as I have wax residue and towel fibers stuck to the letters/symbol haha.
Either way, it's in its rightful place. Ridiculously easy to do, although I would recommend redoing it every few months. Or maybe I'm just bad at waxing and drying my car as I have wax residue and towel fibers stuck to the letters/symbol haha.
#5
Mr. Drop it like it's hot
iTrader: (10)
Joined: Dec 2009
Posts: 6,135
Likes: 39
From: Lawrenceville, GA
Actually igor you or someone else posted this up and it got removed for some unknown reason (maybe cause it has a watermark to another forum?? Who knows) . I used the exact same process following your DIY. Thanks!!!
#6
Thread Starter
Former Sponsor
iTrader: (15)
Joined: Sep 2006
Posts: 1,443
Likes: 24
From: Brooklyn, NYC
If the watermarks are an issue, please notify me. All my other DIYs have the same watermarks and had no issue with them.
Trending Topics
#12
cool, thanks for the response.
Since cali is about 60-70 degrees now, I plan on spray the thin first layer and wait about 10-15 mins and spray on a coat per 10 minutes. Does that sound like the correct way of tackling it?
(First time doing something like this)
Since cali is about 60-70 degrees now, I plan on spray the thin first layer and wait about 10-15 mins and spray on a coat per 10 minutes. Does that sound like the correct way of tackling it?
(First time doing something like this)
#14
ahhh interesting! very useful diy. considering doing it on mine. i wish you still had your g, igor  . is this applicable to the grill and the side chromes? i wonder how this holds up with washes?
 . is this applicable to the grill and the side chromes? i wonder how this holds up with washes?
#15
Yes and it holds up well, even after dozens of washes! Have it on my rear emblems (was skeptical of removing them to paint and not being able to place them back to OEM specs).


