DIY: Installing Vanity light LEDs
#1
DIY: Installing Vanity light LEDs
I get a number of questions on which lights to install and decided to put together a short DIY to change the vanity lights on our Gs. There are a variety of threads showing the lights installed but I didnít see a detailed DIY of how to do it. This is a difficulty level of 1 on a scale of 10 and can be completed in less than 10 minutes.
<O </O
</O
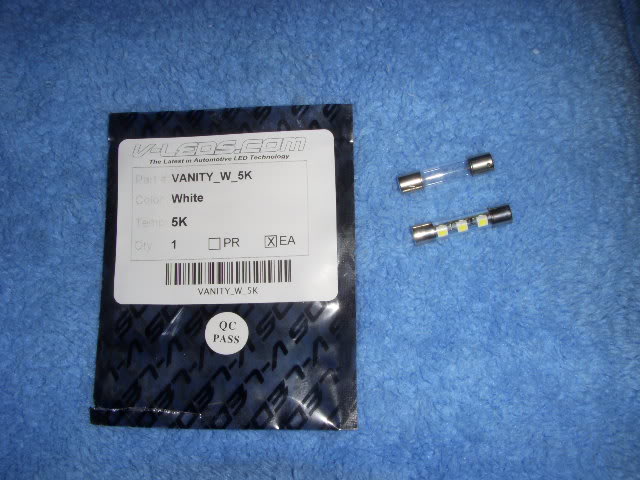
First off, I ordered this LED:
<O </O
</O
http://www.v-leds.com/Interior-LED/Vanity-LED/White-LED/HI-POWER-SMT-3-LED-HID-p7114848.html
<O </O
</O
The picture below shows what it looks like compared to the original factory vanity light. Looks just like a fuse. This is a 5K LED and all my other lights are 6K LED but the difference is not really noticeable. I felt the 5K was a bit better for illuminating your face in the mirror than the 6K LED. This is a personal choice but the installation is the same. If you want the 6K one, order this one:
HI POWER SMT 3 LED HID WHITE VANITY LIGHT BULB
<O </O
</O
<O </O
</O
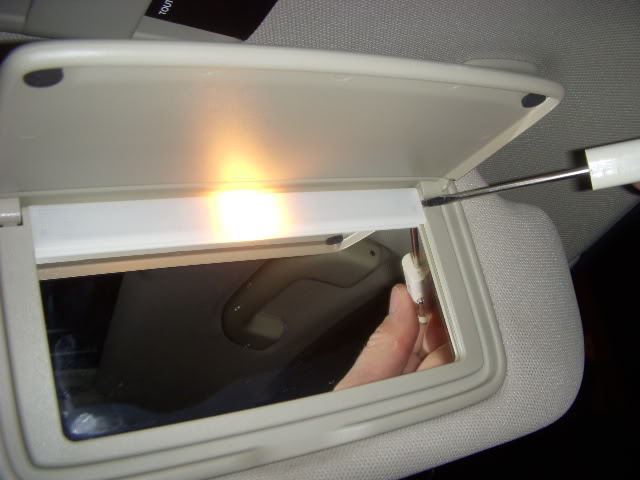
In order to get to the light to replace it, you must first remove the bezel using a small flathead screwdriver. There is a depression on the right side where you can gently insert the screwdriver and loosen the bezel. Several have had some difficulty here as too much force can crack the mirror. I loosened the right hand side then using the same screwdriver gently loosened across the front until the entire bezel could easily be pulled off by hand.
<O </O
</O
<O </O
</O
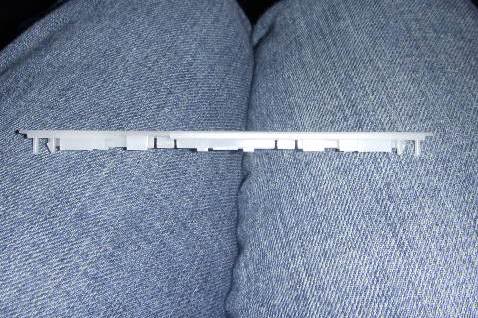
Pay close attention to the bezel as it has small delicate pins on each end to align with a hole on the visor.
<O </O
</O
<O </O
</O
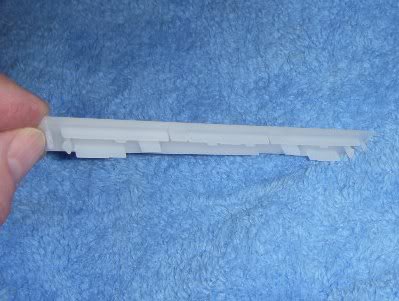
Also note the bezel has a long plastic guide on the lower edge and a short guide on the upper edge. When re-installing, be careful as you have to be gentle or youíll break the pins or the mirror. It only fits one way so donít force it.
<O </O
</O
<O </O
</O
Once exposed the light can be pulled with a fuse puller or in my case I used the same small screwdriver and pried it out. When installing the LED remember that they are polarized so if it doesnít light up when touching the contacts, try reversing the ends. Ensure the LEDs are pointing outward before you push it all the way in as it is difficult to rotate.
<O </O
</O
After the install, replace the bezel and youíre done!
<O </O
</O
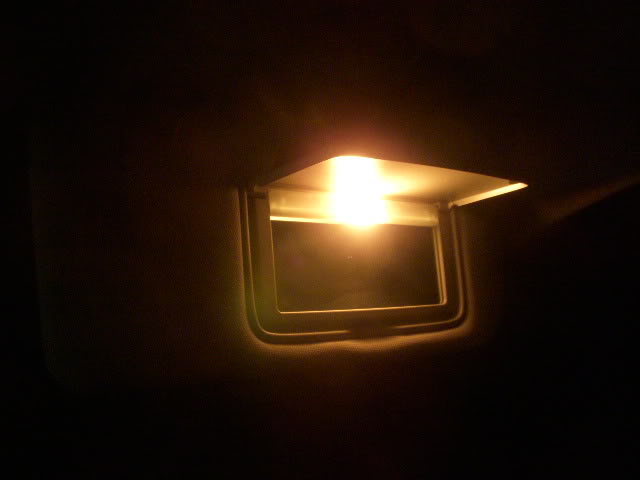
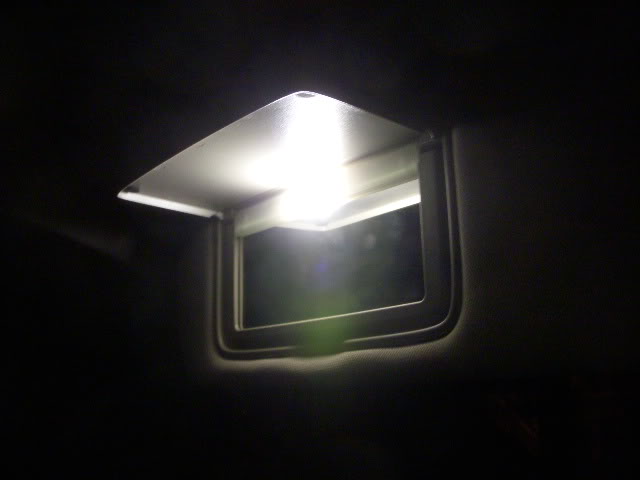
Here are the before and after shots:
<O </O
</O
Before:
<O </O
</O
<O </O
</O
<O </O
</O
<O </O
</O
<O </O
</O
After:
<O </O
</O
<O </O
</O
<O </O
</O
<O </O
</O
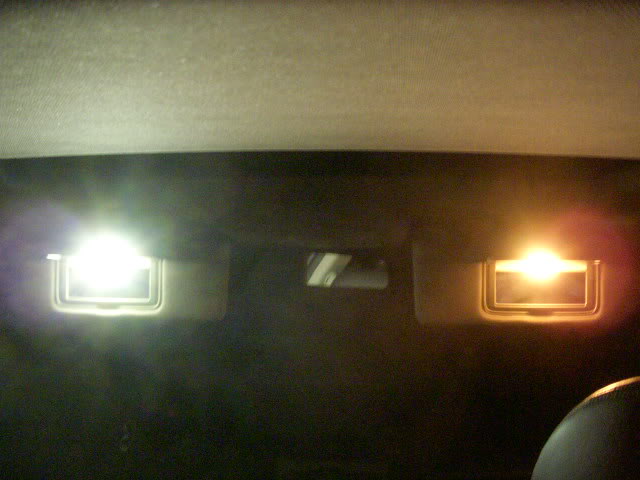
And one shot showing the difference.
<O </O
</O
<O </O
</O
<O
 </O
</O
First off, I ordered this LED:
<O
 </O
</O
http://www.v-leds.com/Interior-LED/Vanity-LED/White-LED/HI-POWER-SMT-3-LED-HID-p7114848.html
<O
 </O
</O
The picture below shows what it looks like compared to the original factory vanity light. Looks just like a fuse. This is a 5K LED and all my other lights are 6K LED but the difference is not really noticeable. I felt the 5K was a bit better for illuminating your face in the mirror than the 6K LED. This is a personal choice but the installation is the same. If you want the 6K one, order this one:
HI POWER SMT 3 LED HID WHITE VANITY LIGHT BULB
<O
 </O
</O

<O
 </O
</O
In order to get to the light to replace it, you must first remove the bezel using a small flathead screwdriver. There is a depression on the right side where you can gently insert the screwdriver and loosen the bezel. Several have had some difficulty here as too much force can crack the mirror. I loosened the right hand side then using the same screwdriver gently loosened across the front until the entire bezel could easily be pulled off by hand.
<O
 </O
</O

<O
 </O
</O
Pay close attention to the bezel as it has small delicate pins on each end to align with a hole on the visor.
<O
 </O
</O

<O
 </O
</O
Also note the bezel has a long plastic guide on the lower edge and a short guide on the upper edge. When re-installing, be careful as you have to be gentle or youíll break the pins or the mirror. It only fits one way so donít force it.
<O
 </O
</O

<O
 </O
</O
Once exposed the light can be pulled with a fuse puller or in my case I used the same small screwdriver and pried it out. When installing the LED remember that they are polarized so if it doesnít light up when touching the contacts, try reversing the ends. Ensure the LEDs are pointing outward before you push it all the way in as it is difficult to rotate.
<O
 </O
</O
After the install, replace the bezel and youíre done!
<O
 </O
</O
Here are the before and after shots:
<O
 </O
</O
Before:
<O
 </O
</O

<O
 </O
</O
<O
 </O
</O
<O
 </O
</O
<O
 </O
</O
After:
<O
 </O
</O

<O
 </O
</O
<O
 </O
</O
<O
 </O
</O
And one shot showing the difference.
<O
 </O
</O

<O
 </O
</O
The following users liked this post:
bikezilla (12-19-2015)
#3
I'm sure this will be helpful for future DIYers.
One thing I noticed when I did mine:
When I had the LEDs pointing directly outward, it was just a little too bright for my eyes. I angeled mine slightly lower and that made it "bearable" to stare at the light.
One thing I noticed when I did mine:
When I had the LEDs pointing directly outward, it was just a little too bright for my eyes. I angeled mine slightly lower and that made it "bearable" to stare at the light.
#5
damn... that's a vanity light alright... a lady's make-up vanity light that lights you up like an x-mas tree ha ha.
that's what our vanity light looks like? I have to be honest... I don't think I've ever took the time to look... and I've been driving Gs for 5 years... ha ha
that's what our vanity light looks like? I have to be honest... I don't think I've ever took the time to look... and I've been driving Gs for 5 years... ha ha
#7
To put it back in, notice each side of the bezel has little "rods" that have holes that the line up into the fold down sun visor. So line up the rod from one side, and then the other side. You're going to be bending it a little, and then bend the bottom part of the bezel into it, while pushing it upwards.
Hope that helps
Hope that helps
Trending Topics
#9
is there a listing available for all of the interior bulbs? If I'm going to change out the visor lights, might as well knock em all out at the same time & go LED's all the way around. What to order for the overhead domes, doors, etc....? What an easy DIY that makes a huge difference in night time appearance. Cool.
#11
is there a listing available for all of the interior bulbs? If I'm going to change out the visor lights, might as well knock em all out at the same time & go LED's all the way around. What to order for the overhead domes, doors, etc....? What an easy DIY that makes a huge difference in night time appearance. Cool.
Interior: Map Lights 2 x 194 Style LEDS / Puddle Lamps 2 x 194 Style LEDS (One in each door) / Rear Reading Lamps 2 x 194 Style LEDS (One in each) / Trunk 1 x 194 Style LEDS / Glove Box 1 x 57 Style LED / Front Vanity Mirrors 2 x 29MM Vanity Style LEDS
Exterior: Reverse Lamps 2 x 921 Style LEDS / License Plate 2 x 194 Style LEDS / Front Marker Lamps (Upper Outer Corner of Head Light) 2 x 194 Style LEDS (One each side) / Headlamps 2 x D2S Style HID's / Fog Lamps 2 x H8 Style Halogen Bulbs or LED or HID Conversion Kit / Front Turn Signals 2 x 7444NA Mirror Style Bulbs or LEDs with resistor fix.
#15
found this on someone elses post
Interior: Map Lights 2 x 194 Style LEDS / Puddle Lamps 2 x 194 Style LEDS (One in each door) / Rear Reading Lamps 2 x 194 Style LEDS (One in each) / Trunk 1 x 194 Style LEDS / Glove Box 1 x 57 Style LED / Front Vanity Mirrors 2 x 29MM Vanity Style LEDS
Exterior: Reverse Lamps 2 x 921 Style LEDS / License Plate 2 x 194 Style LEDS / Front Marker Lamps (Upper Outer Corner of Head Light) 2 x 194 Style LEDS (One each side) / Headlamps 2 x D2S Style HID's / Fog Lamps 2 x H8 Style Halogen Bulbs or LED or HID Conversion Kit / Front Turn Signals 2 x 7444NA Mirror Style Bulbs or LEDs with resistor fix.


