
DIY: Grubbs v2 (09) Spoiler Install
 06-27-2009, 09:14 AM
#1
Registered User
Thread Starter
Grubbs v2 (09) Spoiler Install
This is a do-it-yourself article for anyone who wants to install their own Grubbs v2 (09) no-camera spoiler. There were no instruction included with my spoiler so this is just how I chose to do it. The install is quite a bit different than the v1 (08). IMHO the install is simpler and the product is better. As a rule, illustrations will follow instructions. Here goes, hope you enjoy:
The first thing you need to do is remove the stock spoiler. I have heard some suggest that you don’t have to remove it but I didn’t want to drill yet another hole for the brake wire and I could find no functional benefit for leaving it. Start by raising the pop-rivets in the trunk and remove the liner under the deck-lid. Remove the 4 nuts that hold the chrome spoiler on (Fig 1).
Fig 1.

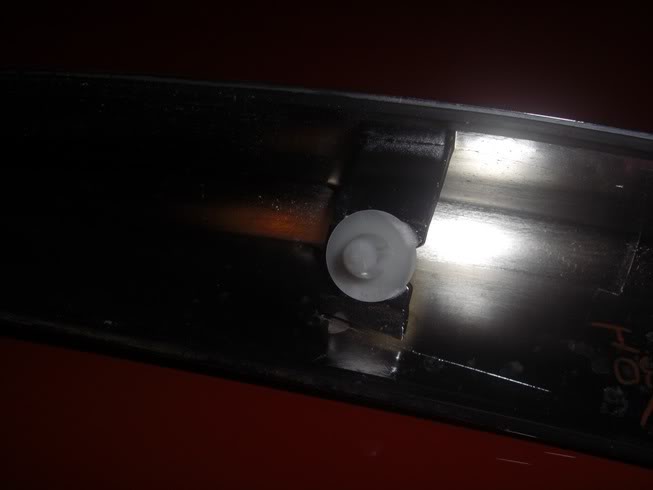
Once the nuts are off, just pull the spoiler off. There are 2 white snap rivets that hold the spoiler in but it can be pulled (Fig 2).
The bare deck lid looks like this (Fig 3).
Fig 3.
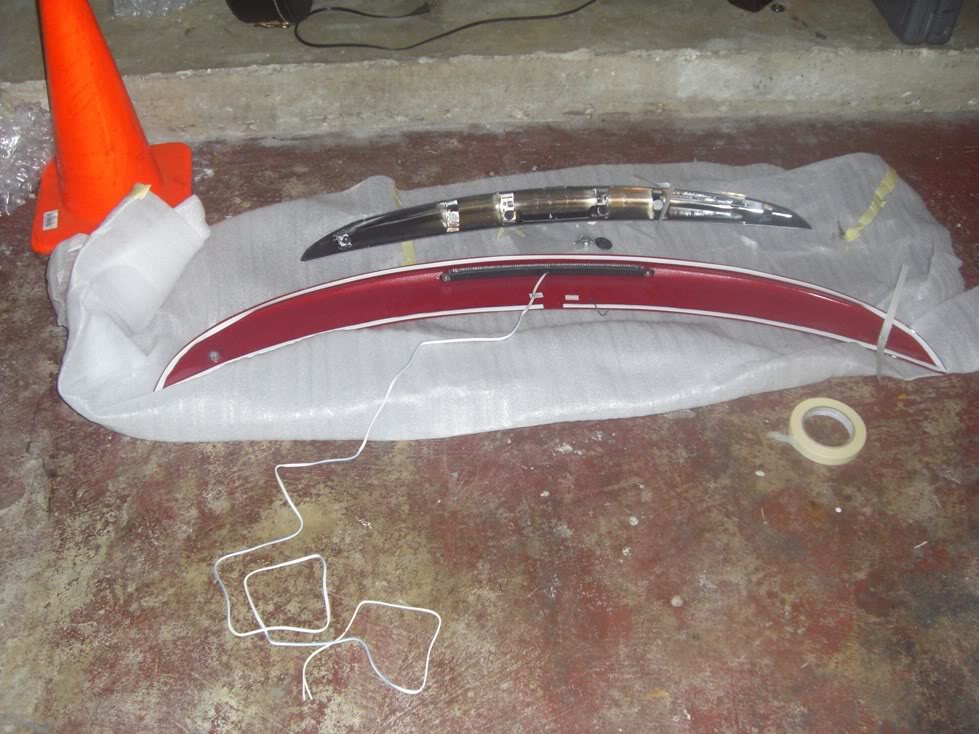
Here is a picture of the spoiler (Fig 4.)
Fig 4.
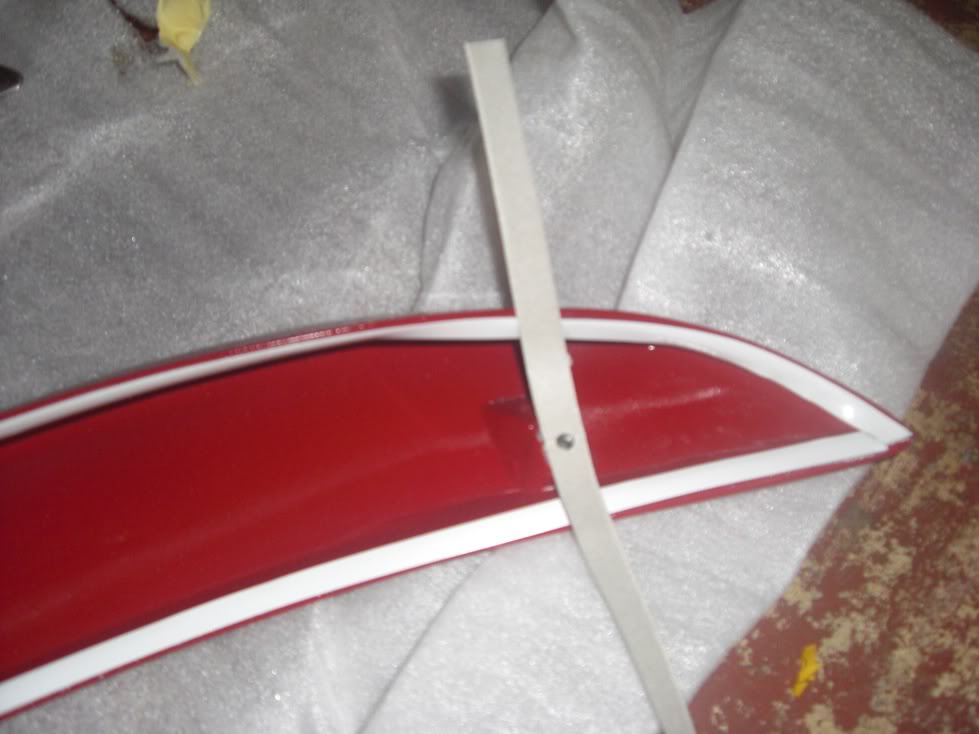
After cleaning the deck lid well, the goal is to line up the spoiler well on the car so that you can drill holes in the right place. The v2 spoiler only requires 2 holes but both are at the tips of the spoiler and are not stock. The spoiler come with cardboard strips that have a hole in the center and help you to mark proper hole placement. First remove the stick backside around the hole and stick the tabs over the holes in the spoiler (Fig 5).
Fig 5.
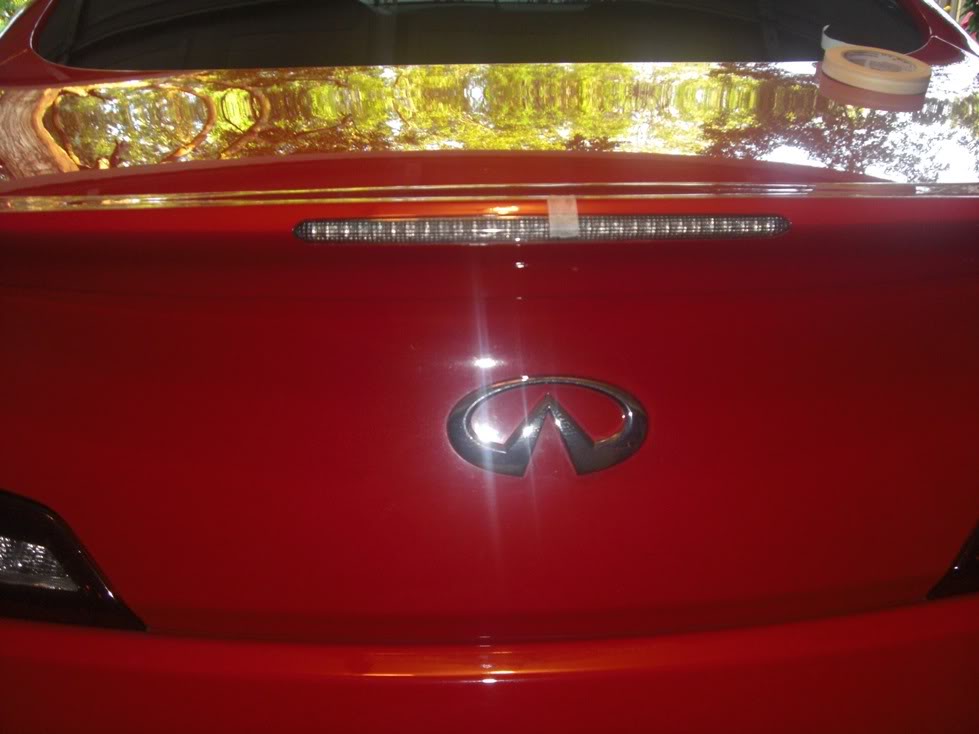
Next, place the wing on the car and line is up right. I started by measuring the center of the brake light and placing a piece of tape there. I then got a level and lined the tape up plumb with the peak of Mt. Fuji (Fig 6).
Fig 6.
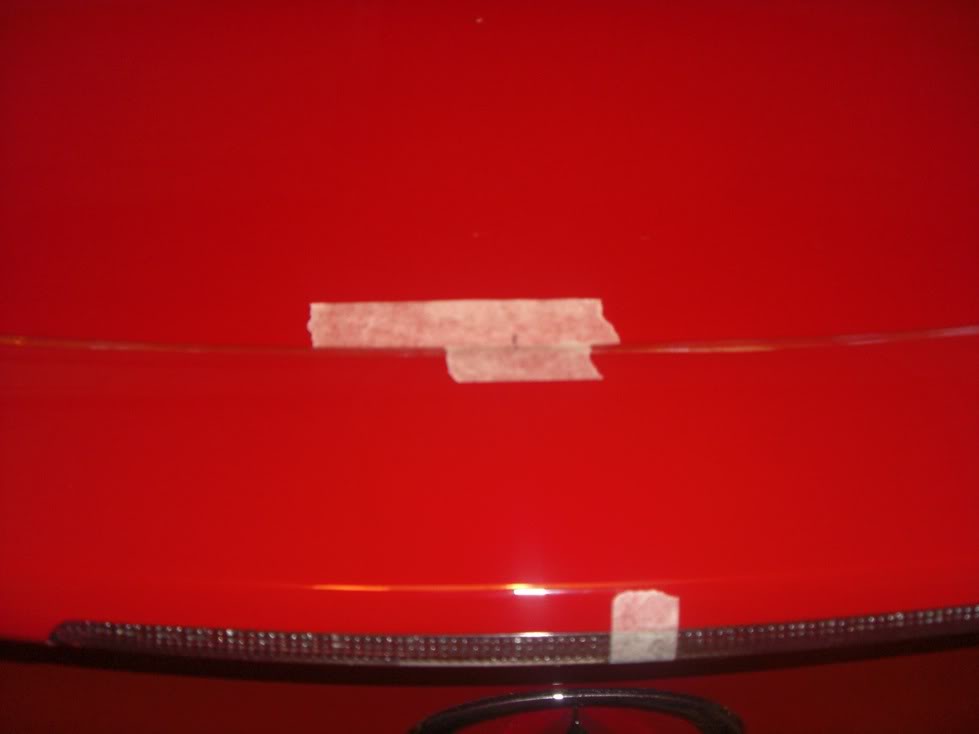
After I got this right, I put a piece of tape on the front of the spoiler and one just in front of it on the deck lid. With a pen, I lined up a mark on both pieces of tape. This way I know the wing would be centered in case it shifted (Fig 7).
Fig 7.
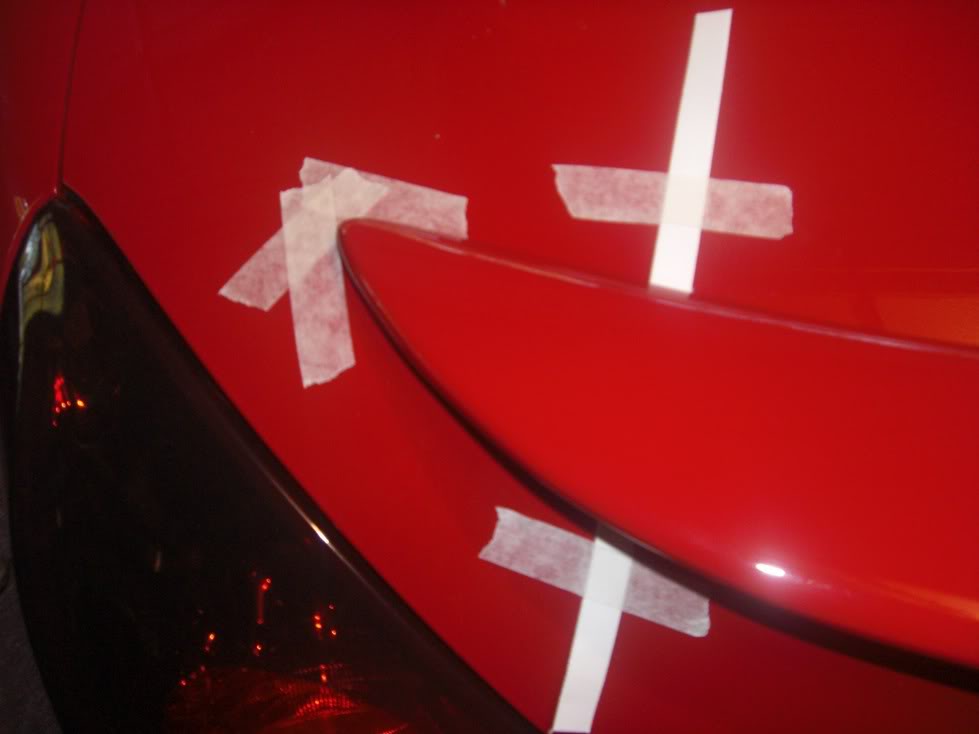
After that, measure from the tips of the spoiler to the various corners of the deck lid and keep shifting the tips fore or aft until it is equal on both sides. Once I got it right, I put some more tape down as a guide (Fig 8).
Fig 8.
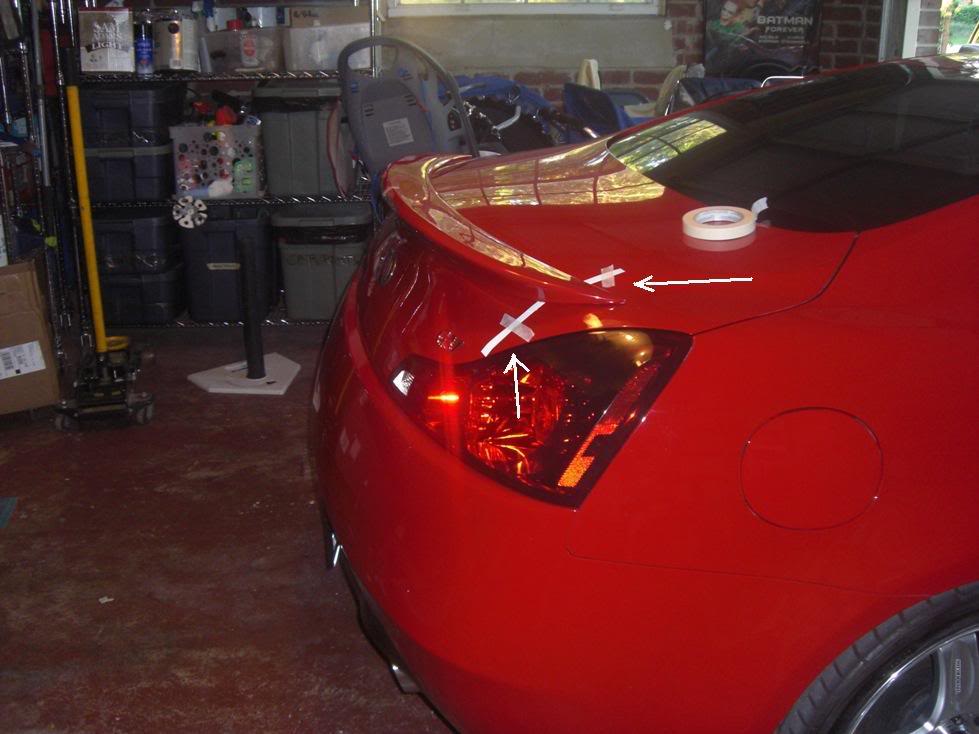
The next step is to tape the tabs down to the trunk, this way, when you remove the spoiler, the tabs will still be present and will show you where to drill (Fig 9).
Now remove the spoiler. Double check location by measuring the distance between the holes in the tabs and various corners on the deck lid; measure twice, drill once! In Fig 10 you can see that I drilled the pilot hole with a small bit. Make sure you use a center punch or nail to mark the hole so you don’t end up with a bit run on the trunk. Drill all the way through the underside of the deck lid (Fig 11). The tabs can now be removed.
Fig 10.

Fig 11.
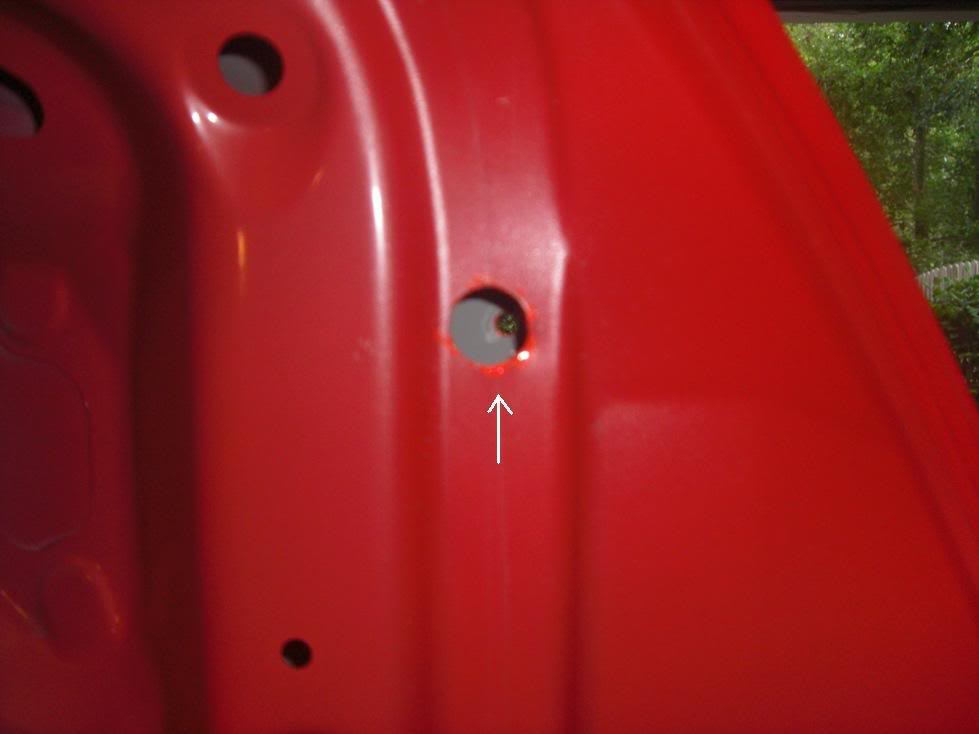
Now there are two more holes to drill on each side. In a future step you will be threading a stud into the bolt holes in the spoiler. One hole on the top of the deck lid must be just slightly larger than the stud (5/16” I think) to allow it to pass through the deck lid (Fig 12). The second on the underside is larger (3/4”) to allow you to use a socket to fasten the nut onto the stud (Fig 13). After I drilled I used a file to de-burr the holes and used a little model acrylic paint to cover up the bare metal.
Fig 12.
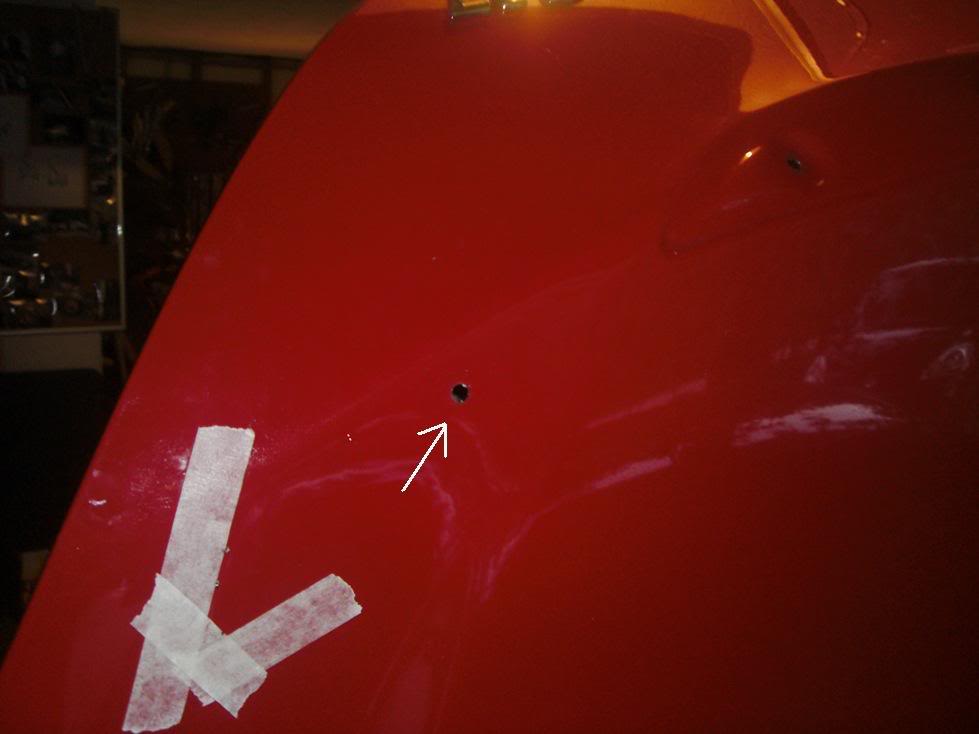
Fig 13.
Now it is time to insert the studs into the spoiler. The head of the stud is slotted for use with a flat head screw driver (Fig 14).
Fig14.
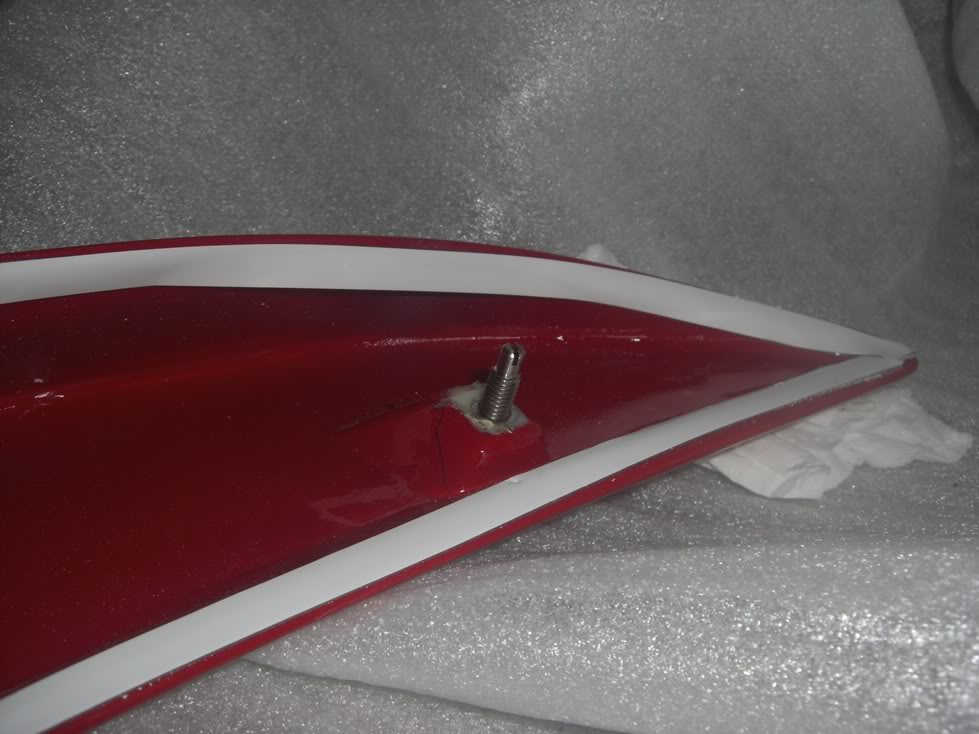
Do a dry run before removing the double sided tape backing to make sure everything looks right. Place the spoiler onto the deck with the studs inserted into the holes you drilled. If you are satisfied, remove the spoiler and set it aside again.
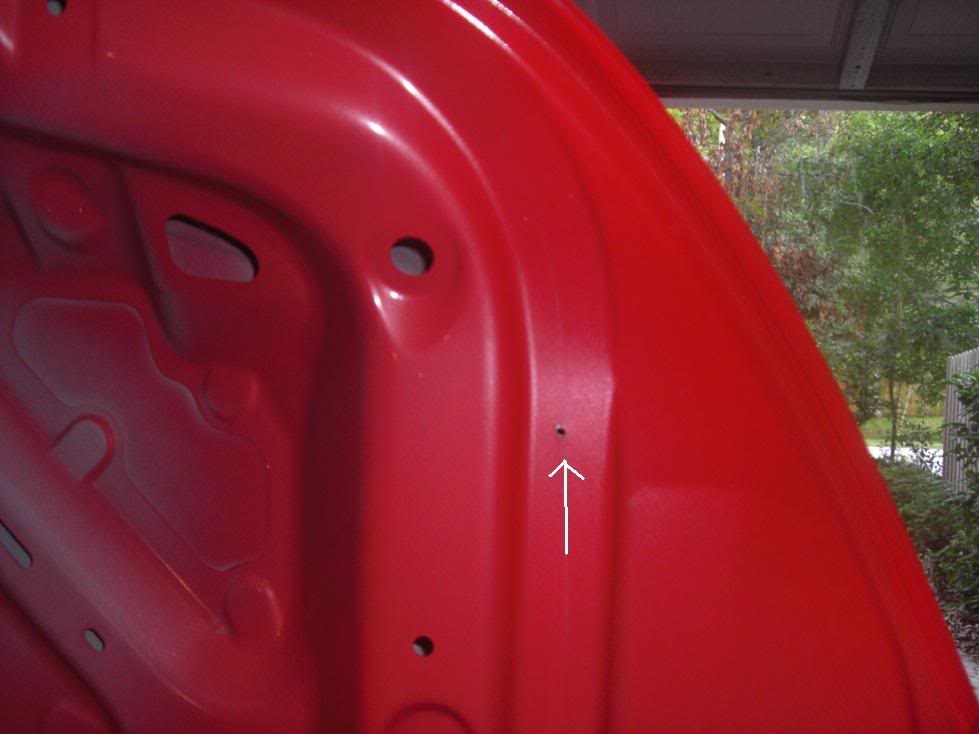
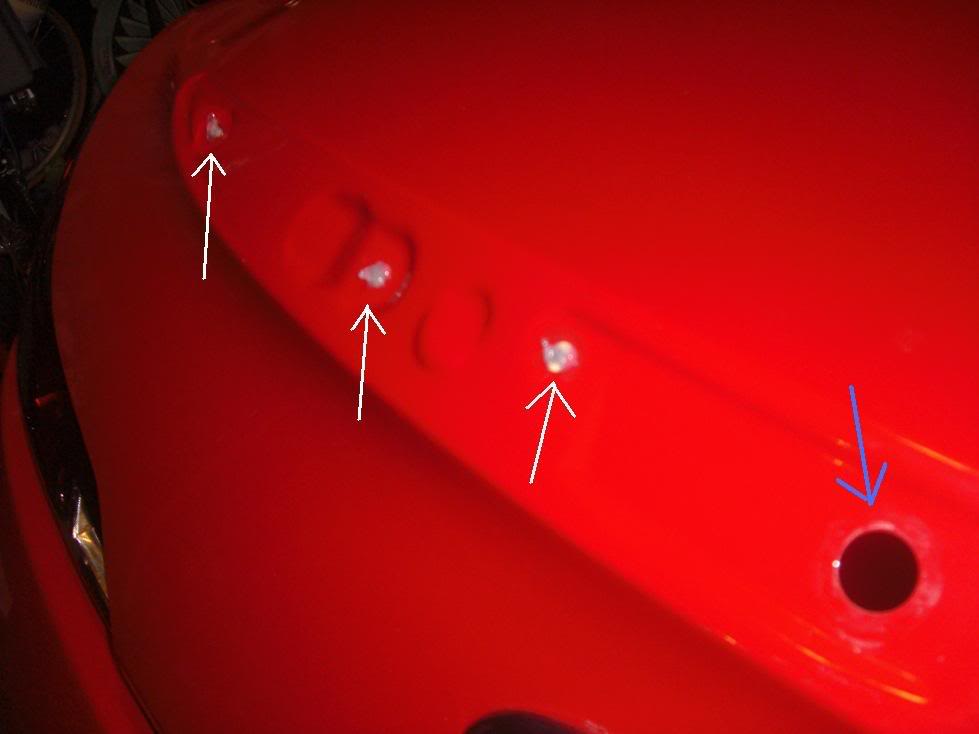
I took some silicone and used it to plug up the stock holes in the deck lid; this will ensure no leakage into the trunk (Fig 15, white arrows). Note: I also did a little extra prep at this point on the spoiler, cutting away some of the double sided away from the edge so it didn’t show and adding some silicone to the tape joints (not pictured).
Poke a hole in the stock large black rubber grommet in the deck lid and run the brake lamp wiring through it (Fig 15, blue arrow).
Fig 15.
I ran the wire through the grommet until there was just enough room for me to pull the backing of the double sided tape off. Pull the tape off, insert the studs and don’t allow any of the tape to stick until the studs are fully inserted into the deck lid. You can spray some water on the tape to make it stick less in case you mess up, but I did not. I found it unnecessary since you have the studs as a guide here.
Once the spoiler is stuck on with the tape, go ahead and tighten the nuts to the studs (10mm). Note: I plan to find some �” grommets to cover these holes for a nice appearance, as there are not covered by the trunk liner.
Run the wire down the stock trunk wiring and through the black rubber hose that connects the deck lid wiring to the chassis (refer back to Fig 1).
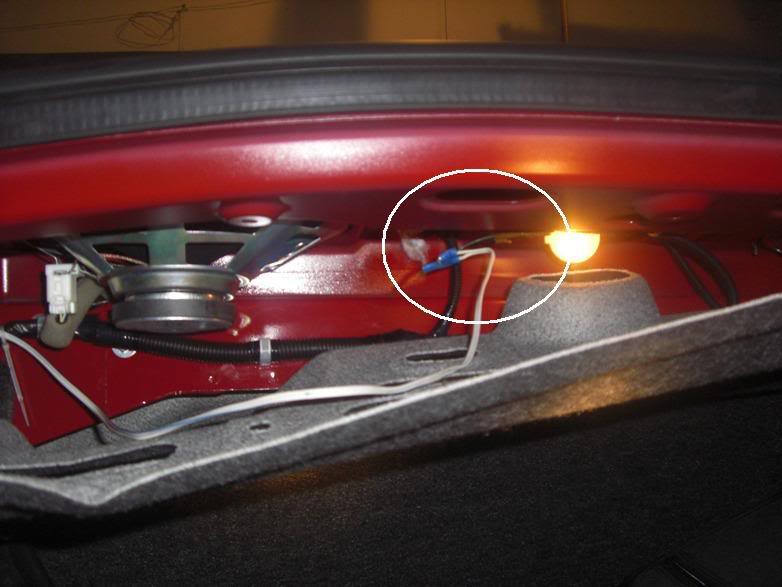
Remove more of those black pop-rivets from inside the trunk and lower the trunk liner that is under the rear speakers (Fig 16). The wire connector for the interior third brake lamp was in the center between the rear speakers (white circle).
Fig 16.
Disconnect the harness and test with the brakes to make sure you got the right one (Fig 17; should be a black wire and a green wire on the harness).
Fig 17.
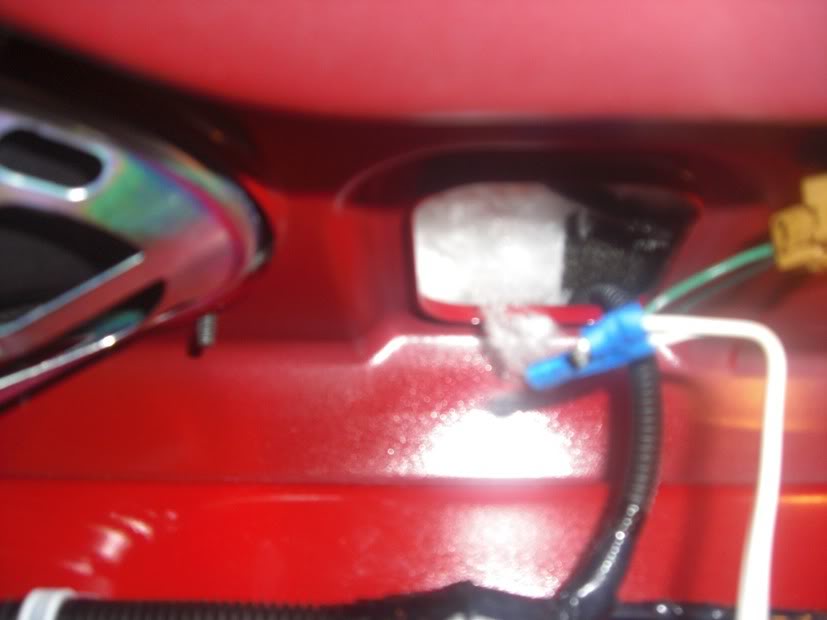
Splice the wire with the strip into the black wire and the other into the green. I wanted to disable my stock third brake light so that it wasn’t so obvious that the spoiler was not stock, so I just left the stock lamp disconnected. (Note: yeah, ugly wiring job but I just used what I had laying around)
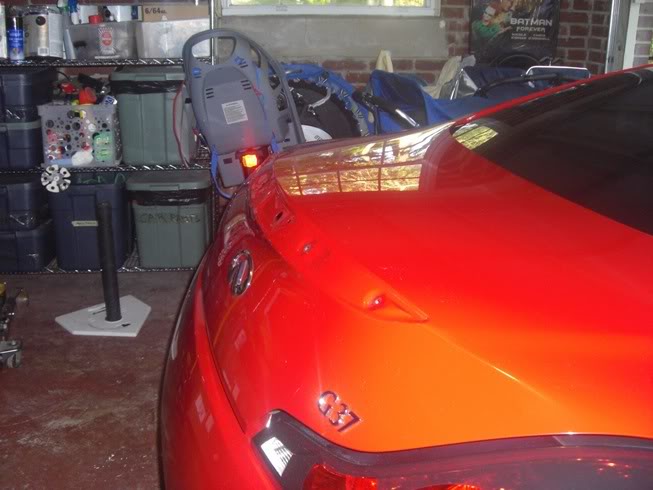
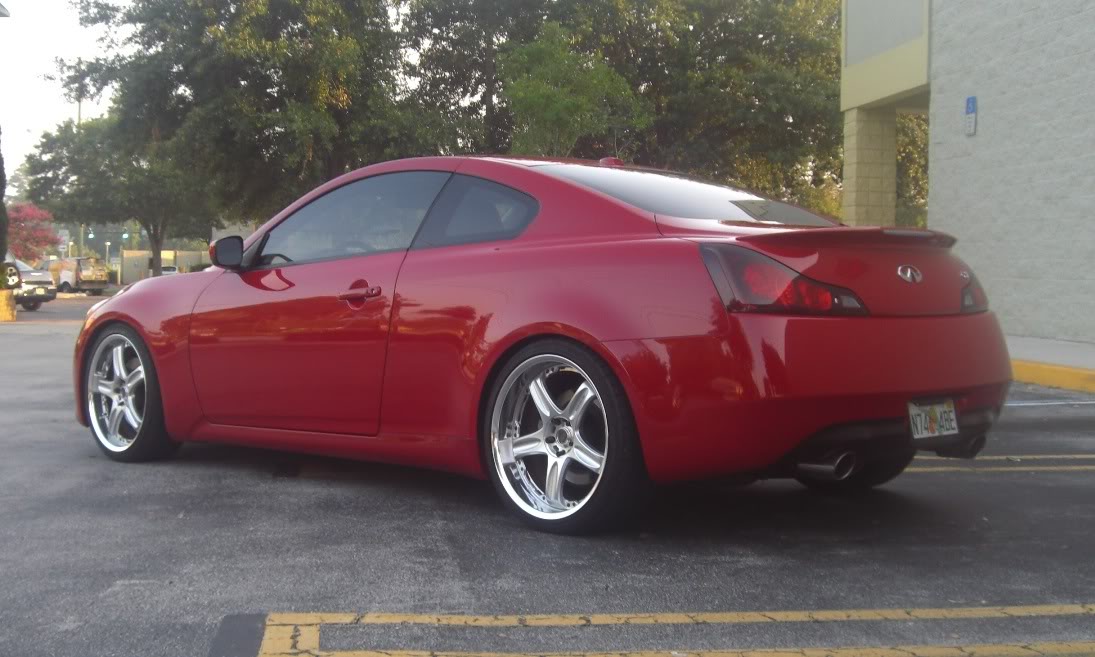
Use electrical tape, zip ties or whatever you want to dress the wires up. Test the new lamp with the brakes to make sure it is functional. Replace all the trunk liner and YOU ARE DONE! (Fig 18).
Fig 18.
The first thing you need to do is remove the stock spoiler. I have heard some suggest that you don’t have to remove it but I didn’t want to drill yet another hole for the brake wire and I could find no functional benefit for leaving it. Start by raising the pop-rivets in the trunk and remove the liner under the deck-lid. Remove the 4 nuts that hold the chrome spoiler on (Fig 1).
Fig 1.
Once the nuts are off, just pull the spoiler off. There are 2 white snap rivets that hold the spoiler in but it can be pulled (Fig 2).
The bare deck lid looks like this (Fig 3).
Fig 3.
Here is a picture of the spoiler (Fig 4.)
Fig 4.
After cleaning the deck lid well, the goal is to line up the spoiler well on the car so that you can drill holes in the right place. The v2 spoiler only requires 2 holes but both are at the tips of the spoiler and are not stock. The spoiler come with cardboard strips that have a hole in the center and help you to mark proper hole placement. First remove the stick backside around the hole and stick the tabs over the holes in the spoiler (Fig 5).
Fig 5.
Next, place the wing on the car and line is up right. I started by measuring the center of the brake light and placing a piece of tape there. I then got a level and lined the tape up plumb with the peak of Mt. Fuji (Fig 6).
Fig 6.
After I got this right, I put a piece of tape on the front of the spoiler and one just in front of it on the deck lid. With a pen, I lined up a mark on both pieces of tape. This way I know the wing would be centered in case it shifted (Fig 7).
Fig 7.
After that, measure from the tips of the spoiler to the various corners of the deck lid and keep shifting the tips fore or aft until it is equal on both sides. Once I got it right, I put some more tape down as a guide (Fig 8).
Fig 8.
The next step is to tape the tabs down to the trunk, this way, when you remove the spoiler, the tabs will still be present and will show you where to drill (Fig 9).
Now remove the spoiler. Double check location by measuring the distance between the holes in the tabs and various corners on the deck lid; measure twice, drill once! In Fig 10 you can see that I drilled the pilot hole with a small bit. Make sure you use a center punch or nail to mark the hole so you don’t end up with a bit run on the trunk. Drill all the way through the underside of the deck lid (Fig 11). The tabs can now be removed.
Fig 10.
Fig 11.
Now there are two more holes to drill on each side. In a future step you will be threading a stud into the bolt holes in the spoiler. One hole on the top of the deck lid must be just slightly larger than the stud (5/16” I think) to allow it to pass through the deck lid (Fig 12). The second on the underside is larger (3/4”) to allow you to use a socket to fasten the nut onto the stud (Fig 13). After I drilled I used a file to de-burr the holes and used a little model acrylic paint to cover up the bare metal.
Fig 12.
Fig 13.
Now it is time to insert the studs into the spoiler. The head of the stud is slotted for use with a flat head screw driver (Fig 14).
Fig14.
Do a dry run before removing the double sided tape backing to make sure everything looks right. Place the spoiler onto the deck with the studs inserted into the holes you drilled. If you are satisfied, remove the spoiler and set it aside again.
I took some silicone and used it to plug up the stock holes in the deck lid; this will ensure no leakage into the trunk (Fig 15, white arrows). Note: I also did a little extra prep at this point on the spoiler, cutting away some of the double sided away from the edge so it didn’t show and adding some silicone to the tape joints (not pictured).
Poke a hole in the stock large black rubber grommet in the deck lid and run the brake lamp wiring through it (Fig 15, blue arrow).
Fig 15.
I ran the wire through the grommet until there was just enough room for me to pull the backing of the double sided tape off. Pull the tape off, insert the studs and don’t allow any of the tape to stick until the studs are fully inserted into the deck lid. You can spray some water on the tape to make it stick less in case you mess up, but I did not. I found it unnecessary since you have the studs as a guide here.
Once the spoiler is stuck on with the tape, go ahead and tighten the nuts to the studs (10mm). Note: I plan to find some �” grommets to cover these holes for a nice appearance, as there are not covered by the trunk liner.
Run the wire down the stock trunk wiring and through the black rubber hose that connects the deck lid wiring to the chassis (refer back to Fig 1).
Remove more of those black pop-rivets from inside the trunk and lower the trunk liner that is under the rear speakers (Fig 16). The wire connector for the interior third brake lamp was in the center between the rear speakers (white circle).
Fig 16.
Disconnect the harness and test with the brakes to make sure you got the right one (Fig 17; should be a black wire and a green wire on the harness).
Fig 17.
Splice the wire with the strip into the black wire and the other into the green. I wanted to disable my stock third brake light so that it wasn’t so obvious that the spoiler was not stock, so I just left the stock lamp disconnected. (Note: yeah, ugly wiring job but I just used what I had laying around)
Use electrical tape, zip ties or whatever you want to dress the wires up. Test the new lamp with the brakes to make sure it is functional. Replace all the trunk liner and YOU ARE DONE!
(Fig 18).Fig 18.
Last edited by LightningG37; 06-27-2009 at 09:27 AM.


The following users liked this post:
Sevn30one (04-16-2019)

 07-04-2009, 06:54 PM
#7
Registered User
Thread Starter
 here's the link for Grubb's Infiniti:
http://www.grubbsperformance.com/servlet/Detail?no=3053
hmmm..when you order on the website, there is an option for color and camera or no camera..it is interesting to note that the picture on their site has the spoiler I sent back...I would think you can get the latest style with the camera, do you know for sure about this?
Trending Topics
07-04-2009, 08:08 PM
#8
The actual OEM one the camera mounts inside the spoiler, but it does not with the Grubbs. I actually have the Grubbs V2 and backup camera. I called them and they specially told me that if you have a backup camera you have to leave on the chrome piece and just place their spoiler on top of it.
The only actual difference between the two options of the Grubbs spoiler is a hole. Nothing else.
The only actual difference between the two options of the Grubbs spoiler is a hole. Nothing else.
The following users liked this post:
Sevn30one (04-16-2019)
07-06-2009, 12:31 PM
#11
07-11-2009, 11:45 AM
#13
Registered User

Join Date: Jul 2003
Location: East Tennessee
Posts: 53
Likes: 0
Received 0 Likes
on
0 Posts

