Notices
Body Interior Exterior Lighting

Restored and Tinted My Tail Lights Today

Thread Tools
 
Search this Thread
 
Old 04-23-2016, 09:22 PM
  #1  
Thirty_Seven
Registered User
Thread Starter
iTrader: (5)
 
Thirty_Seven's Avatar
 
Join Date: Jul 2014
Posts: 629
Received 69 Likes on 59 Posts
Restored and Tinted My Tail Lights Today

So the previous owner of my car tinted the tail lights at some point and did a horrible job. I don't think he cleared them at all and after a couple passes of compounding and polishing, the tint was gone and there was absolutely no UV protection.

The lights started showing signs of wear and there were a million little "cracks" and they looked very faded and always drove me nuts. Today I sanded them down and tinted them, and I think they came out pretty good.

Here's my process in case anyone is interested:

1. Clean the tails with 1:1 mix of rubbing alcohol and water.

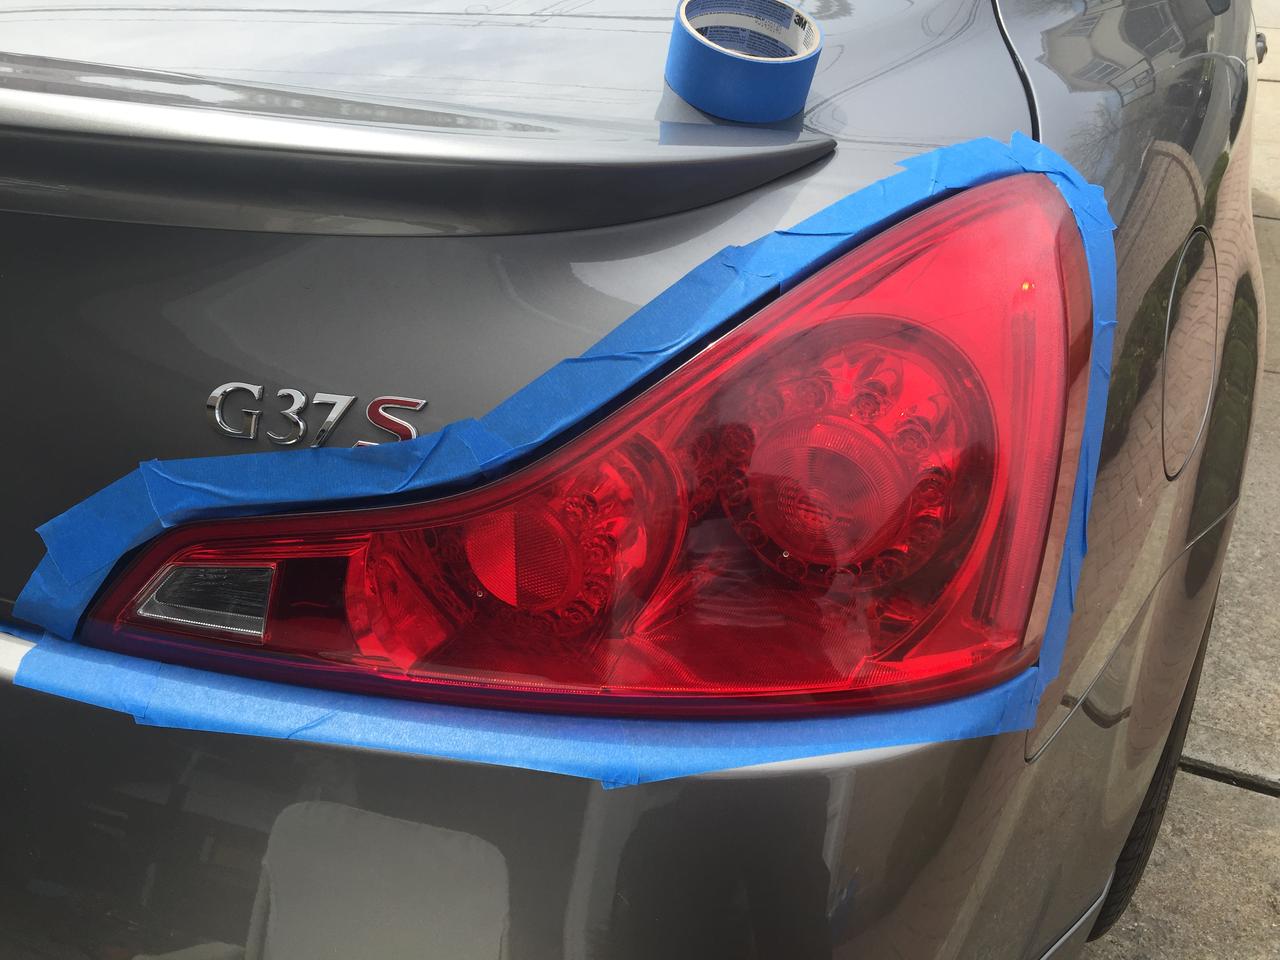
2. Remove tails or mask off surrounding area. Apparently removing coupe tail lights requires breaking off a clip so I chose to mask off the area with newspaper.

3. Apply the tint spray. I used VHT Night Shades, which is a popular choice. I did 3 coats with 15 minute drying times between coats. It was pretty hot out which helped.

4. After the final coat of tint, I waited 1.5 hours and then wetsanded both tails with 1000 grit sandpaper.

5. I started applying clear coats. I did 6 coats, again, 15 minutes between.

6. Wetsanded the clear coat with 2000 grit after waiting 2 hours.

7. Compounded and polished both lights.

EDIT: Went outside today and noticed some orange peel in the lights so I wetsanded with 1500 grit, then again with 2000, then compounded and polished. Now they're super smooth.
Now, here's what you were waiting for, pics!

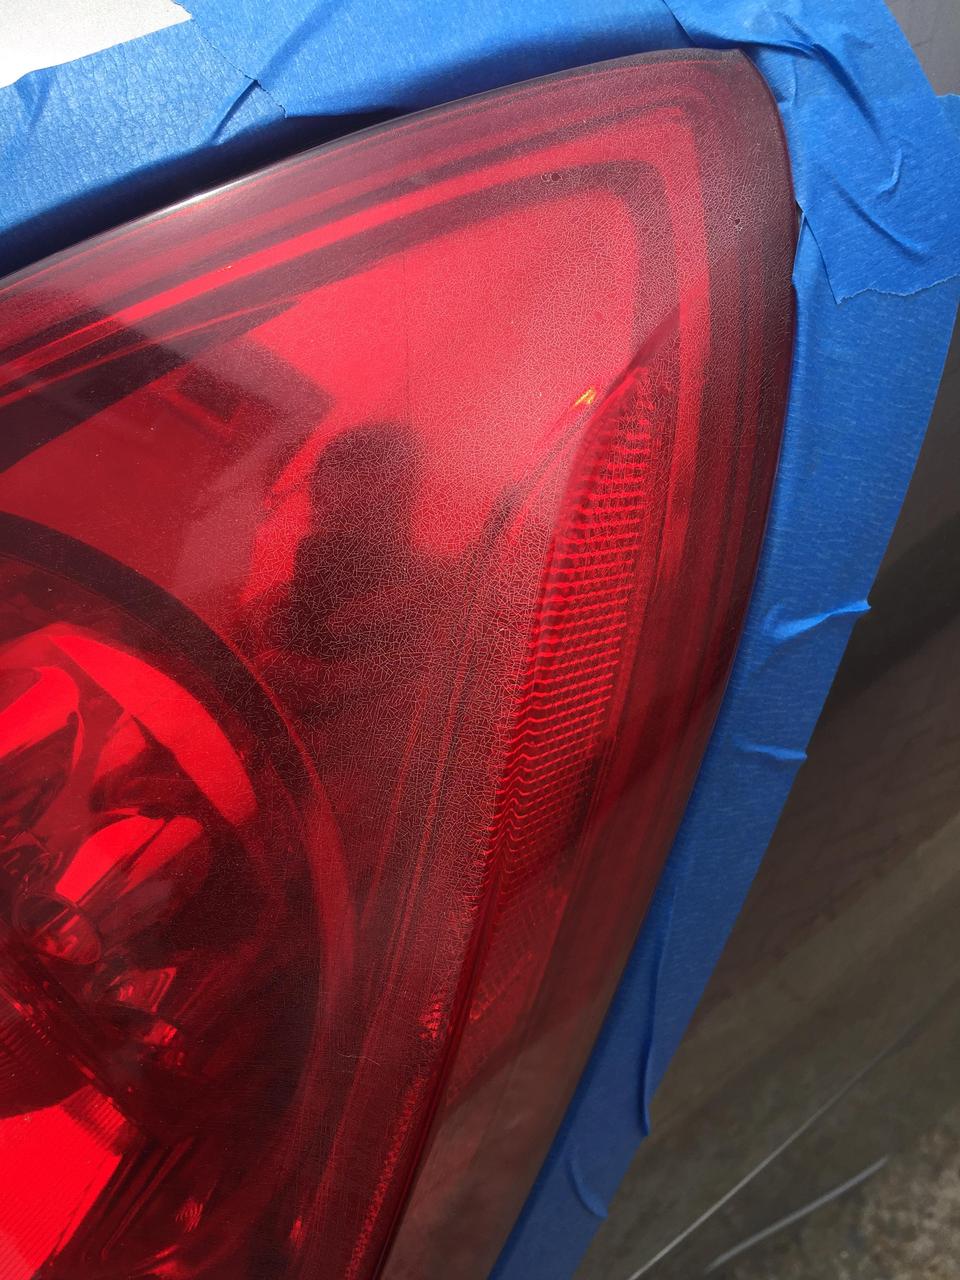
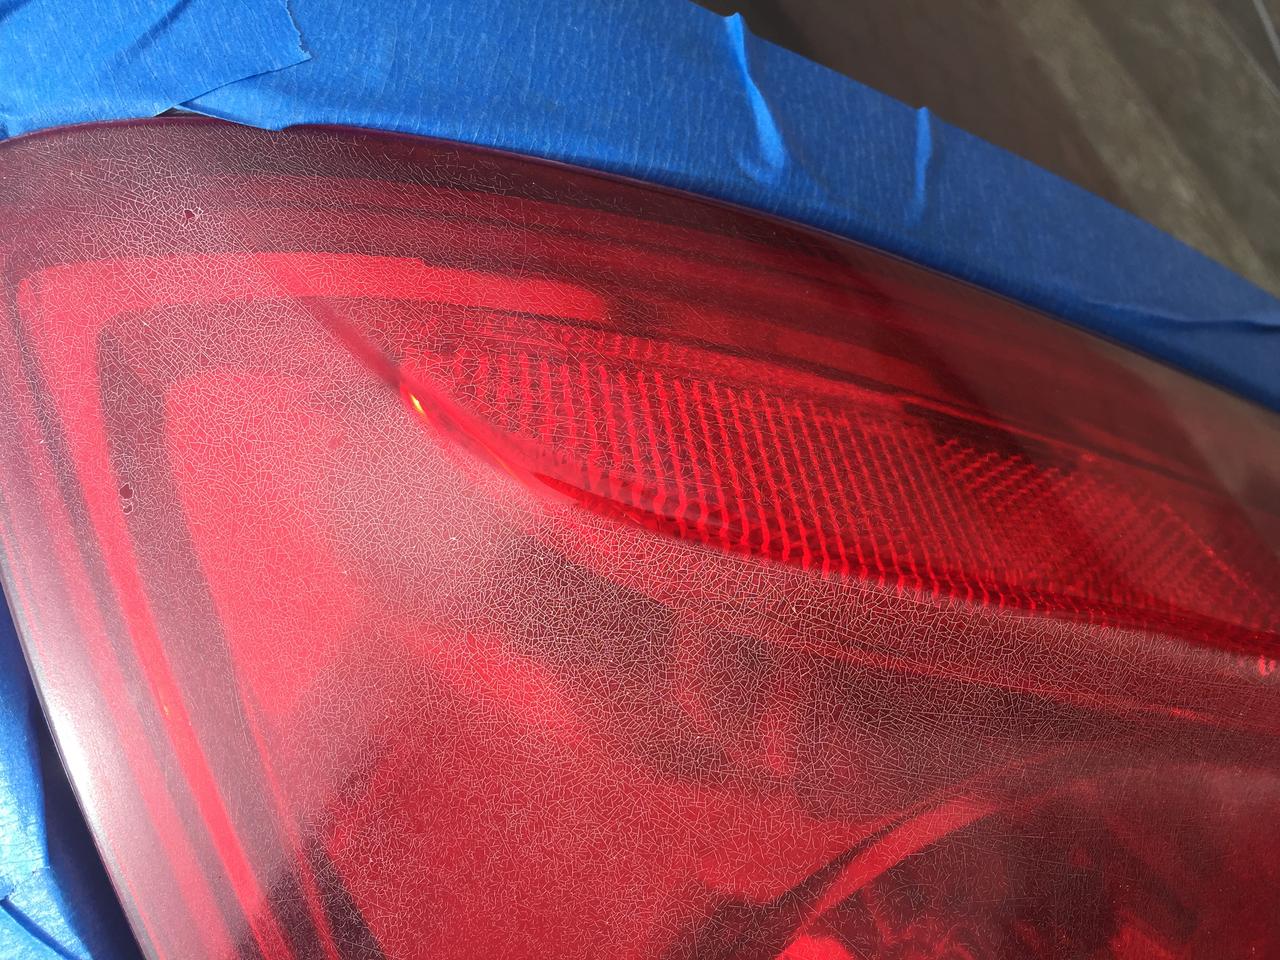
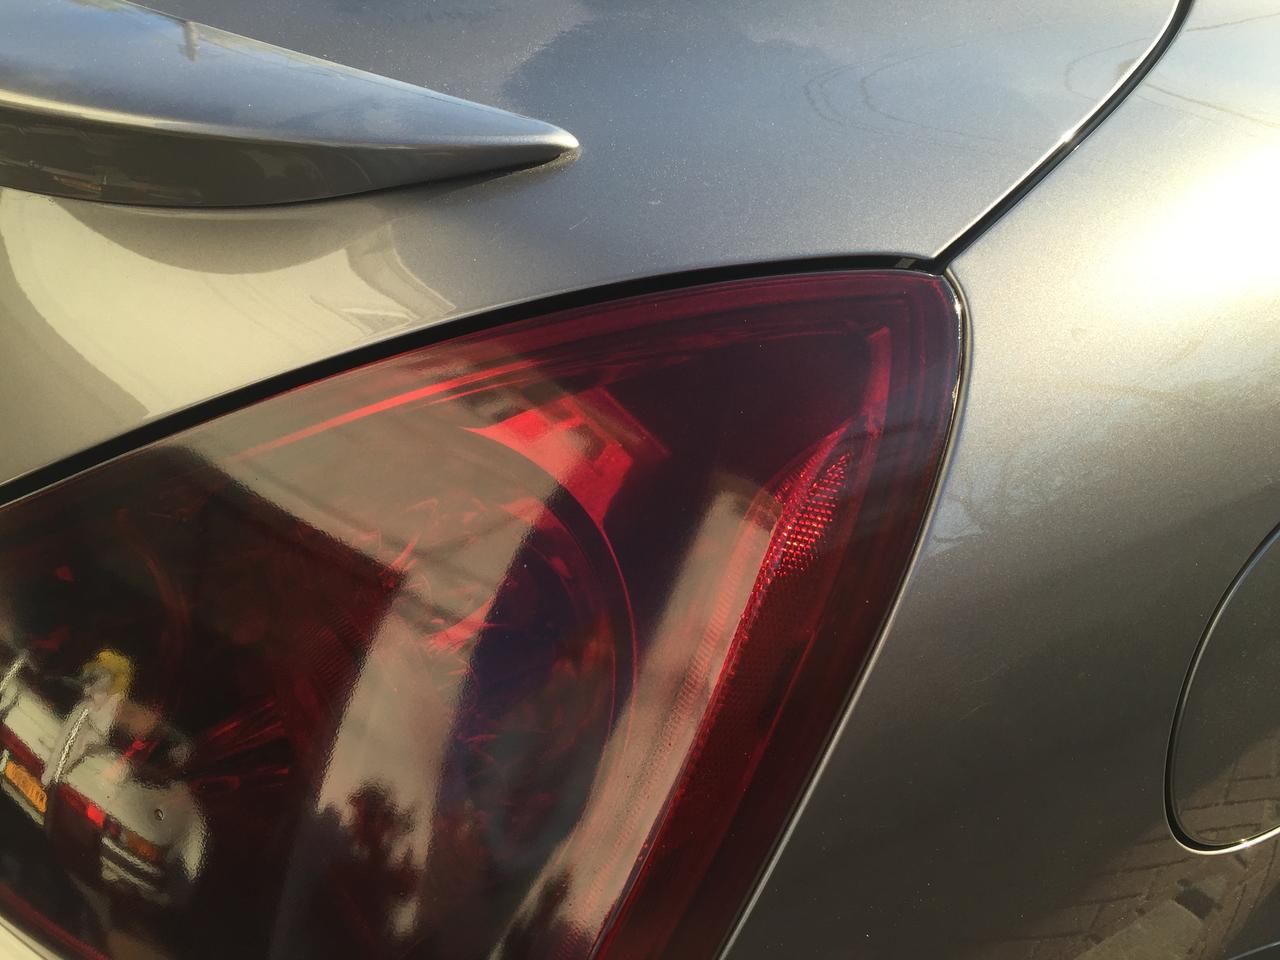
You can see the fade and cracking in the lenses here:

Name:  jpm3qZu.jpg
Views: 1408
Size:  166.5 KB

Name:  BvVhqEE.jpg
Views: 1383
Size:  125.2 KB

Name:  ixeLR4W.jpg
Views: 1408
Size:  251.4 KB

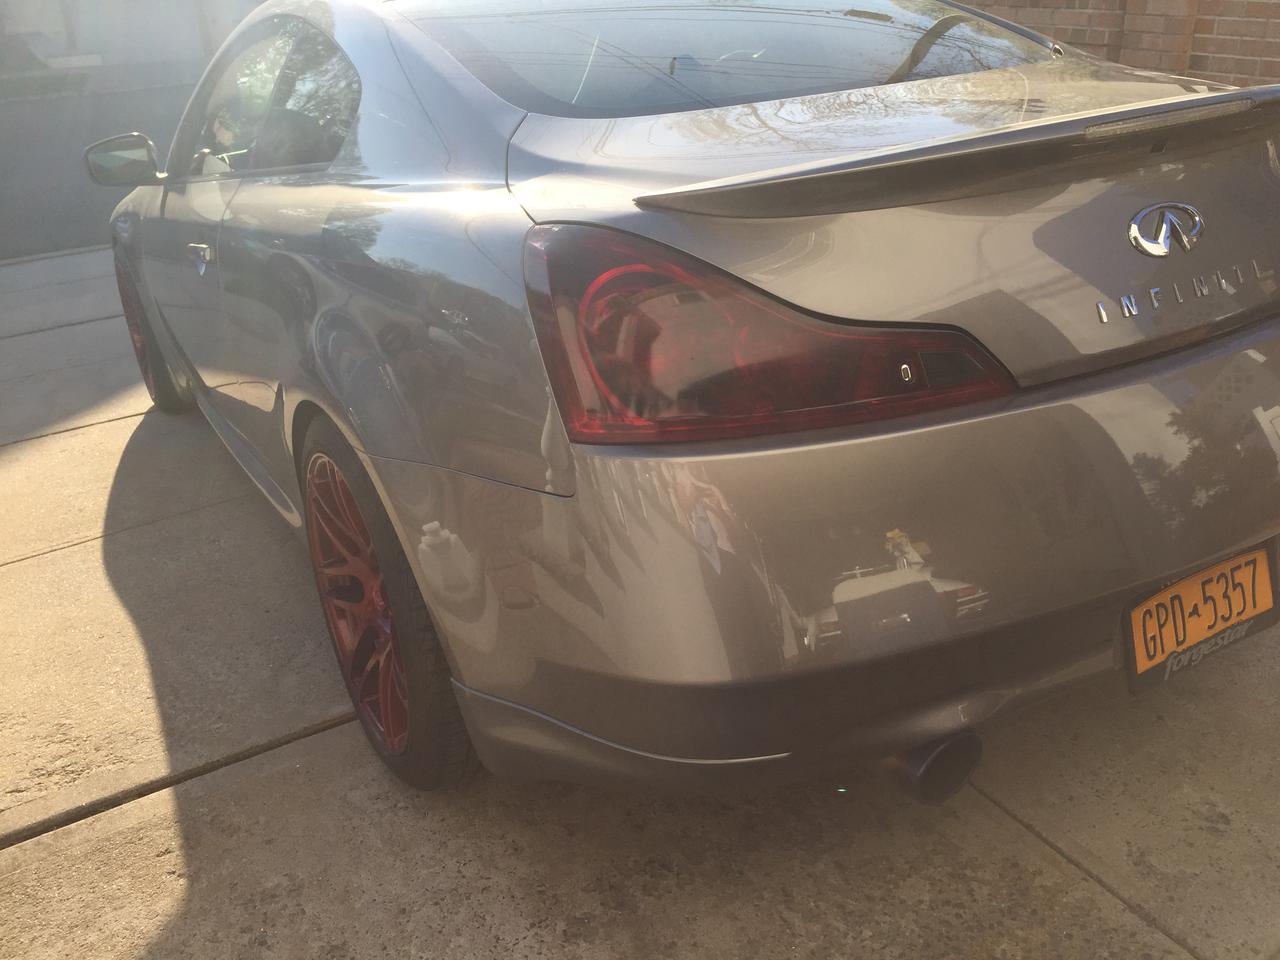
Here's the final results:
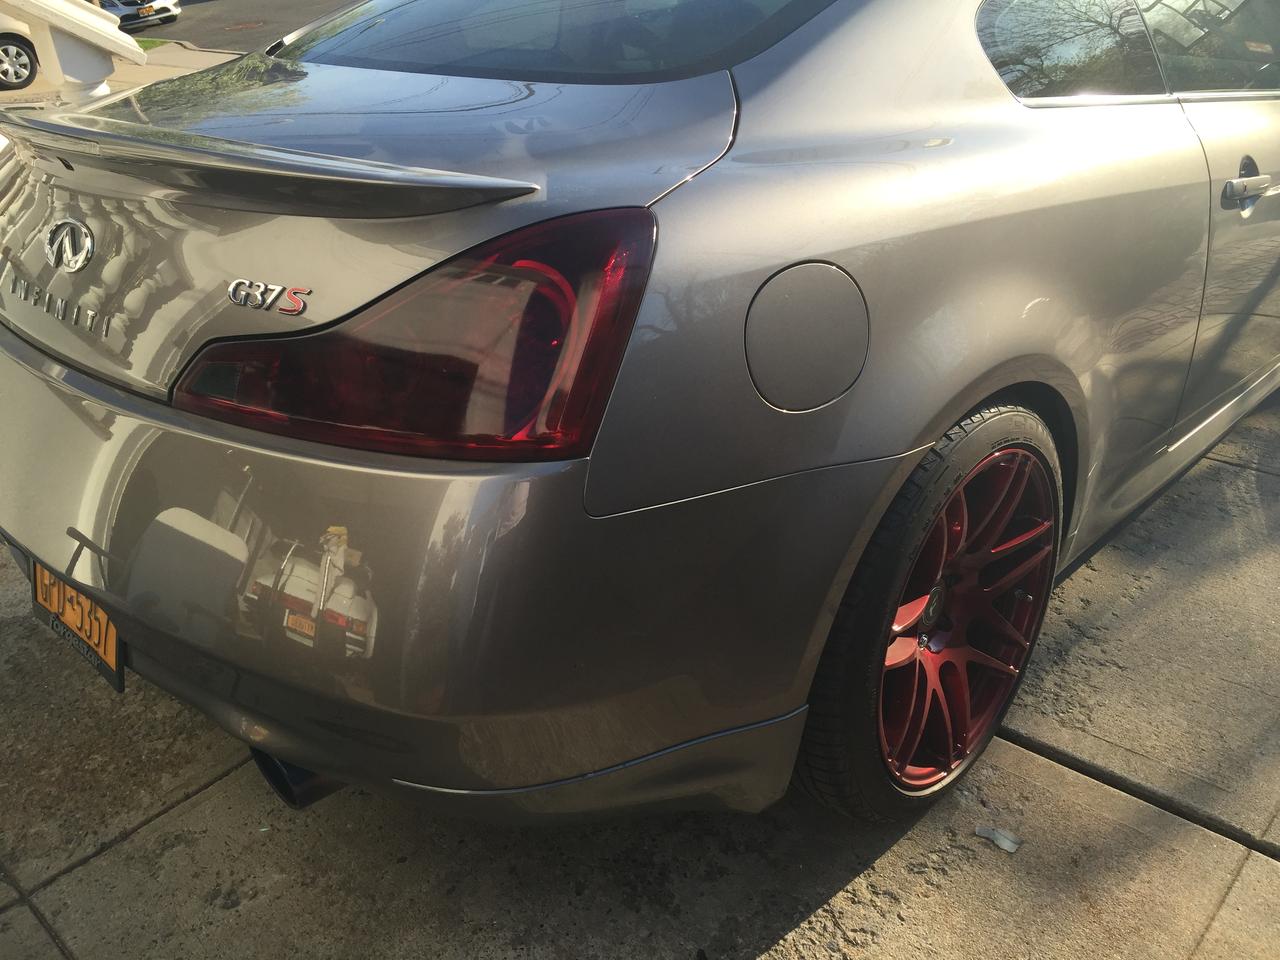
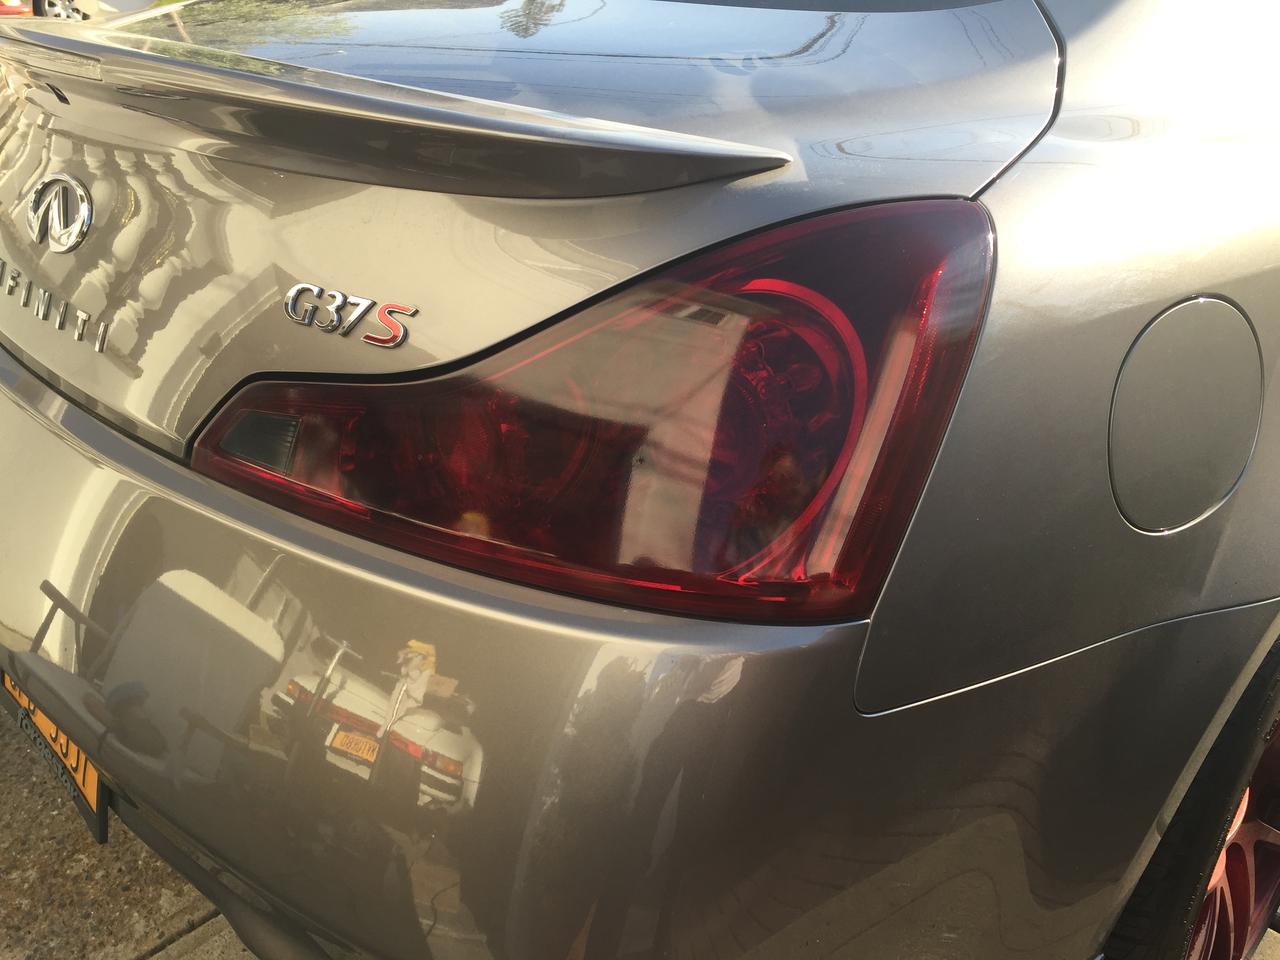
Name:  FBcYGBS.jpg
Views: 1420
Size:  144.5 KB

Name:  yWoui4b.jpg
Views: 1401
Size:  111.8 KB

Cracks are gone!

Name:  i4rV9uC.jpg
Views: 1391
Size:  100.3 KB

Name:  6qEd0cb.jpg
Views: 1409
Size:  111.1 KB

Name:  il8GWBL.jpg
Views: 1415
Size:  51.8 KB

Last edited by Thirty_Seven; 04-24-2016 at 04:05 PM.
Old 04-23-2016, 09:54 PM
  #2  
G37sGraphite
Registered User
iTrader: (9)
 
G37sGraphite's Avatar
 
Join Date: Feb 2016
Location: Earths toilet: Houston Texas
Posts: 763
Received 140 Likes on 115 Posts
Great job! I don't know how you did all that with them on. I did mine too but I took the tails off and if you do it slow you wont break the clips. Hard enough doing a good job and wet sanding and painting them etc. with them off - you did a great job with them on!!
Old 04-23-2016, 10:09 PM
  #3  
G37xhibeet
Registered User
iTrader: (1)
 
G37xhibeet's Avatar
 
Join Date: Sep 2014
Posts: 822
Received 93 Likes on 77 Posts
looks good; yeah seems tough with them on
Old 04-23-2016, 10:25 PM
  #4  
Thirty_Seven
Registered User
Thread Starter
iTrader: (5)
 
Thirty_Seven's Avatar
 
Join Date: Jul 2014
Posts: 629
Received 69 Likes on 59 Posts
Originally Posted by G37sGraphite
Great job! I don't know how you did all that with them on. I did mine too but I took the tails off and if you do it slow you wont break the clips. Hard enough doing a good job and wet sanding and painting them etc. with them off - you did a great job with them on!!
Thanks man! Yeah, I'm sure I could've gotten them off somehow but I figured a good mask would be good enough. I taped the whole inside of the trunk off and taped around the headlights BEFORE going over the whole rear of the car with newspaper.

Originally Posted by G37xhibeet
looks good; yeah seems tough with them on
Thanks, wasn't too much trouble. The prep work was worth it.
Old 04-24-2016, 02:44 AM
  #5  
kennyz424
Moderator
iTrader: (147)
 
kennyz424's Avatar
 
Join Date: Apr 2013
Location: Florida
Posts: 6,353
Received 1,499 Likes on 1,272 Posts
Looks flawless man! GREAT JOB!!!!!!
Old 04-24-2016, 08:11 AM
  #6  
Thirty_Seven
Registered User
Thread Starter
iTrader: (5)
 
Thirty_Seven's Avatar
 
Join Date: Jul 2014
Posts: 629
Received 69 Likes on 59 Posts
Originally Posted by kennyz424
Looks flawless man! GREAT JOB!!!!!!
Thanks man!!
Old 04-24-2016, 10:42 AM
  #7  
jman09
Registered User
 
jman09's Avatar
 
Join Date: Feb 2015
Location: chi-town
Posts: 146
Likes: 0
Received 16 Likes on 15 Posts
looks great! i bookmarked this so that i can do it to my G when i have the time. did you compound/polish by hand or did you use an orbital? is it necessary to compound/polish at the end?
Old 04-24-2016, 12:52 PM
  #8  
blnewt
Movin On!
iTrader: (13)
 
blnewt's Avatar
 
Join Date: Nov 2009
Posts: 24,877
Received 4,943 Likes on 4,176 Posts
Looking good!
For those wanting to do this, try to source an industrial grade clear coat, that makes a huge difference in initial deep gloss and longevity.
Old 04-24-2016, 01:00 PM
  #9  
Epiphany
Registered Member
 
Epiphany's Avatar
 
Join Date: May 2015
Location: Alberta
Posts: 1,728
Received 242 Likes on 215 Posts
Looks good, they even match your wheels nicely.
Old 04-24-2016, 04:03 PM
  #10  
Thirty_Seven
Registered User
Thread Starter
iTrader: (5)
 
Thirty_Seven's Avatar
 
Join Date: Jul 2014
Posts: 629
Received 69 Likes on 59 Posts
Originally Posted by jman09
looks great! i bookmarked this so that i can do it to my G when i have the time. did you compound/polish by hand or did you use an orbital? is it necessary to compound/polish at the end?
Thanks man! I polished using a dual action polisher. If you don't have access to that, polishing by hand is fine, and compounding isn't 100% necessary so you may be able to get away with just polish. I used Meguiars M205.

Originally Posted by blnewt
Looking good!
For those wanting to do this, try to source an industrial grade clear coat, that makes a huge difference in initial deep gloss and longevity.
Thanks. And I agree, your choice of clear coat makes a big difference. I used automotive grade clear coat with UV protection, which is important because the factory UV will be gone once you wetsand.

Originally Posted by Epiphany
Looks good, they even match your wheels nicely.
Thanks! Yeah, that's what I was going for.
Old 04-24-2016, 11:56 PM
  #11  
Goonz
Premier Member

iTrader: (9)
 
Goonz's Avatar
 
Join Date: Jul 2005
Location: Boston, MA
Posts: 1,954
Received 60 Likes on 54 Posts
wow that looks awesome! I'll def be going this route when the tint the tails on my next car.
Old 04-27-2016, 09:09 AM
  #12  
MilehighG37s
Registered User
 
MilehighG37s's Avatar
 
Join Date: Apr 2016
Posts: 44
Received 3 Likes on 3 Posts
They look really nice ! Great work. I might try your process on my lights too. Thanks again
Old 04-28-2016, 10:54 PM
  #13  
Archernw
Registered User
 
Archernw's Avatar
 
Join Date: Apr 2016
Posts: 1
Likes: 0
Received 0 Likes on 0 Posts
Damn..

Nice job. Do you have any more pics of the process? Also, never would have considered red wheels, but yours look great, esp. with the tint!
Old 04-28-2016, 11:04 PM
  #14  
Thirty_Seven
Registered User
Thread Starter
iTrader: (5)
 
Thirty_Seven's Avatar
 
Join Date: Jul 2014
Posts: 629
Received 69 Likes on 59 Posts
Originally Posted by Goonz
wow that looks awesome! I'll def be going this route when the tint the tails on my next car.
Thanks man!

Originally Posted by MilehighG37s
They look really nice ! Great work. I might try your process on my lights too. Thanks again
Thanks! It's pretty simple but time-consuming. Make sure you plan a full day for it.

Originally Posted by Archernw
Nice job. Do you have any more pics of the process? Also, never would have considered red wheels, but yours look great, esp. with the tint!
Thanks, unfortunately I didn't take any pics during the process because I wasn't planning on doing a DIY or anything. There's a few good videos on YouTube is you search VHT Night Shades
Old 05-05-2016, 08:00 PM
  #15  
saywat?
Registered Member
iTrader: (3)
 
saywat?'s Avatar
 
Join Date: Jan 2016
Posts: 3,233
Received 277 Likes on 239 Posts
nice wat'd u use to clear it?


Quick Reply: Restored and Tinted My Tail Lights Today


All times are GMT -4. The time now is 05:34 AM.