
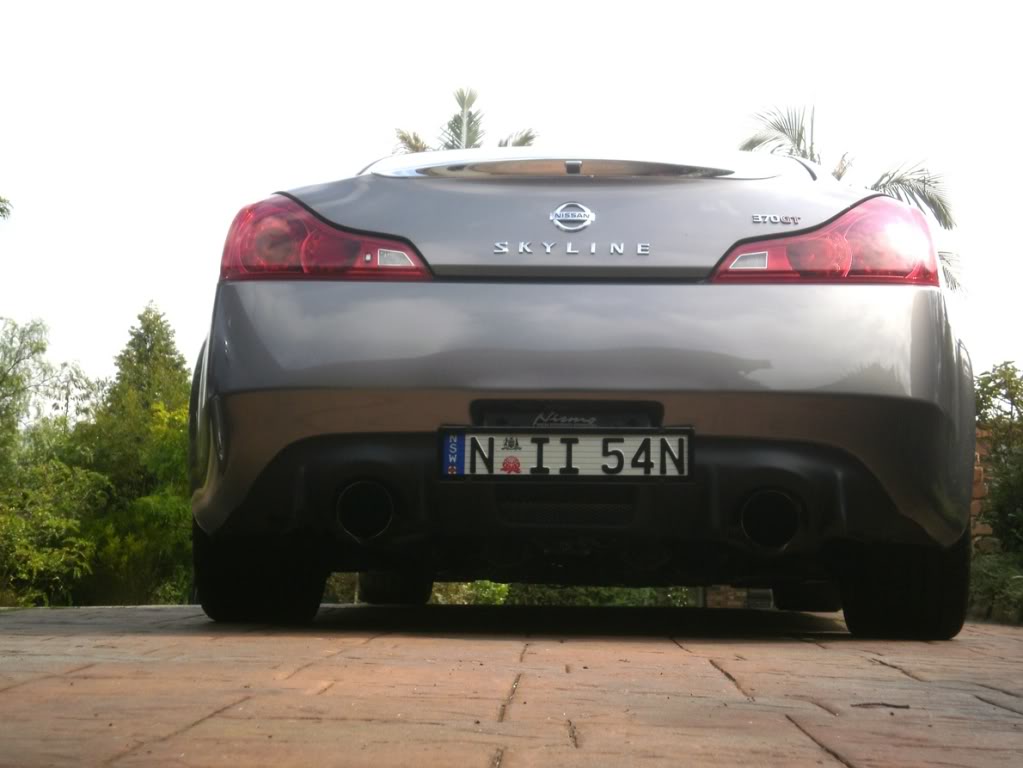
Installed Autokits-X v2 rear diffuser!
 03-18-2011, 06:24 AM
#16
Registered Member
Thread Starter
iTrader: (2)

Join Date: May 2010
Location: Branchburg, NJ
Posts: 881
Likes: 0
Received 0 Likes
on
0 Posts
i don't like the sound of a gap it seems you have with the tape... is there an extra thin tape available?
if u used silicone to glue it, it will disintegrate with time, and get soft in the sun if you parked outside or drove anywhere, and makes a royal mess. Whats the name of the other glue?
any other options to attach this diffuser, is the official autokits rec to tape it?
btw those diffusers look sick, very nice guys... can't wait for mine


 03-18-2011, 11:59 AM
#18


bought the diffuser painted and boy do I love it! its dark out now and couldnt get any good pics, but ill upload some tomorrow afternoon if you guys want to see it on my OB coupe 
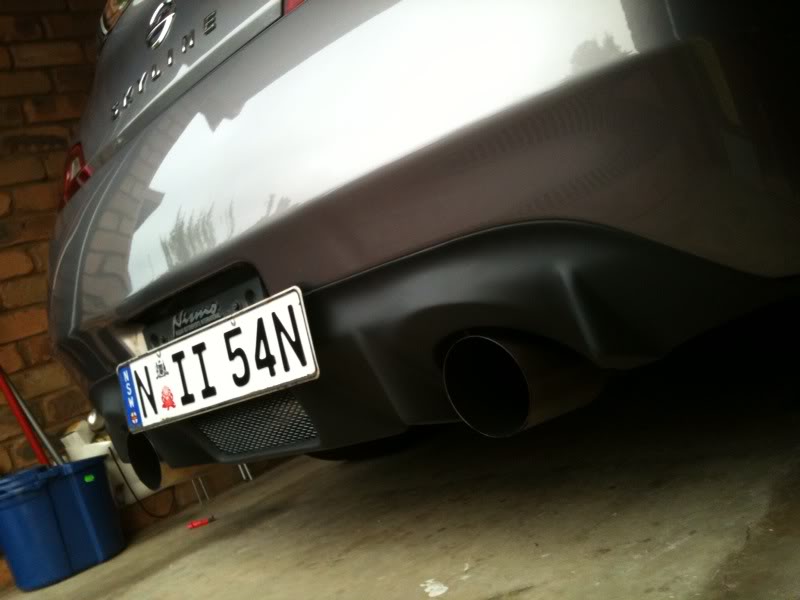
just one question.. i installed the top with double sided tape, but if you look at it closely, there is a small gap between the diffuser and my bumper. how can i correct this to make it look more flush? i was thinking of using some touch up paint maybe? just paint the edge of the tape that you can see so it blends in better. would that work? or is there a better way.. this is the first time ive ever installed something onto the body of my car so im a noob haha
Here is the picture of the box when it arrived
I was wondering if you order the diffuser directly from us? or did you buy it use from other member?
because we never use that big masking tape and the boxes are brand new.. just wondering.!!
about the gap and 3m double side tape?
you have to make sure the surface is very clean (diffuser and bumper), you can clean it up with some alcohol.
when you apply the tape around the diffuser make sure to dont pass the edges lines otherwise it will show the tape after you installed it.
We highly recommend to apply some adhesive for extra secure.
3M/1 oz. tube plastic emblem and trim adhesive (03601) | Body Trim Adhesive | AutoZone.com_
Don't worry even if you put some adhesive, it won't damage the bumper or leave any marks when you take off the part. (just take your time and carefuly)
i was thinking of using some touch up paint maybe?
If you want a black color around the edges, here is my advice
faster way: black pen/mark
we recommend : black touch up pen
Birchwood Casey Super Black Touch-Up Pen Gloss - MidwayUSA
send me a pm if you have any question with the installation.
Thanks,
AUTOKITS X

 03-18-2011, 03:14 PM
#21
Registered Member
Thread Starter
iTrader: (2)
Join Date: May 2010
Location: Branchburg, NJ
Posts: 881
Likes: 0
Received 0 Likes
on
0 Posts
Autokits-X, thanks for the info! but no, i bought it off another member haha! i might try reapplying tape, or might just paint the edges. i like the way it sits right now so im leaning towards just using a marker to do it. will upload pics soon
will upload pics soon


 03-19-2011, 12:14 AM
#27
Registered Member
Thread Starter
iTrader: (2)
Join Date: May 2010
Location: Branchburg, NJ
Posts: 881
Likes: 0
Received 0 Likes
on
0 Posts

thank you! its not very different from a stock car off the lot, but i baby the thing as much as i can, so every compliment really is nice to hear
 03-19-2011, 11:55 PM
#28
Registered User

Join Date: Oct 2008
Location: Sydney Australia
Posts: 99
Likes: 0
Received 0 Likes
on
0 Posts
I was thinking the same thing about the double sided tape
Alex already replied to my PM & said that it should be fine as long as the tape had a clean surface to stick to
I washed then clay-barred my bumper then let it all dry before attaching the diffuser...
I made sure not to go past the lip but there is still the top of the tape that is exposed to the outside at the seal between the tape & the bumper
would rain/washing my car erode the tape over time as it is exposed to water?
I'm not too fussed anyway as if the tape fails I'll just use screws in the licence plate recess & on the bottom corners of the bumper & silicon joiner down the line
03-20-2011, 12:00 AM
#29
Registered Member
Thread Starter
iTrader: (2)
Join Date: May 2010
Location: Branchburg, NJ
Posts: 881
Likes: 0
Received 0 Likes
on
0 Posts
so i took off the tape and redid it. got some 3m super heavy duty scotch mounting tape (thats what the package was called) and it looks MUCH better. i applied the tape almost to the edge of the diffuser, with less than 1/8th of an inch from the edge. it looks so much cleaner. attached well too, its been almost 8 hours since i applied it and its still holding up in all areas. i think the true test will be when i was the car.. thats when the other tape really failed.