
Blood Red Taillight Project


 11-25-2010, 12:48 AM
#34

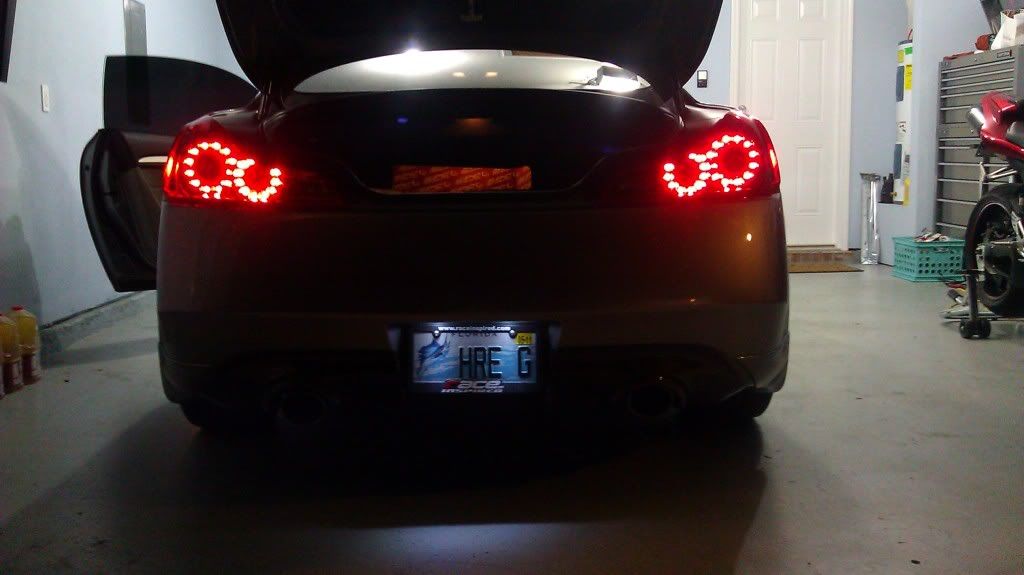
Hard to see the difference in these pics, I'll get some better ones in the morning with a real camera, cell cam doesn't pic up the colors very well.


 11-25-2010, 08:55 AM
#38
Registered User

Join Date: Sep 2010
Location: SoCal 90125
Posts: 1,230
Likes: 0
Received 0 Likes
on
0 Posts
Have a great Thankgiving and if you get a chance to shoot some new pics (with non-phone camera) post em up! Looks good from what I can see. Morecstep by step images would be helpful to. Especially how you get them back together with a good seal and no fogging/ condensation.
11-25-2010, 09:27 AM
#39
I will def get some better pics today with a really good camera. I sprayed the insides with Dodge Charger black, which if you have seen in person has a LOT of flake. So when the light hits it now it has a red sparkle to it, instead of just a flat black, gives it that extra little touch. I'll try to get some extreme close ups to show it.
Only one light is done right now, since I have to drive the car if it rains, I did not want to down it if it rained and be stuck on the bike.
No condensation, trust me, I left it outside last night and it was SO humid here in Pcola FL, that the roof of my house was dripping water so heavily it looked like a light rain. I'll leave it out of the garage for a week or so, to check the reliability of my method.
I didn't get a lot of pics because I was trying to pay attention since this was a first for me with these style lights. On the drivers side light I will try to do a step by step for those of you wanting to try it yourselves. It's tedious and nerve racking trying to seal them with a plastic welder, wasn't sure if I was going to burn through too much or what haha. Also have some filler welding rods that I could use if I needed, but since the cut was so narrow it sealed back rather nice, clean and smooth.


 .
.