
LEDs installed for vanity mirrors, doors and license plate
 11-23-2008, 12:43 AM
#91

More Conservative Light Change � Part 2
Overall, my goal was to get as close to the stock headlight color (4300K) inside and out. I posted all of my LED changes in this thread in Post #73 and they came out real good.
Today I changed my Fogs, City and Backup lights as follows:
Fogs: PIAA Part #11655 H1 Xtreme White Plus @ 4000K
City Light: PIAA Part #19172 168 Xtreme White Wedge Bulb to match Fog
Source: amazon
Backups: 25 Led SMT Tower III 194 168 W5W 2825
Source: autolumination
There are many before and after pictures of the front light changes. So I am only posting my results to let you see how close it is to the stock HID in color. The City light is the closest match. The Fog is much whiter than stock, but not quite a perfect match up close. However, it is close enough for me so I�m done with this project, BUT if I was doing it over I would probably try the 4700K PIAA instead of the 4000K.
I used this DIY for the Fog and City. Fog and City DIY. It has great pictures that helped a lot. However, I went in through the top instead of the wheel well. I took off the stock air boxes and you can do it without disconnecting the wiring��just one bolt and one screw on each side. On passenger side also take off the washer filler neck.
For the tail lights I used this DIY. Tailight DIY. It gave me the basics.
All of the pictures were taken about 4-6 feet from the car. The farther away the closer the color match.
 11-23-2008, 01:23 AM
#92
Couple of Suggestions on Reverse Light Change
Here are a couple of things to consider when changing the reverse light. It made it a little easier for me.
Picture 1: Strongly suggest you blue tape off the fender. Prevents scratches and helps with my way of changing the bulbs.
Picture 2: When you pop off the cover, it may look like this. However, my clips (in picture 3) stayed on the white taps you see in this picture.
Picture 3: Note that the little tabs are bent up. This will happen normally if they stay on the car when you pull up the light cover. If they stay on the car, then carefully pry them off the white tabs.
Picture 4: Put the connectors from picture 3 back onto the cover. Take a flat screw driver and make sure to bend up the tabs so the connectors are tightly on the light cover.
Picture 5: When I pulled out the light, I left everything connected. I just reached in by the reverse light and took one cable off its plastic tabs to give me a little room to work. WHile holding the light in one hand, I just reached in and took original bulb out. Sat the light on the bumper. Put the LED in. It was a very solid fit. Sat the whole light assembly back down and tested the bulb. Then put everything back together.
The cover and connectors attached in picture 4 just snaps back on.
Good luck.


 11-25-2008, 11:02 PM
#98
Yeah. So took picture in pitch black with no other lights on except for reserve light. Actual brightness from the reverse lights probably a little more than the picture shows. However, the stock bulb is still "brighter", but I like the color of the LED better than stock.
12-04-2008, 06:27 PM
#99
Yeah. So took picture in pitch black with no other lights on except for reserve light. Actual brightness from the reverse lights probably a little more than the picture shows. However, the stock bulb is still "brighter", but I like the color of the LED better than stock.
Thanks a lot. I'll definately buy this.
 12-05-2008, 02:19 AM
#102
Registered User

Join Date: Jul 2008
Posts: 12
Likes: 0
Received 0 Likes
on
0 Posts
I am looking to buy the WLED-WHP Pure white.
I am using those WLEDX5 white one. But it looks more blue then white.
so I believe Pure White WLED-WHP from
http://www.superbrightleds.com/
will match what i want.
I love those lexus license plate bulb.
I am using those WLEDX5 white one. But it looks more blue then white.
so I believe Pure White WLED-WHP from
http://www.superbrightleds.com/
will match what i want.
I love those lexus license plate bulb.
12-11-2008, 04:58 PM
#104
Registered User

Join Date: May 2008
Location: Texas
Posts: 141
Likes: 0
Received 0 Likes
on
0 Posts
ok sorry so late guys. had a couple errands to do after work. here it is. i apologize for the quality. i was using my phone to record this:

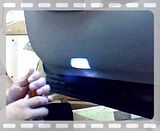
i actually had to use the screw driver this time. i guess when i used my hands last time i had longer finger nails or something.
oh i forgot to mention to disconnect the battery of the car before taking the stock bulbs out for the vanity mirrors and the door lights. this is so you dont burn the crap out of your fingers.
12-11-2008, 05:00 PM
#105
Registered User
Join Date: May 2008
Location: Texas
Posts: 141
Likes: 0
Received 0 Likes
on
0 Posts
After trying several different bulbs and temps, I decided on a goal of matching everything inside and out as close as possible to the 4300K temp of the stock HID. Here are my LED change-outs.
Vanity: Vanity Mini 3 LED SMT Festoon, 31mm x 5mm diameter, Super White
Source: http://autolumination.com/festoon.htm
Map: WLED-NW5, Natural White @ 4500K, 220 degree pattern, 12 Lumens
Door: WLED-NW6, Natural White @ 4500K, 35 degree pattern, 12 Lumens
License: WLED-NW5, Natural White @ 4500K, 220 degree pattern, 12 Lumens
Trunk: WLED-WHP, Pure White @ 4500, 120 degree pattern, 20 Lumens
Source: http://www.superbrightleds.com/mini-wedge.html
Some Things to Consider:
1. Seems like a majority of people use the Cool White LED. For the WLED-5, it is 8000K and the WLED-6 is 9600K. I did not notice this when I made my first order. When I installed them it was too blue and too dim for me. So I put them in my son�s GTI and they matched well. When I put the Natural White in I liked it much better. It gets rid of the stock �yellow� lights and I can see much better. Maybe not as �cool� at the Cool White, but better choice for me. If you are not sure, then you may want to order a couple of samples and play with them first before ordering a whole set.
2. Think about the pattern of the light and the orientation of the bulb before deciding on the 5 or 6 LED for each location. I used 5 in the Map to give a glow. The 6 in the Map gave too much of a spotlight effect. Now in the door, I wanted more of the spotlight effect so used 6. In the license I wanted better dispersion so used 5.
3. Tried the Cool White 5 and 6 in the trunk before ordering the WHP. It is much brighter than either and lights up trunk much better especially since it is 4500K.
Pictures were requested in another post. So here is my best attempt. Taken in a garage with no other lights. Used tripod so I could play with exposure to get pictures as close to actual as possible. It was real hard to get the color in the photo to match the real life. However, the first one below named "accurate color" is real close. Hope that helps.
I really like how this came out......
Thanks again.