Betty's Garage Grounding Wires
 07-07-2008, 12:44 AM
#1

Betty's Garage Grounding Wires
Now you too can have a set! Here's a little Q and A.
Q: What do they do?
A: Grounding wires (when properly designed and installed) improve a vehicle's electrical system by using various grounding points and more and/or larger wiring than the car came with from manufacturer with. They create a safe and reliable way of creating a low resistance ground path for your car. The benefits are very evident particularly on cars equipped with automatic transmissions. Reduced electrical “noise” can improve ECU signals and throttle response, on models equipped with automatic transmission you will notice quicker transmission shifting right off the bat. Make no mistake about it, they greatly reduce the "shift lag" that automatic transmission equipped G's experience. Just ask those who actually have the product and have experienced the benefits. They can attest first hand that it works. This benefit alone makes it worthwhile as a very inexpensive yet effective performance upgrade. On manual transmission cars, the greatest benefit is improved throttle response and smoother idle (this applies to both AT and MT models). You can be certain that all electrical components are getting the full current that they need to operate at peak performance. If you have or plan to add aftermarket electronics or stereo components (head units, amplifiers, etc.) you will also get the peace of mind that they will have ample voltage to operate at peak performance. Ever seen any auto sound competitors who don't upgrade the "Big 3"? Rarely. Your lights are less likely to dim on heavy bass notes (depending on your amplifier wattage, they still may do so).
Q: How many HP will this give me?
A:I don't sell this grounding kit as a modification designed to increase your horsepower. I will not make any HP claims regarding these. I don't claim that it makes any horsepower although other sellers have made claims (some of them quite ridiculous!) that the grounding kits they sell make a measurable increase in horsepower. We all know as enthusiasts that the difference between one dyno pull and the next can easily vary as much as 5-10 HP or more, even under identical conditions, and is quite easy to manipulate. I don't attribute it to this gain to my grounding kit as a marketing tool. In reality, it should actually free up some HP, but how much is probably not significant so I won't make claims.
Q: What's in a set of Betty's Garage Grounding Wires?
A: 100% copper wiring with tin plated copper ring terminals to connect them to engine bay components. And a handful of cable ties to make the installation neat. Not copper clad aluminum, because copper has less resistance than aluminum. The set contains high quality, very flexible copper wires with terminals that install easily along with your car's current electrical grounding. The wires are covered in TechFlex to give them a fantastic custom appearance in your engine bay. You don't need to remove the factory grounding wires that are already there, you only need to add to them. That's all you need. When I researched what's already there and where it could be improved and I feel that these wires are all you need. Keep it simple. Keep it easy.
Q: What components does this set ground?
A: Betty's Garage wiring sets ground the negative battery terminal to the chassis, the engine block to chassis on both the right and left cylinder banks of the engine block, and both throttle bodies to the negative battery terminal. Only one throttle body on 1st generation G35s because they only have one.
Q: Are there any options to customize it to fit my personal style?
A: Yes! You can go with larger wires (mine is 4 AWG). You can choose your color of the Tech Flex covering. If you have any other ideas, ask me. I will do whatever I reasonably can to accommodate you but it will cost a little more and take extra time.
Q: What's the difference between 4 AWG and 8 AWG wire?
A: 4 AWG (American Wire Gauge) wire is larger and more conductive (carries more current) than 8 AWG wire. Is it truly necessary? Not absolutely - I wouldn't offer the 8 AWG if they didn't work effectively. But the 4 AWG leaves nothing to doubt as to whether it's heavy enough for all your grounding needs. If you have or plan to add any aftermarket electronics (stereo upgrades, GPS, forced induction, etc) I recommend the larger 4 AWG set. The wiring to the throttle body is 8 AWG size on both the 8 AWG and 4 AWG sets.
Q: Is ground wiring for the throttle body included in this set?
A: YES! It is included in every set (both TBs for 2nd generation coupes and sedans) in the price you pay.
Q: How hard is it to install? What tools will I need?
A: It's really easy to install even if you don't know much about cars. I will provide instructions. It will take only about 20 to 30 minutes for the most novice mechanic to install (it takes me 15). You don't have to have any technical knowledge. I'd rate it a 3 on a scale of 1 to 10 in difficulty. All you will need is a couple of sockets, a ratchet, a short extension, and an allen wrench. That's it!
Q: I've heard that grounding wires cause battery problems. Is that true?
A: Absolutely not! Adding grounding wires to your car does not cause damage to your battery or any other components of your car.
Q: I'm in! How much does it cost?
A: Cost:
A: It's really easy to install even if you don't know much about cars. I will provide instructions. It will take only about 20 to 30 minutes for the most novice modder to install (took me 10). You don't have to have any technical knowledge. 3 on a scale of 1 to 10 in difficulty. All you will need is 8 and 10 mm sockets, a ratchet, a short socket extension, and an allen wrench. That's it!
Q: Where's the instructions?
A: Rather than send out a printed copy of instructions, I will post them here in this thread for all to see. There are also installation DIY's in the stickies of the DIY/Modification subforum.
This thread is for questions regarding the wire sets and comments that are on this topic. Post here if you want one, have technical or installation questions, or have a comment on the Betty's Garage Grounding Wires. Please refrain from posting irrelevant things here as it just muddles things up and makes it harder for me to sift through the garbage to get to posters with questions or comments. If you'd rather PM or email me that's cool too.
These are samples of standard colors:
Custom colors that are UV Reactive:
Custom solid colors:
Custom striped/tracer colors:
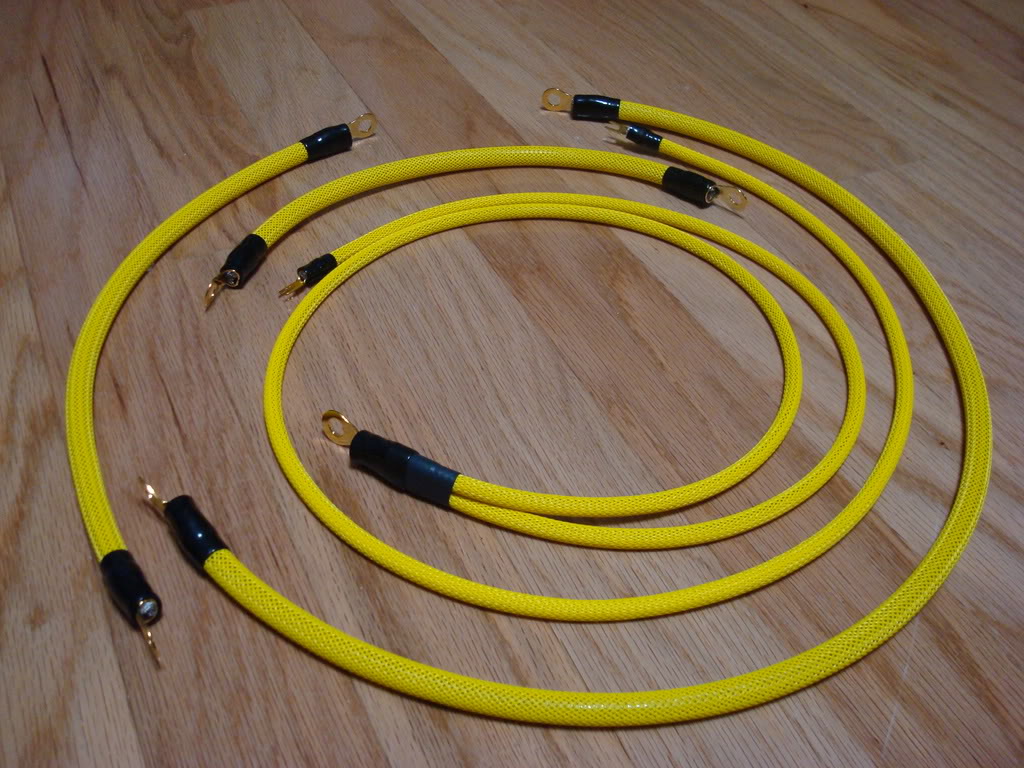
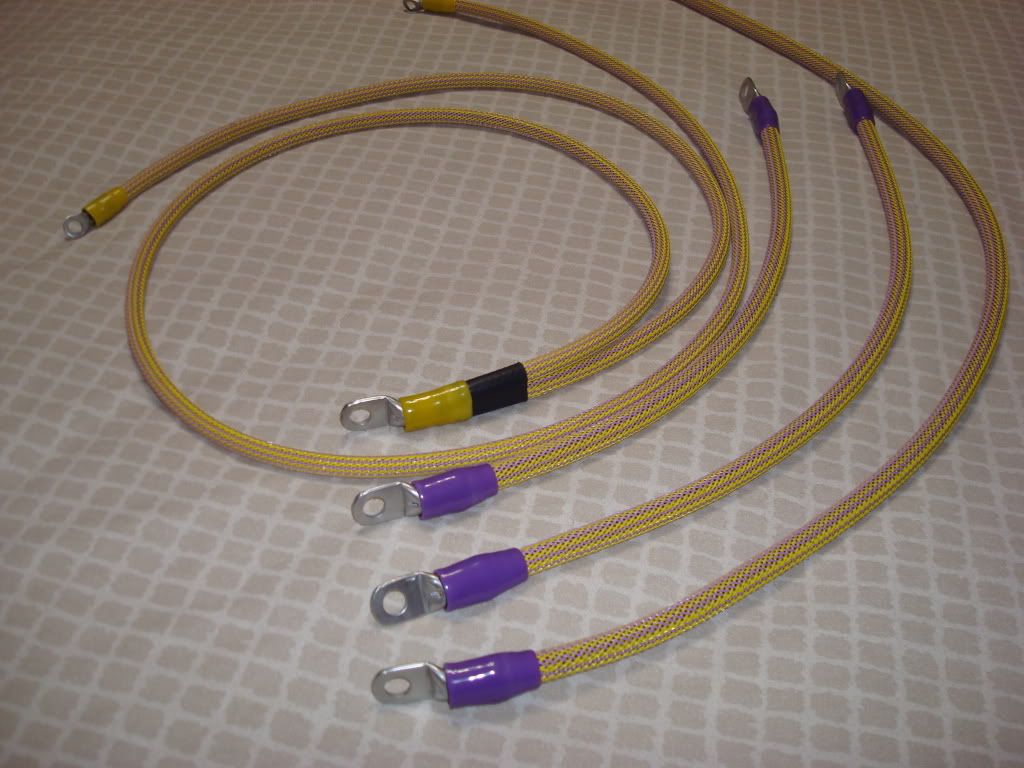
A yellow set for a customer. Special orders are no problem.
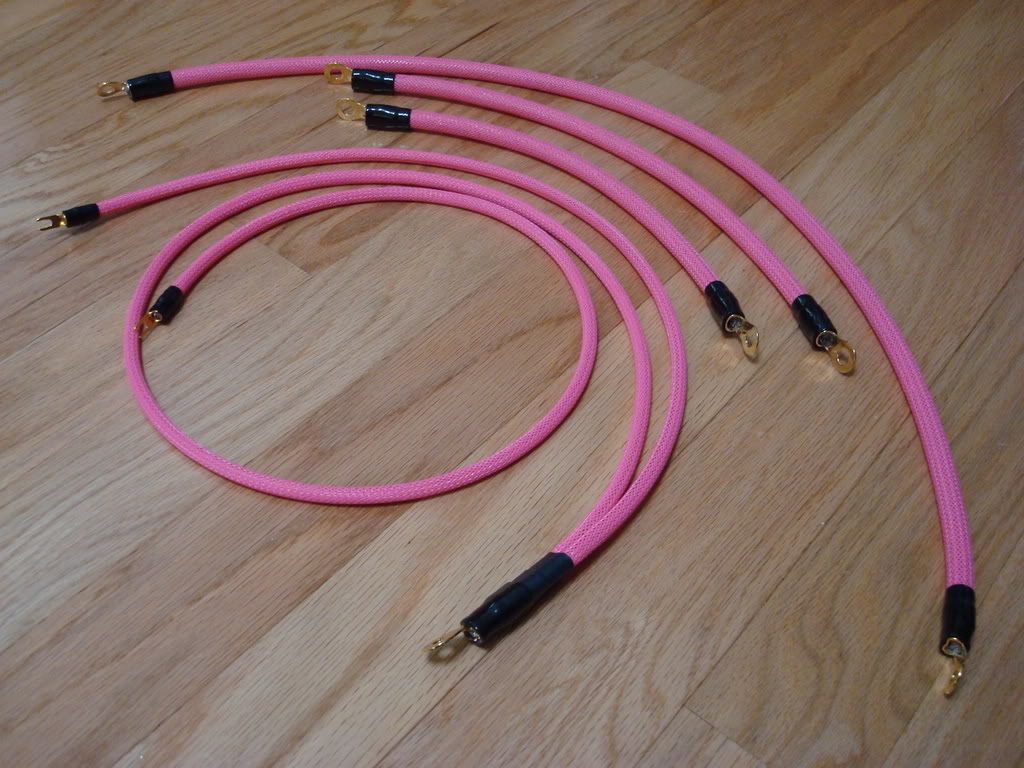
Custom Neon Pink set:
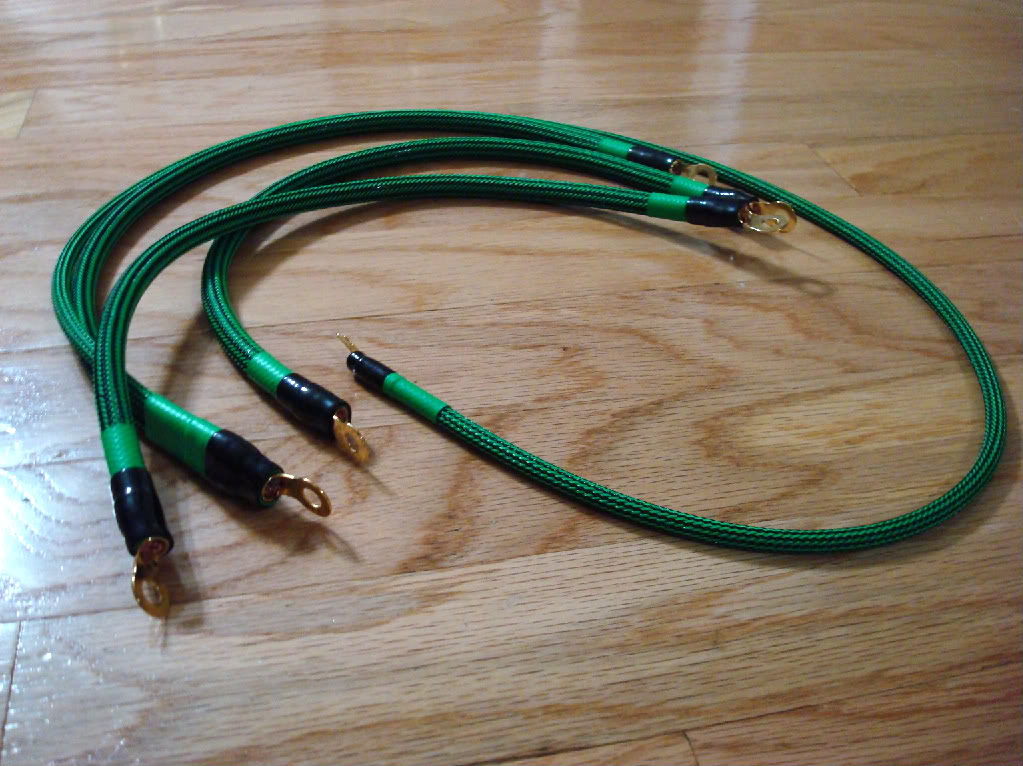
Custom set for Green Goblin:
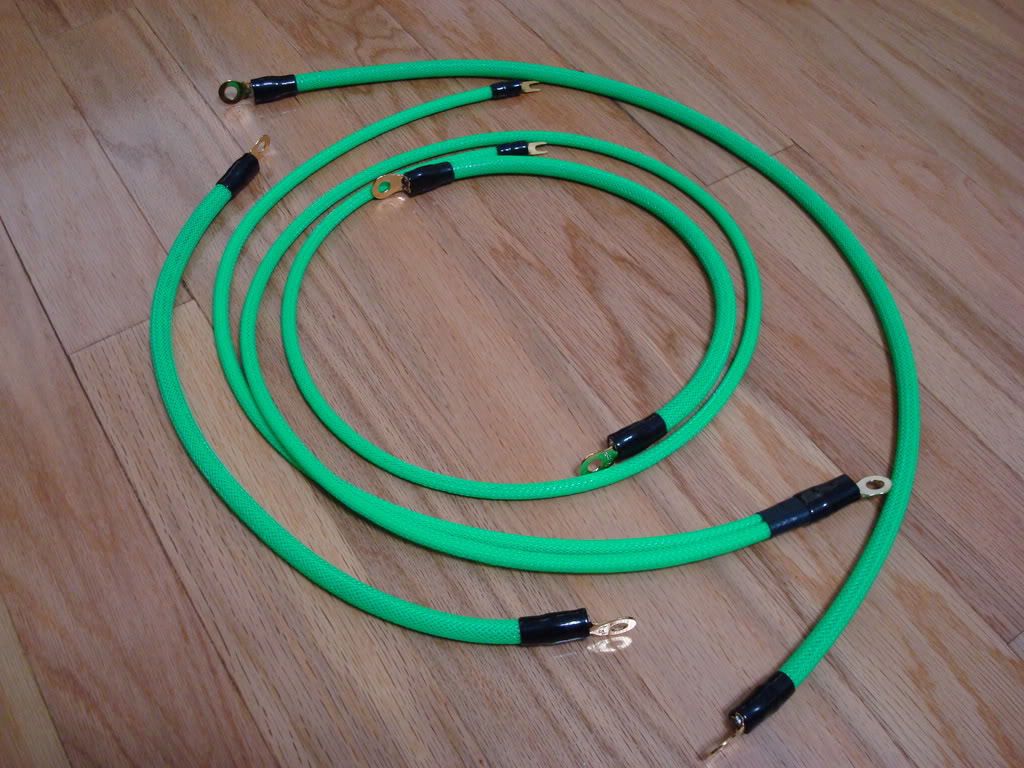
Custom set in Neon Green:
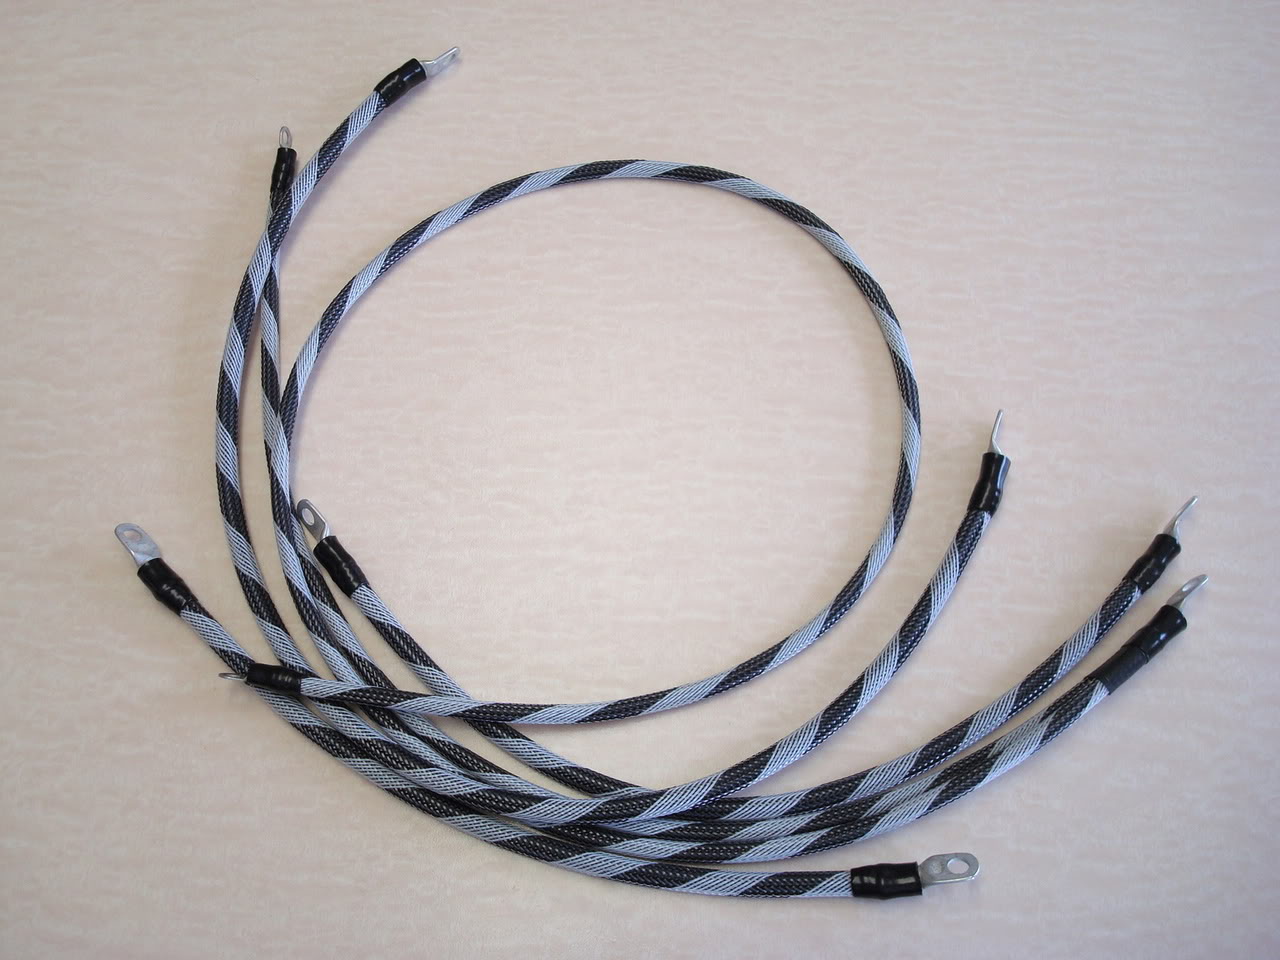
Custom set in Monochrome (black/white stripe):
Black Betty is currently proudly flying LSU colors:
Click here for my complete Betty's Garage Photo Gallery!
NOTICE: I don't make or sell grounding wires anymore and I haven't for years now. If you were thinking of sending me a visitor message, PM, or email asking me about it please don't. There's no need. I don't make or sell them. I don't have any left over to sell. I won't make just one more just for you even if you ask really nicely and offer to pay me extra. I appreciate everyone's interest, but I'm not in that business anymore.
Q: What do they do?
A: Grounding wires (when properly designed and installed) improve a vehicle's electrical system by using various grounding points and more and/or larger wiring than the car came with from manufacturer with. They create a safe and reliable way of creating a low resistance ground path for your car. The benefits are very evident particularly on cars equipped with automatic transmissions. Reduced electrical “noise” can improve ECU signals and throttle response, on models equipped with automatic transmission you will notice quicker transmission shifting right off the bat. Make no mistake about it, they greatly reduce the "shift lag" that automatic transmission equipped G's experience. Just ask those who actually have the product and have experienced the benefits. They can attest first hand that it works. This benefit alone makes it worthwhile as a very inexpensive yet effective performance upgrade. On manual transmission cars, the greatest benefit is improved throttle response and smoother idle (this applies to both AT and MT models). You can be certain that all electrical components are getting the full current that they need to operate at peak performance. If you have or plan to add aftermarket electronics or stereo components (head units, amplifiers, etc.) you will also get the peace of mind that they will have ample voltage to operate at peak performance. Ever seen any auto sound competitors who don't upgrade the "Big 3"? Rarely. Your lights are less likely to dim on heavy bass notes (depending on your amplifier wattage, they still may do so).
Q: How many HP will this give me?
A:I don't sell this grounding kit as a modification designed to increase your horsepower. I will not make any HP claims regarding these. I don't claim that it makes any horsepower although other sellers have made claims (some of them quite ridiculous!) that the grounding kits they sell make a measurable increase in horsepower. We all know as enthusiasts that the difference between one dyno pull and the next can easily vary as much as 5-10 HP or more, even under identical conditions, and is quite easy to manipulate. I don't attribute it to this gain to my grounding kit as a marketing tool. In reality, it should actually free up some HP, but how much is probably not significant so I won't make claims.
Q: What's in a set of Betty's Garage Grounding Wires?
A: 100% copper wiring with tin plated copper ring terminals to connect them to engine bay components. And a handful of cable ties to make the installation neat. Not copper clad aluminum, because copper has less resistance than aluminum. The set contains high quality, very flexible copper wires with terminals that install easily along with your car's current electrical grounding. The wires are covered in TechFlex to give them a fantastic custom appearance in your engine bay. You don't need to remove the factory grounding wires that are already there, you only need to add to them. That's all you need. When I researched what's already there and where it could be improved and I feel that these wires are all you need. Keep it simple. Keep it easy.
Q: What components does this set ground?
A: Betty's Garage wiring sets ground the negative battery terminal to the chassis, the engine block to chassis on both the right and left cylinder banks of the engine block, and both throttle bodies to the negative battery terminal. Only one throttle body on 1st generation G35s because they only have one.
Q: Are there any options to customize it to fit my personal style?
A: Yes! You can go with larger wires (mine is 4 AWG). You can choose your color of the Tech Flex covering. If you have any other ideas, ask me. I will do whatever I reasonably can to accommodate you but it will cost a little more and take extra time.
Q: What's the difference between 4 AWG and 8 AWG wire?
A: 4 AWG (American Wire Gauge) wire is larger and more conductive (carries more current) than 8 AWG wire. Is it truly necessary? Not absolutely - I wouldn't offer the 8 AWG if they didn't work effectively. But the 4 AWG leaves nothing to doubt as to whether it's heavy enough for all your grounding needs. If you have or plan to add any aftermarket electronics (stereo upgrades, GPS, forced induction, etc) I recommend the larger 4 AWG set. The wiring to the throttle body is 8 AWG size on both the 8 AWG and 4 AWG sets.
Q: Is ground wiring for the throttle body included in this set?
A: YES! It is included in every set (both TBs for 2nd generation coupes and sedans) in the price you pay.
Q: How hard is it to install? What tools will I need?
A: It's really easy to install even if you don't know much about cars. I will provide instructions. It will take only about 20 to 30 minutes for the most novice mechanic to install (it takes me 15). You don't have to have any technical knowledge. I'd rate it a 3 on a scale of 1 to 10 in difficulty. All you will need is a couple of sockets, a ratchet, a short extension, and an allen wrench. That's it!
Q: I've heard that grounding wires cause battery problems. Is that true?
A: Absolutely not! Adding grounding wires to your car does not cause damage to your battery or any other components of your car.
Q: I'm in! How much does it cost?
A: Cost:
- 1st Generation Gs ('03-'06 G35 sedan, '03-'07 G35 coupe) $70 +shipping for a 8 AWG set.
- 1st Generation Gs ('03-'06 G35 sedan, '03-'07 G35 coupe) $83 + shipping for a 4 AWG set.
- 2nd Generation Gs ('07+ G37 sedan, '08+ G37 coupe)$88 + shipping for a 4 AWG set.
- All sets shipped to TX must add 8.25% sales Tax!
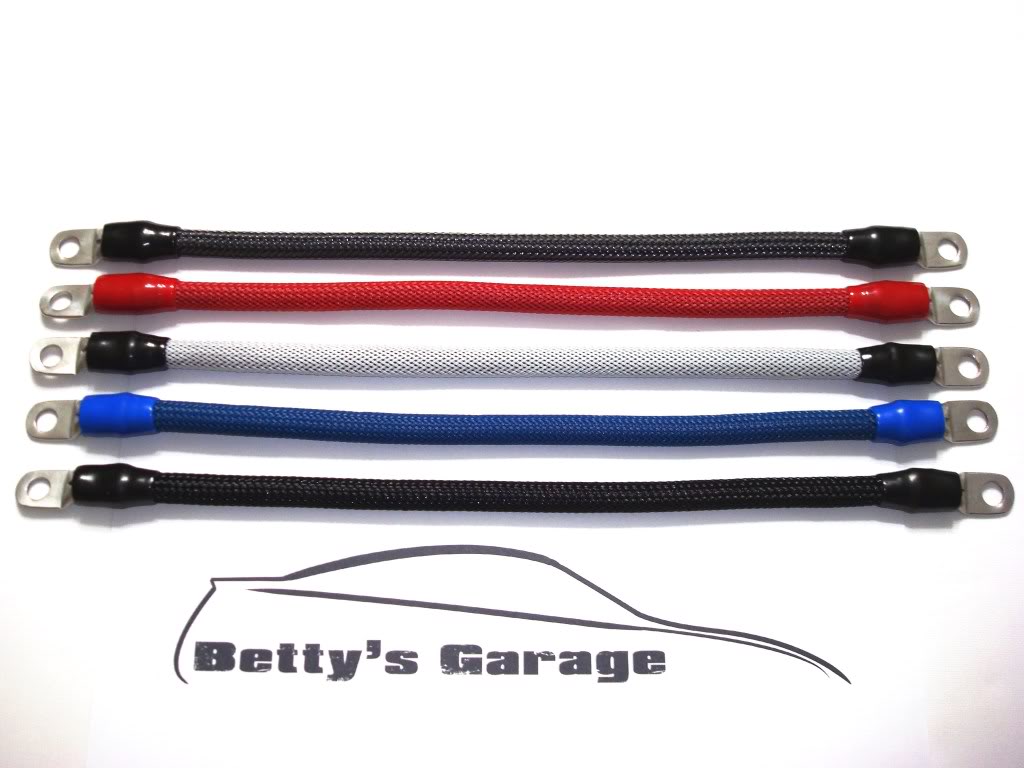
- In stock colors are available: Black Obsidian, Vibrant Red, Athens Blue, and Carbon Fiber look. PM me with other custom color requests and I'll give you a time estimate on completion.
- Domestic shipping starts at $7 for USPS Priority Mail 2 to 3 Day shipping. Other USPS and UPS shipping options are available at a higher cost. International destinations, please PM or email for a shipping quote.
A: It's really easy to install even if you don't know much about cars. I will provide instructions. It will take only about 20 to 30 minutes for the most novice modder to install (took me 10). You don't have to have any technical knowledge. 3 on a scale of 1 to 10 in difficulty. All you will need is 8 and 10 mm sockets, a ratchet, a short socket extension, and an allen wrench. That's it!
Q: Where's the instructions?
A: Rather than send out a printed copy of instructions, I will post them here in this thread for all to see. There are also installation DIY's in the stickies of the DIY/Modification subforum.
This thread is for questions regarding the wire sets and comments that are on this topic. Post here if you want one, have technical or installation questions, or have a comment on the Betty's Garage Grounding Wires. Please refrain from posting irrelevant things here as it just muddles things up and makes it harder for me to sift through the garbage to get to posters with questions or comments. If you'd rather PM or email me that's cool too.
These are samples of standard colors:
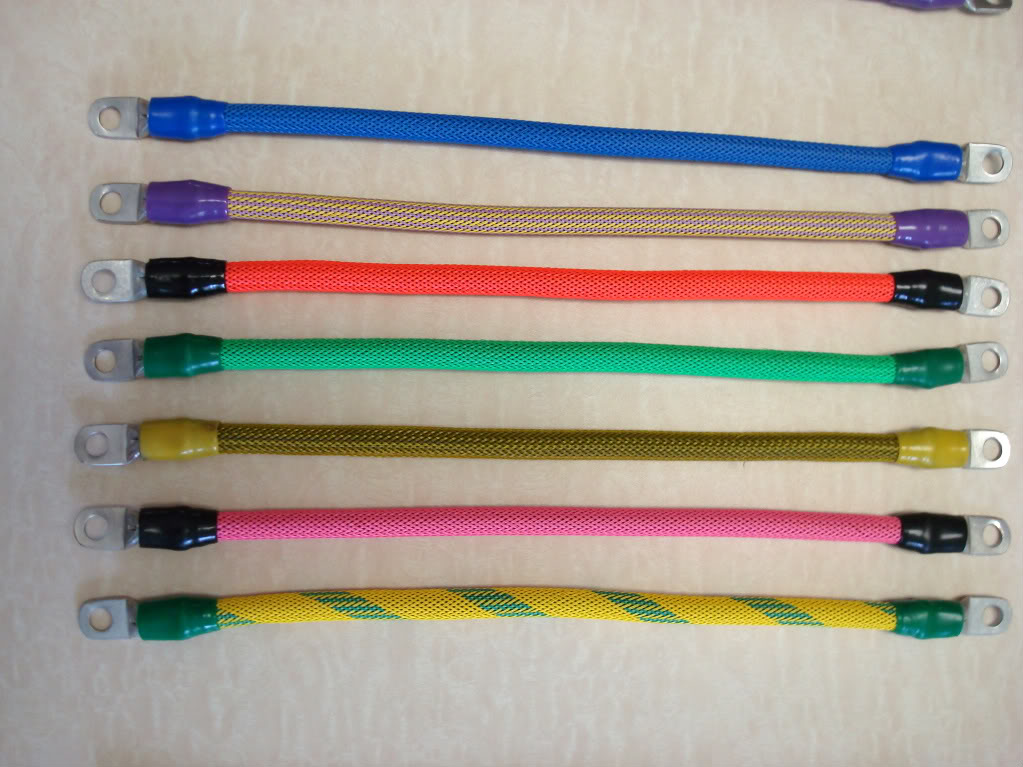
Custom colors that are UV Reactive:
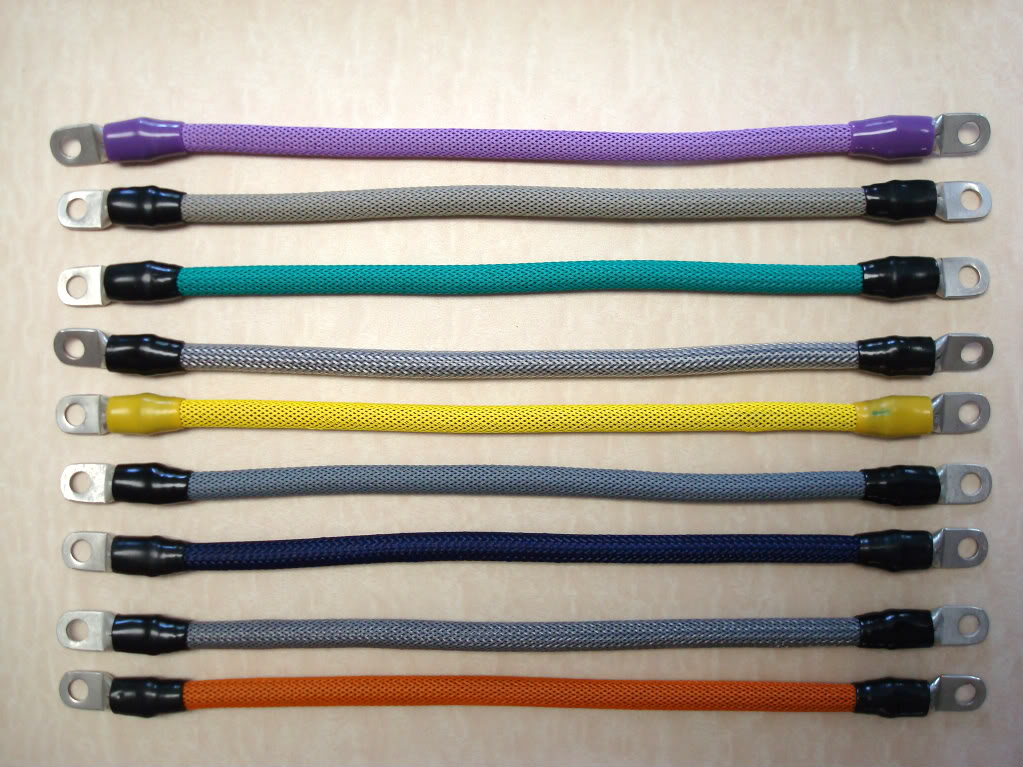
Custom solid colors:
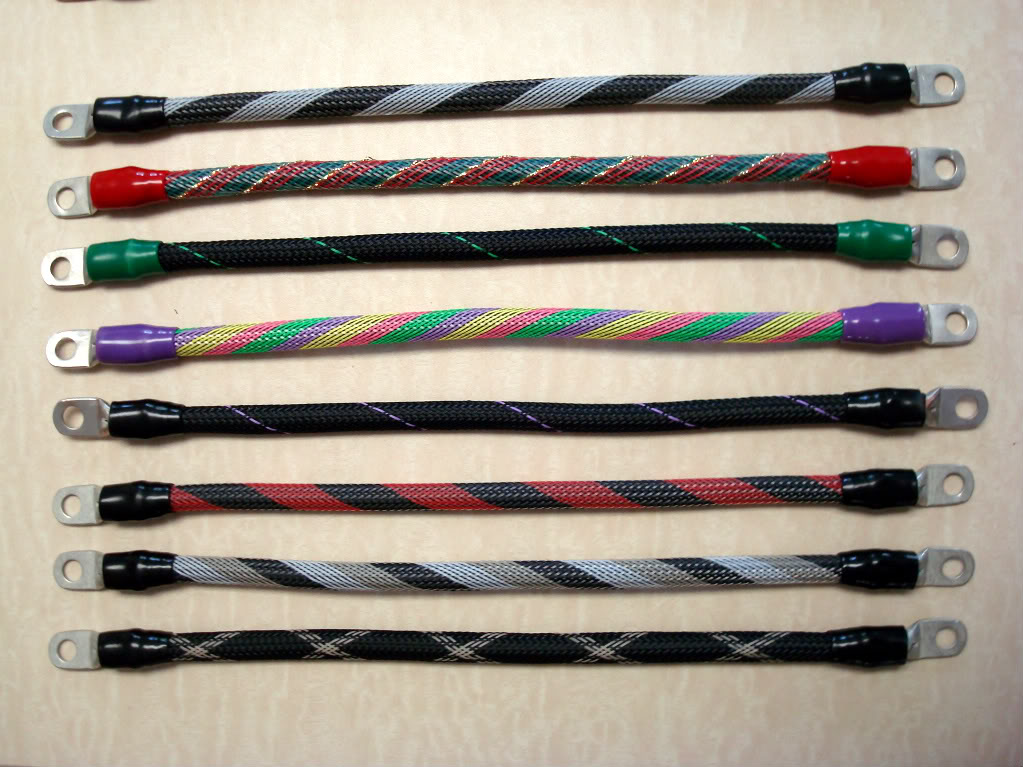
Custom striped/tracer colors:
A yellow set for a customer. Special orders are no problem.
Custom Neon Pink set:
Custom set for Green Goblin:
Custom set in Neon Green:
Custom set in Monochrome (black/white stripe):
Black Betty is currently proudly flying LSU colors:
Click here for my complete Betty's Garage Photo Gallery!
NOTICE: I don't make or sell grounding wires anymore and I haven't for years now. If you were thinking of sending me a visitor message, PM, or email asking me about it please don't. There's no need. I don't make or sell them. I don't have any left over to sell. I won't make just one more just for you even if you ask really nicely and offer to pay me extra. I appreciate everyone's interest, but I'm not in that business anymore.
Last edited by Black Betty; 06-04-2014 at 11:17 AM. Reason: I am no longer making or selling these
 07-07-2008, 01:18 AM
#2
Instructions
Here's how to install the wire set.
DISCLAIMER: This set of wires is purchased and used solely at your own risk. I will not be held responsible or liable for any harm or damage that comes to your car or to you. What you are installing is a set of wires, nothing more. Take every reasonable precaution for safety when installing. Use good judgment and common sense. Installation of the Betty's Garage Grounding Wires do not necessarily void your factory warranty on electrical components in your car unless it can be proven that they are the cause of the malfunction. With proper installation they will not be.
Tools needed:
All bolts shown are 10 mm.
1. DISCONNECT THE NEGATIVE BATTERY CABLE! You should always disconnect the negative battery cable before doing anything electrical on your car. Always!
2. Take either end of the longest wire and connect it to your negative battery terminal. Leave this negative terminal disconnected until you finish all the steps before coming back to where you started and reconnecting the cable.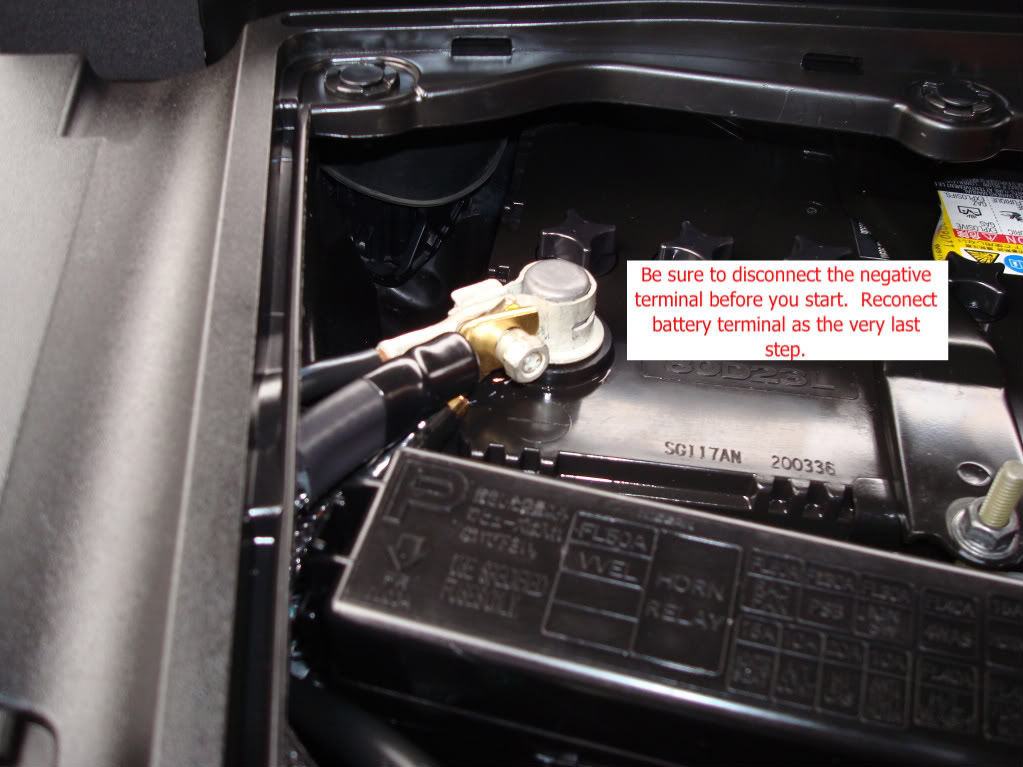
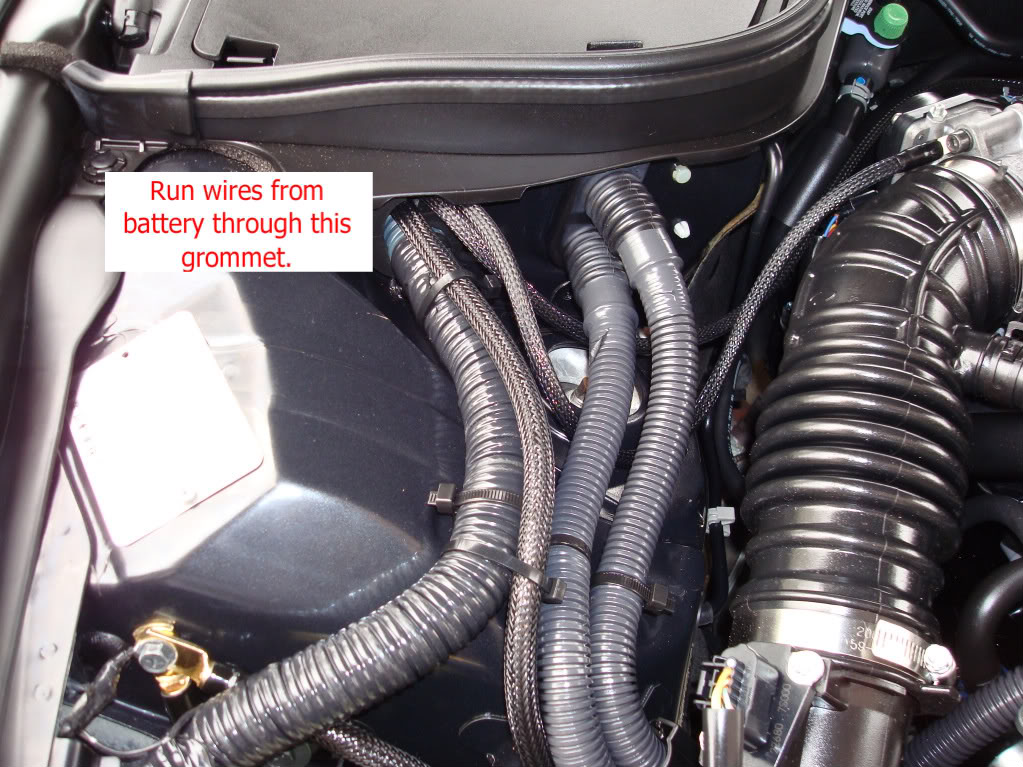
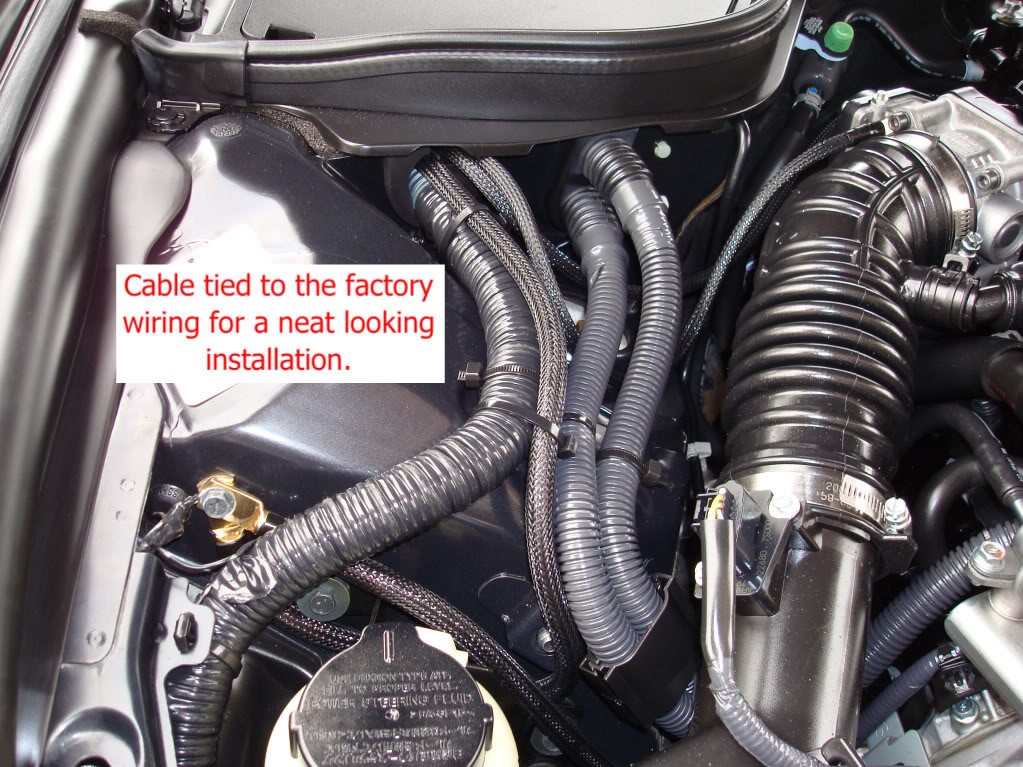
3. Run the wire through the opening that has the single bundle of wires running through it. There is enough room for you to run the grounding wire along side the wire bundle that's already there.
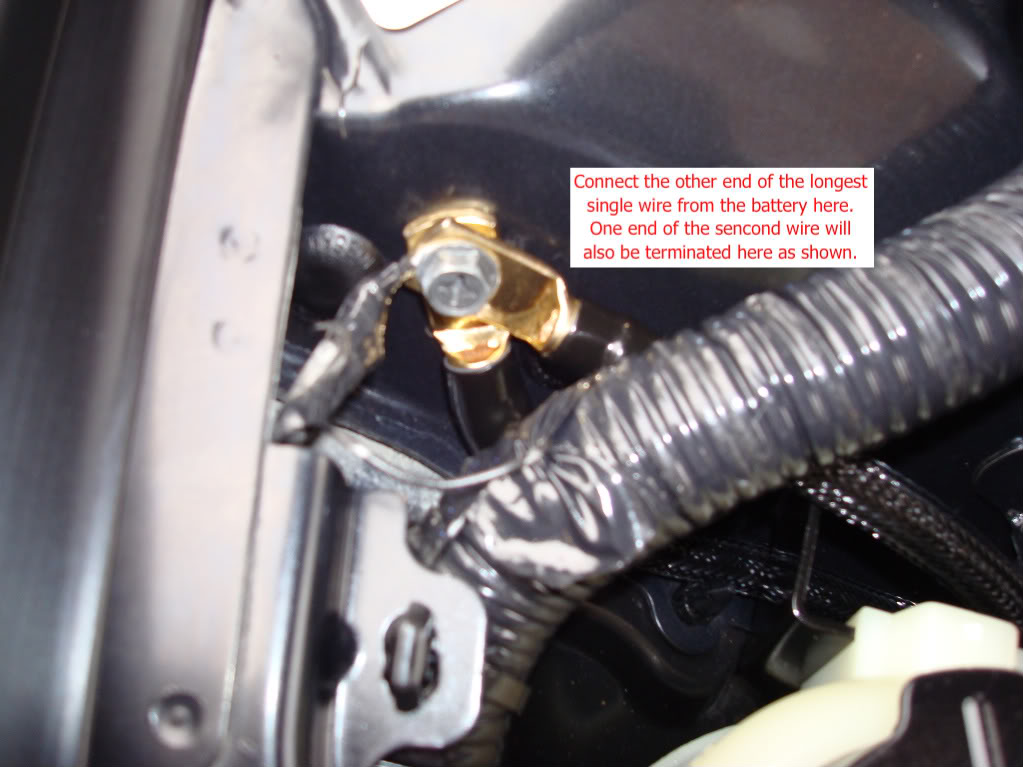
4. Connect the other end of the long wire to the bolt on the strut tower where there is already a tiny grounding wire anchored. Run the new wire underneath the existing one. Don't tighten the bolt all the way as you will attach another wire here. You can use the cable ties to attach the wire to the bundle of wires that it runs along for a factory looking install.
5. Connect either end of the second longest wire to the same point you just terminated the first wire. Place both ring terminals on top on one another under the existing puny wire. Tighten bolt.
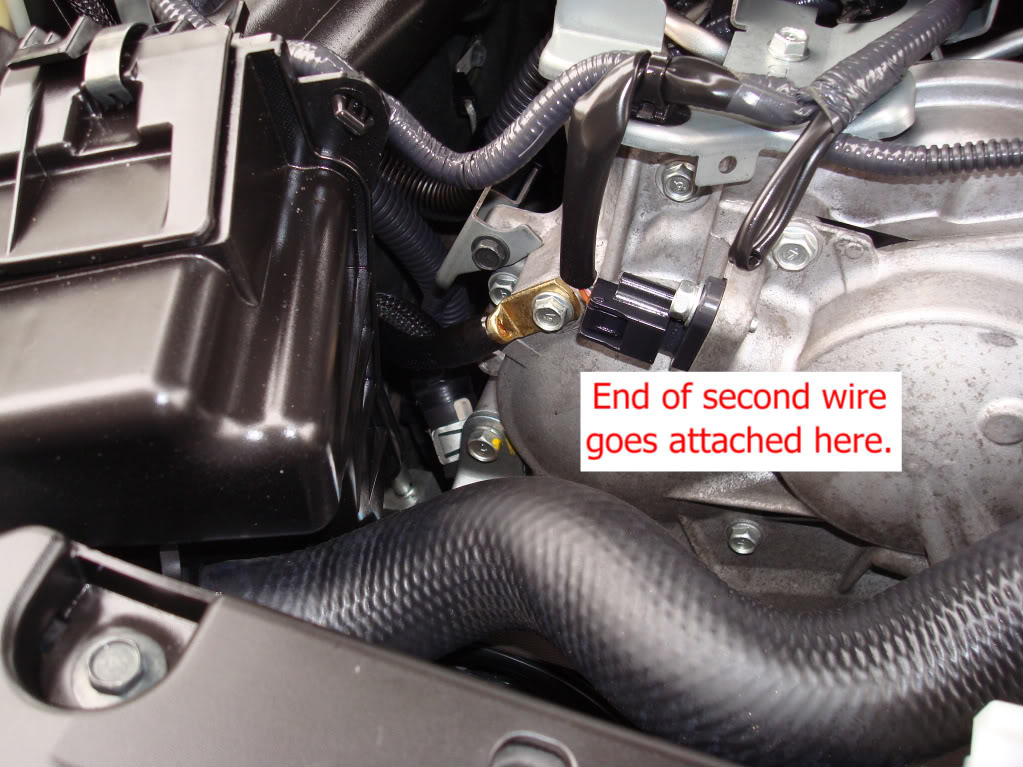
6. Run the wire under your intake tubing and connect to the bolt on the front side of the engine block shown on the passenger side. Tighten bolt.
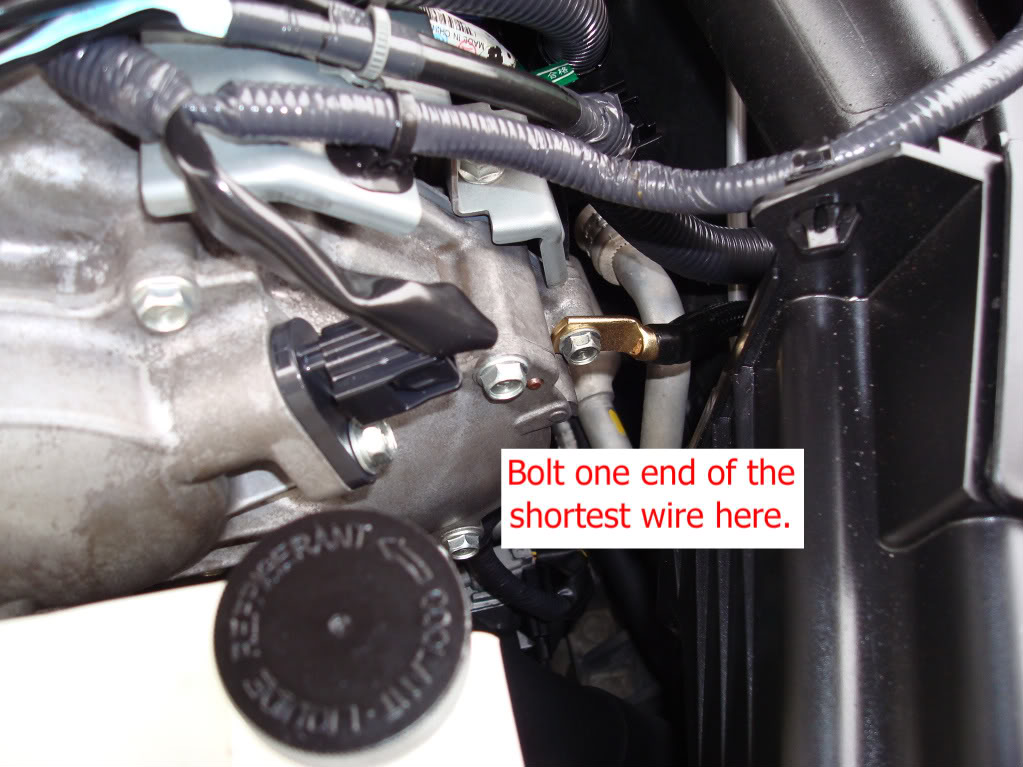
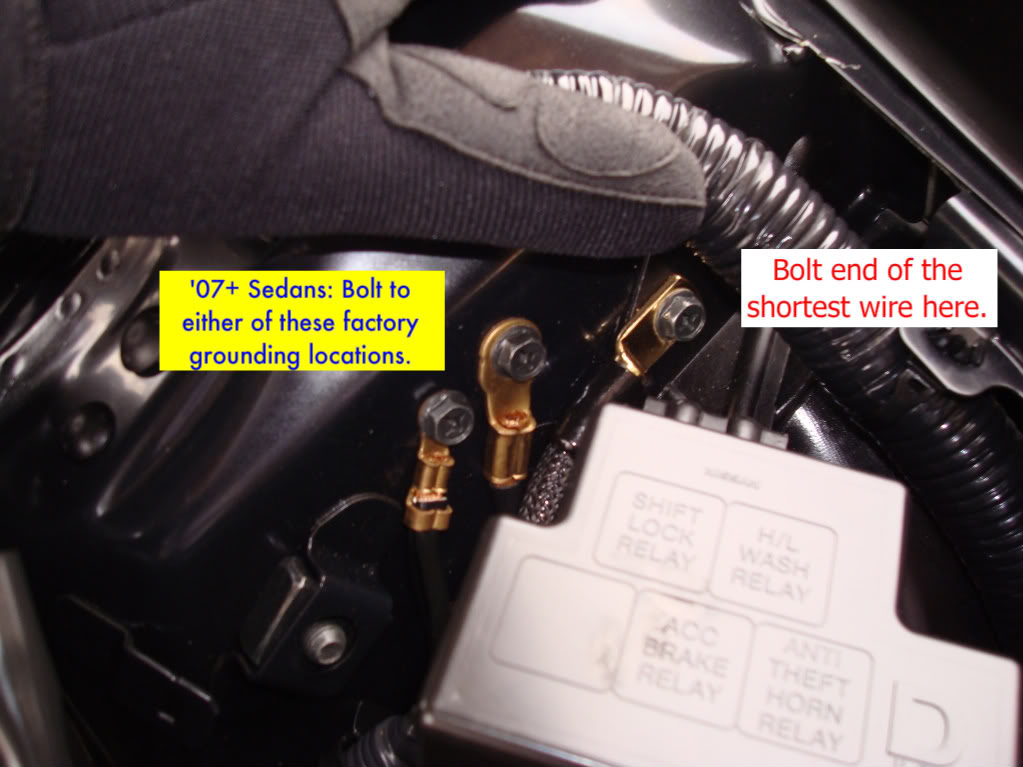
7. Connect either end of the shortest wire to the bolt shown on the driver side. You may need to use a short extension or a deep 10 mm socket to reach this bolt easily.
8. Connect the other end of the this wire to the bolt shown that holds the bracket for the relay box. '07+ SEDAN OWNERS NOTE: You don't have the bolt shown in this step, just a plastic cover there. Connect it to either of the factory grounding points show right beside where this wire is connected.
In addition to the instructions for the original wires, here's how to install the throttle body upgrade (the dual cable pictured above):
9. Remove your engine cover.
10. Connect the shorter of the two 8 AWG cables that have the spade terminal ends to the passenger side throttle body. You can do this in one of 3 places: 1) on the lower inset hex screw on the firewall side of the TB, 2) on the upper inset hex screw on the top firewall side of the TB, 3) underneath the stainless steel nut on top of the TB. The first 2 locations are a very tight fit and it may be easier to get the spade terminal connected by disconnecting the intake tubing. The spade will go on the TB screws but it's tight. The next larger size was too loose and may disconnect if you don't tighten the screw down enough. Under the nut on top of the TB is the easiest of the 3 locations (props to KODG MAN! ) but it's your choice as any of the three will work just fine.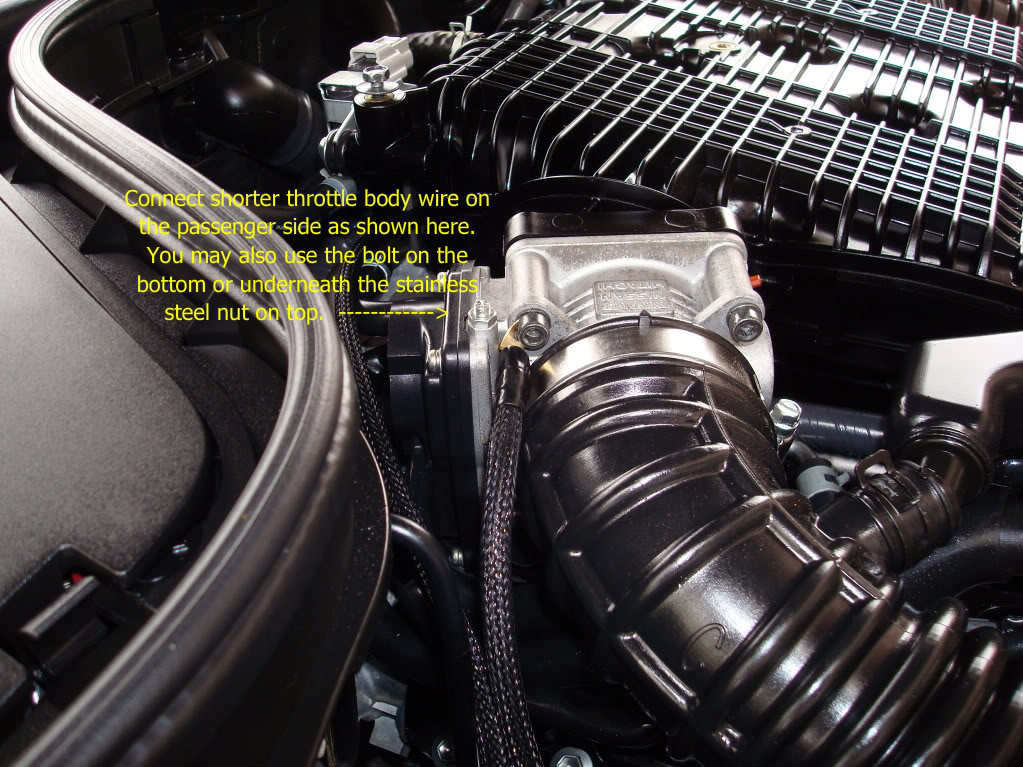
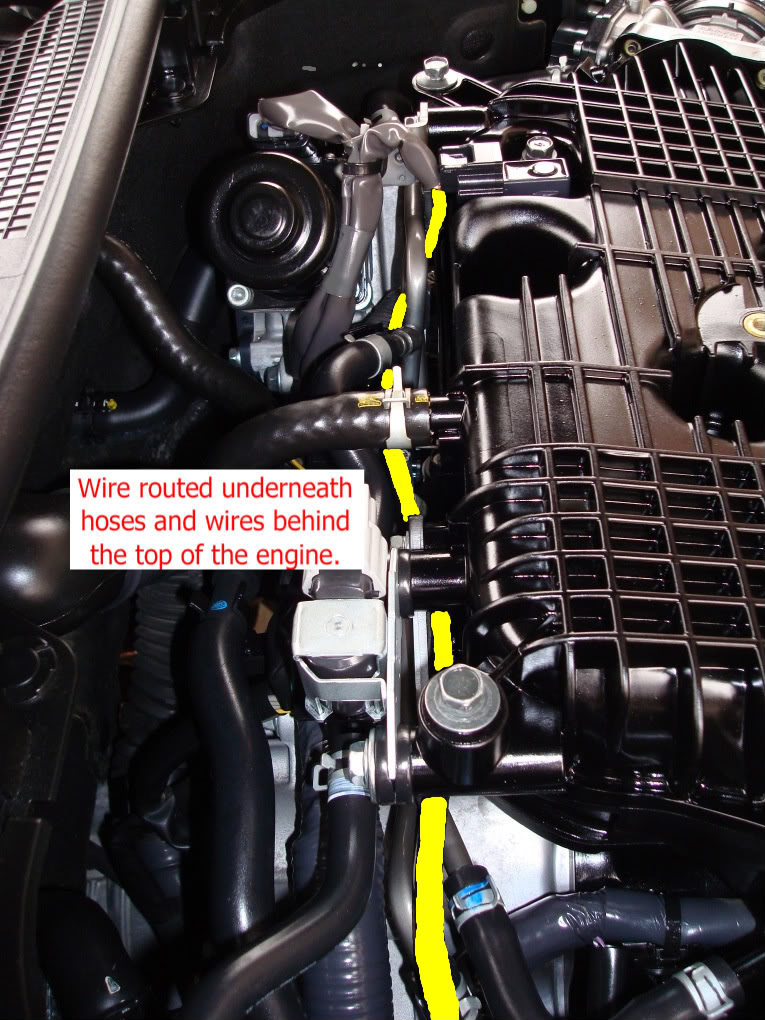
11. Connect the longer of the two 8 AWG cables that have the spade terminal ends to the driver side throttle body in your choice of the same 3 same locations as the other side. The cable length is designed to run underneath the various lines/hoses behind the top of the engine. This will make it very inconspicuous with the cover replaced and have it out of the way of everything.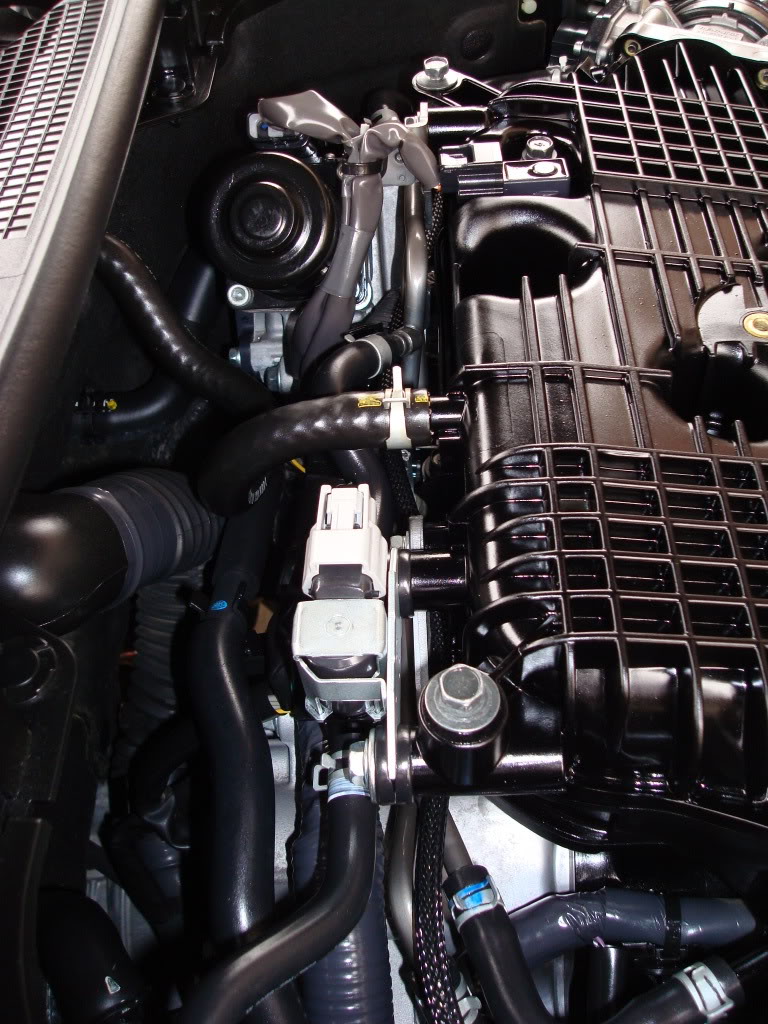
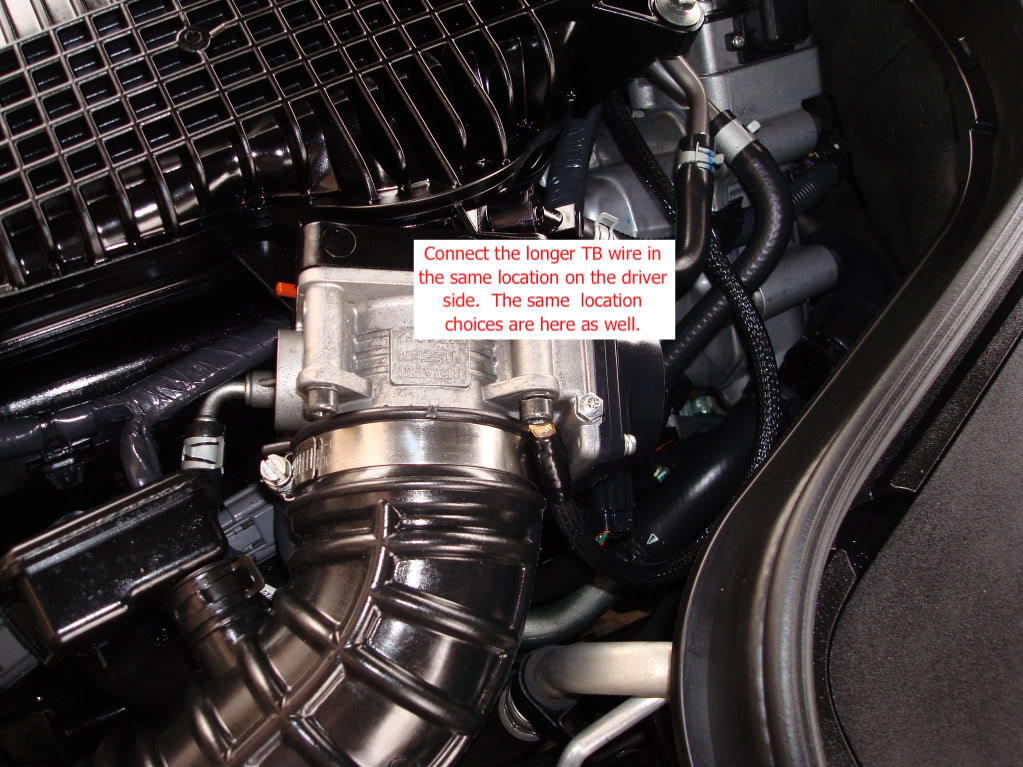
12. Finally, run the end with the 4 AWG ring terminal where both wires are spliced together back through the same grommet as the battery to chassis cable (the first one). Attach it along with the other cable and reconnect your battery terminal.
13. Voila! You are done. Enjoy.
You will need to reset your windows since your battery has been disconnected. To perform a window reset, start your car then hold down the driver side window button until the window goes all the way down and then continue for another 20 seconds. Do the same when rolling it up. Repeat on the passenger side window. You'll may also need to reset your radio station presets.

DISCLAIMER: This set of wires is purchased and used solely at your own risk. I will not be held responsible or liable for any harm or damage that comes to your car or to you. What you are installing is a set of wires, nothing more. Take every reasonable precaution for safety when installing. Use good judgment and common sense. Installation of the Betty's Garage Grounding Wires do not necessarily void your factory warranty on electrical components in your car unless it can be proven that they are the cause of the malfunction. With proper installation they will not be.
Tools needed:
- 10 mm socket
- 8 mm socket
- ratchet
- short extension or a deep 10 mm socket
- 5 mm Allen wrench
All bolts shown are 10 mm.
1. DISCONNECT THE NEGATIVE BATTERY CABLE! You should always disconnect the negative battery cable before doing anything electrical on your car. Always!
2. Take either end of the longest wire and connect it to your negative battery terminal. Leave this negative terminal disconnected until you finish all the steps before coming back to where you started and reconnecting the cable.
3. Run the wire through the opening that has the single bundle of wires running through it. There is enough room for you to run the grounding wire along side the wire bundle that's already there.
4. Connect the other end of the long wire to the bolt on the strut tower where there is already a tiny grounding wire anchored. Run the new wire underneath the existing one. Don't tighten the bolt all the way as you will attach another wire here. You can use the cable ties to attach the wire to the bundle of wires that it runs along for a factory looking install.
5. Connect either end of the second longest wire to the same point you just terminated the first wire. Place both ring terminals on top on one another under the existing puny wire. Tighten bolt.
6. Run the wire under your intake tubing and connect to the bolt on the front side of the engine block shown on the passenger side. Tighten bolt.
7. Connect either end of the shortest wire to the bolt shown on the driver side. You may need to use a short extension or a deep 10 mm socket to reach this bolt easily.
8. Connect the other end of the this wire to the bolt shown that holds the bracket for the relay box. '07+ SEDAN OWNERS NOTE: You don't have the bolt shown in this step, just a plastic cover there. Connect it to either of the factory grounding points show right beside where this wire is connected.
In addition to the instructions for the original wires, here's how to install the throttle body upgrade (the dual cable pictured above):
9. Remove your engine cover.
10. Connect the shorter of the two 8 AWG cables that have the spade terminal ends to the passenger side throttle body. You can do this in one of 3 places: 1) on the lower inset hex screw on the firewall side of the TB, 2) on the upper inset hex screw on the top firewall side of the TB, 3) underneath the stainless steel nut on top of the TB. The first 2 locations are a very tight fit and it may be easier to get the spade terminal connected by disconnecting the intake tubing. The spade will go on the TB screws but it's tight. The next larger size was too loose and may disconnect if you don't tighten the screw down enough. Under the nut on top of the TB is the easiest of the 3 locations (props to KODG MAN! ) but it's your choice as any of the three will work just fine.
11. Connect the longer of the two 8 AWG cables that have the spade terminal ends to the driver side throttle body in your choice of the same 3 same locations as the other side. The cable length is designed to run underneath the various lines/hoses behind the top of the engine. This will make it very inconspicuous with the cover replaced and have it out of the way of everything.
12. Finally, run the end with the 4 AWG ring terminal where both wires are spliced together back through the same grommet as the battery to chassis cable (the first one). Attach it along with the other cable and reconnect your battery terminal.
13. Voila! You are done. Enjoy.
You will need to reset your windows since your battery has been disconnected. To perform a window reset, start your car then hold down the driver side window button until the window goes all the way down and then continue for another 20 seconds. Do the same when rolling it up. Repeat on the passenger side window. You'll may also need to reset your radio station presets.
Last edited by Black Betty; 03-04-2009 at 03:07 PM. Reason: Added TB instructions

 07-12-2008, 04:13 PM
#5
Registered User

Join Date: Apr 2008
Location: San Juan, Puerto Rico
Posts: 397
Likes: 0
Received 0 Likes
on
0 Posts
What is the price shipped to Puerto Rico, Zip Code 00902? �'m asking because you only gave price for Mainland and Canada.
Also, I'ma newbie on this, so what will be the benefits of 4AWG over 8AWG?, I have a Journey with Premium Package, 5AT.
Thanks.
Also, I'ma newbie on this, so what will be the benefits of 4AWG over 8AWG?, I have a Journey with Premium Package, 5AT.
Thanks.
07-12-2008, 11:29 PM
#7
I'll ship to you for the same price as Canada, I love Puerto Rico! Honestly, 4 AWG is probably only needed if you are going to add aftermarket electronics that have a big current draw like high wattage amps etc. 8 AWG will be just fine if you just want to improve your throttle response and shifting if your AT. FWIW, I was going to do 0 AWG luke I have in my Maxima but 4 is more than enough.
Trending Topics
 07-14-2008, 03:56 PM
#10
I've had several requests for customization. If you want something different or extra, please ask. More wires, custom colors, etc. Is anyone interested in a Alternator + to Battery + wire to complete the "Big 3"? This should be a no brainer for those of you with big aftermarket amps.
 07-14-2008, 04:14 PM
#12
I've had several requests for customization. If you want something different or extra, please ask. More wires, custom colors, etc. Is anyone interested in a Alternator + to Battery + wire to complete the "Big 3"? This should be a no brainer for those of you with big aftermarket amps.


