
DIY: Installing a Vinyl Roof
 03-08-2012, 05:57 AM
#1
Registered Member
Thread Starter

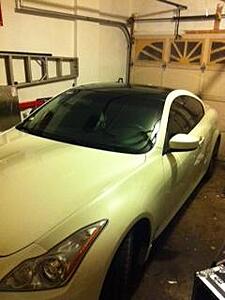
Installing a Vinyl Roof
Thought i'd vinyl my roof today and make a DIY
First things first
TOOLS
Spray bottle with dish soap (all you need is a drop of soap)
Vinyl squeegee or credit card wrapped in a micro fiber cloth
Exacto knife blades
Heat gun/Hair dryer
Plastic pry tool(if you wish to remove the roof trim)
Socket set/adjustable wrench
Needle nose pliers
clay kit (optional)
MATERIAL
42X50 sheet of vinyl (I have Extra, PM me and we can meet)
This is significantly bigger than the original size of the G's roof
You can choose from a ton of different vinyl... I picked mine up from a local car modification place here in Toronto but you can shop around, if you want a nice carbon fiber look stick to 3M's DI-NOC and if you want an easy to use vinyl stick with the 1080 series by 3M, shop around and make up your mind.
HOW TO
This step is only needed if you wish to remove the XM antenna and then re-attach it once youve applied the vinyl film for a cleaner look
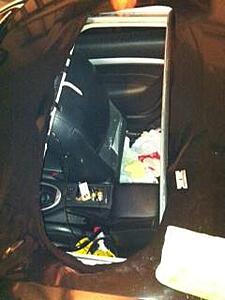
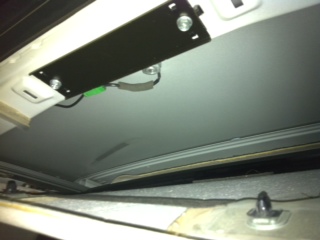
Remove the rear of the head liner to remove the XM antenna
-make sure the sun roof is closed and push the sunroof cover to the closed position

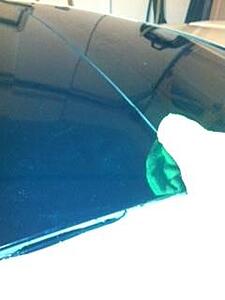
Locate the XM antenna
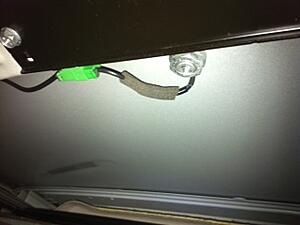
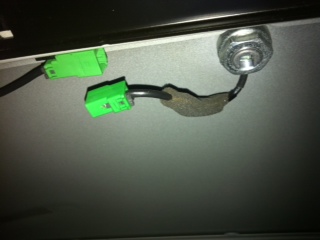
Remove the XM Antenna
- using needle nose pliers press down on the green clip and take off the antenna connector plug, use your fingers to feel for the plug if you break this or mess up the plug kiss your XM good bye
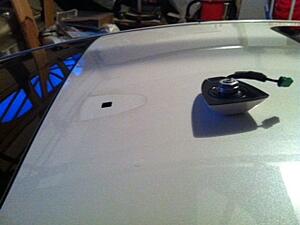
- use an adjustable wrench or a socket remove the nut holding the antenna in place

Once you pull it all off it should look like this
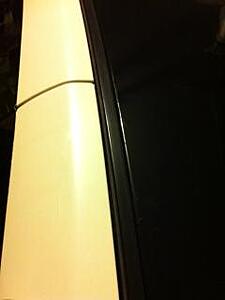
Remove the roof trim(optional)
-start from the rear of the car and use a plastic pry tool to pop off the trim
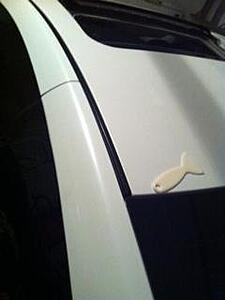
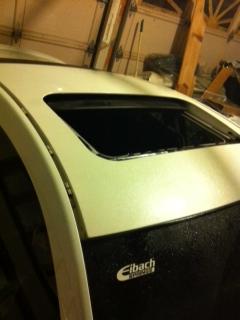
Once its off it should look like this (do this for both sides)

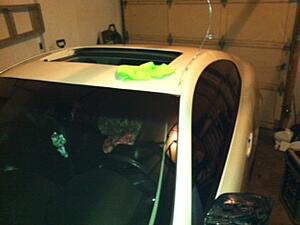
Time to clean and clay your roof
- to get the vinyl to stick on its best to clean your roof and the trim area completely
-by using a clay kit you can ensure you get all contaminates off your roof
- at this time you can tape down the sun roofs stone repelling thing
Spray down your roof and surrounding areas with the soap/water mix and open up your sun roof

Peel back 6 inches of vinyl and spray it down with the soap/water mix

Apply the 6 inch vinyl to the rear of the car and peel off the rest and apply your soap/water mix

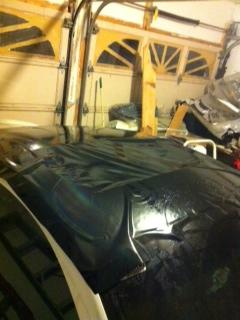
Lay out your vinyl and use a credit card wrapped into a microfiber cloth or a vinyl squeegee to remove all air pockets
- at this point start from the middle and work your way out on both sides making sure that the sticky part of the vinyl stays wet
- use your heat gun to slowly heat up the vinyl so that it follows the curves of the car and slowly stretch the vinyl over the roof and past all the trim mounts and windows

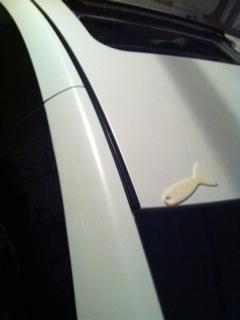
- once your happy with what you have its time cut off all the extra vinyl.
- using a razor blade I cut off just enough so that I could tuck the extra away under the trim and the windows.
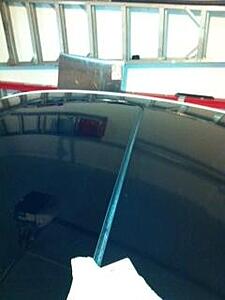
THIS WAS THE HARDEST STEP SORRY I COULDNT TAKE MANY PICTURES
Thats a picture of me using a credit card and microfiber cloth to tuck all the excess away
Attach your roof trim
Cut about 1/2 inch away from the sun roof
- use your heat gun to apply and mold the vinyl around the curves. I added some relief cuts in each corner to make it easier
Once your get everything molded and snug pop the sun roof closed so that it holds the vinyl in place
Cut a small hole in the vinyl for the XM Antenna to go back into and tighten it back up
AND YOUR DONE... IT WILL TAKE ABOUT 24 HOURS FOR THE VINYL TO COMPLETELY DRY
First things first
TOOLS
Spray bottle with dish soap (all you need is a drop of soap)
Vinyl squeegee or credit card wrapped in a micro fiber cloth
Exacto knife blades
Heat gun/Hair dryer
Plastic pry tool(if you wish to remove the roof trim)
Socket set/adjustable wrench
Needle nose pliers
clay kit (optional)
MATERIAL
42X50 sheet of vinyl (I have Extra, PM me and we can meet)
This is significantly bigger than the original size of the G's roof
You can choose from a ton of different vinyl... I picked mine up from a local car modification place here in Toronto but you can shop around, if you want a nice carbon fiber look stick to 3M's DI-NOC and if you want an easy to use vinyl stick with the 1080 series by 3M, shop around and make up your mind.
HOW TO
This step is only needed if you wish to remove the XM antenna and then re-attach it once youve applied the vinyl film for a cleaner look
Remove the rear of the head liner to remove the XM antenna
-make sure the sun roof is closed and push the sunroof cover to the closed position
Locate the XM antenna

Remove the XM Antenna
- using needle nose pliers press down on the green clip and take off the antenna connector plug, use your fingers to feel for the plug if you break this or mess up the plug kiss your XM good bye
- use an adjustable wrench or a socket remove the nut holding the antenna in place
Once you pull it all off it should look like this

Remove the roof trim(optional)
-start from the rear of the car and use a plastic pry tool to pop off the trim
Once its off it should look like this (do this for both sides)

Time to clean and clay your roof
- to get the vinyl to stick on its best to clean your roof and the trim area completely
-by using a clay kit you can ensure you get all contaminates off your roof
- at this time you can tape down the sun roofs stone repelling thing
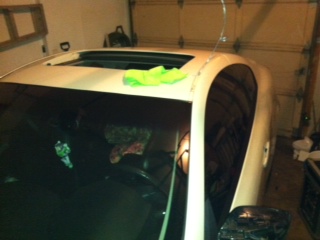
Spray down your roof and surrounding areas with the soap/water mix and open up your sun roof
Peel back 6 inches of vinyl and spray it down with the soap/water mix
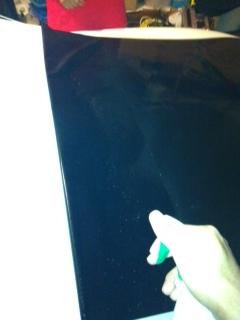
Apply the 6 inch vinyl to the rear of the car and peel off the rest and apply your soap/water mix

Lay out your vinyl and use a credit card wrapped into a microfiber cloth or a vinyl squeegee to remove all air pockets
- at this point start from the middle and work your way out on both sides making sure that the sticky part of the vinyl stays wet
- use your heat gun to slowly heat up the vinyl so that it follows the curves of the car and slowly stretch the vinyl over the roof and past all the trim mounts and windows
- once your happy with what you have its time cut off all the extra vinyl.
- using a razor blade I cut off just enough so that I could tuck the extra away under the trim and the windows.
THIS WAS THE HARDEST STEP SORRY I COULDNT TAKE MANY PICTURES

Thats a picture of me using a credit card and microfiber cloth to tuck all the excess away
Attach your roof trim

Cut about 1/2 inch away from the sun roof
- use your heat gun to apply and mold the vinyl around the curves. I added some relief cuts in each corner to make it easier
Once your get everything molded and snug pop the sun roof closed so that it holds the vinyl in place

Cut a small hole in the vinyl for the XM Antenna to go back into and tighten it back up
AND YOUR DONE... IT WILL TAKE ABOUT 24 HOURS FOR THE VINYL TO COMPLETELY DRY


 03-08-2012, 07:43 AM
#3
Registered Member
Thread Starter
thanks... and I never ended up using the Dinoc or the 1080 stuff.. i just wanted to see how it all looked with this cheaper stuff... ill throw on the 1080 series stuff once the weather warms up a bit more... I guess ill Write up another DIY LOL
03-08-2012, 07:56 AM
#4
I like how you went and removed the antenna. I did it without removing and it was, shall we say, tricky. Eventually got it down and smooth, but i wasn't completely happy with the effect* -- and somehow i managed to scratch areas of the vinyl. Removed it a couple days later.
I'll re-try with the 1080 stuff someday, too! Just got a swatch book from 3M and the finishes are amazing! I also bought a small sheet to try on and it applies so much better and easier than the wet-applied non-channeled vinyl.
Again, good job on the application!
*referring to the finish of "high gloss" vinyl -- still too much orange-peel for my taste.
03-29-2012, 05:06 AM
#5
Registered User

Join Date: Mar 2012
Posts: 28
Likes: 0
Received 0 Likes
on
0 Posts
The black roof looks awesome btw. I have a couple of questions though... Is this reversible and if so how difficult is it to remove the 3m or vinyl? Also will this damage the paint at all?

Trending Topics
06-10-2012, 01:09 PM
#8
Registered Member
Thread Starter
it looks much better than before since the heat from the suns made the surface even more level and bubble free. Vinyl scratches real easily, but I found rubbing compound, sealant and wax did the trick. Its held up really well but the next time around I will just use the 1080 stuff, easier install and its easy to work with

Thread
Thread Starter
Forum
Replies
Last Post