
DIY: Headlight and Foglight Adjustment


i think i adjusted it too much cuz now when i turn on my brights it doesn't look like it makes a difference, i just put the car as close to the garage as possible and since i lowered my car an inch i raised the HIDs and Fogs an inch...prolly too high huh?

Thread Starter
Registered Member
iTrader: (2)
Joined: Aug 2008
Posts: 1,386
Likes: 14
From: Miami, Florida
I would follow the instructions here to a T to get it right the first or at most the second time. An inch adjustment that close is a big difference in feet.
Make sure that your using a leveled surface like found in most parking garage's.


Registered User
Joined: Jul 2009
Posts: 400
Likes: 4
From: Keyport/Old Bridge, NJ
Adjusting the low beams on the sedan is a BEYATCH. First, you have to break this tamper proof plastic crap off the adjuster screw. Second, it's not a gear, it's just an 8mm hex with philips head in the center. You can't fit a ratchet or screw driver in there without removing the airbox. A small ratcheting wrench might work, but I keep mine at work.
Last edited by DJ Hellfire; Aug 26, 2009 at 09:55 PM.

Registered User
Joined: Jun 2009
Posts: 28
Likes: 0
From: Toronto - GTA
where are the screws?
Can somebody provide me some more info on where the screw is to adjust low beam headlights?
I can see one gear that can be turned on each side of the headlights, but when i turn it, it makes no difference. I've turned it many times which makes me believe I'm turning the wrong gear.
is there supposed to be two on each side (one for fog and one for headlights?) I can only find one, and turning it does not change anything.
please, can someone post up some pics? (2009 G37 sedan)
Thanks a bunch!
Thread Starter
Registered Member
iTrader: (2)
Joined: Aug 2008
Posts: 1,386
Likes: 14
From: Miami, Florida
Can somebody provide me some more info on where the screw is to adjust low beam headlights?
I can see one gear that can be turned on each side of the headlights, but when i turn it, it makes no difference. I've turned it many times which makes me believe I'm turning the wrong gear.
is there supposed to be two on each side (one for fog and one for headlights?) I can only find one, and turning it does not change anything.
please, can someone post up some pics? (2009 G37 sedan)
Thanks a bunch!
I can see one gear that can be turned on each side of the headlights, but when i turn it, it makes no difference. I've turned it many times which makes me believe I'm turning the wrong gear.
is there supposed to be two on each side (one for fog and one for headlights?) I can only find one, and turning it does not change anything.
please, can someone post up some pics? (2009 G37 sedan)
Thanks a bunch!
Try our partner site: http://www.g35driver.com/

Thread Starter
Registered Member
iTrader: (2)
Joined: Aug 2008
Posts: 1,386
Likes: 14
From: Miami, Florida
^^^ My bad I must of not seen that correct. You have a 2009 Sedan. I would imagine the headlight adjustment is no different and you have 2 adjusters on each side (one for headlight/hi-beam and one for fog) Take a look at the tutorial pics again they should be the same. Sorry don't have a 2009 Sedan to look at to make sure.
Registered User
Joined: Jun 2009
Posts: 28
Likes: 0
From: Toronto - GTA
I took it to the dealership today and they made the adjustment. They tried to justify how the lights are supposed to point down. But I insisted they were too low.
All is working fine now.
I wasn't there beside them when they did it, so i sitll don't know where the specific screws are. But i did see them turn the steering wheel in one direction so that they can access part of the headlamp through the front fenders (from the outside of the car!)
the service manager advised me that the forums in the USA are not relevant to my car as my car is Canadian (different specs and all). Not sure if this is true. Sure we have daytime running lights etc, but I think everything else still applies (engine, transmission, gearboxes etc)
Registered User
Joined: Jul 2009
Posts: 400
Likes: 4
From: Keyport/Old Bridge, NJ
Like I said above, adjusting the low beam on the Sedan is a BEYATCH and a bit different than the Coupe. Here is how you do it. First peel back the little side rubber thing along the fender and locate this little off-white/cream colored plastic collar. I have it pictured below. You have to break that off some how to expose the adjuster. I stuck a steak knife down in there and cut it down the middle, then pried it off with a flat head. It's a pain in the azz to get it off because it spins.
Once you get it off, grab and 8mm ratcheting wrench and turn the adjuster clockwise to raise the projector higher and counter clockwise to lower the projector. If you don't have a ratcheting wrench, there are other was to get in there. You can remove the airbox and go in from the side with a ratchet and socket. Or you can go through the wheel well with a ratchet or Philips head.
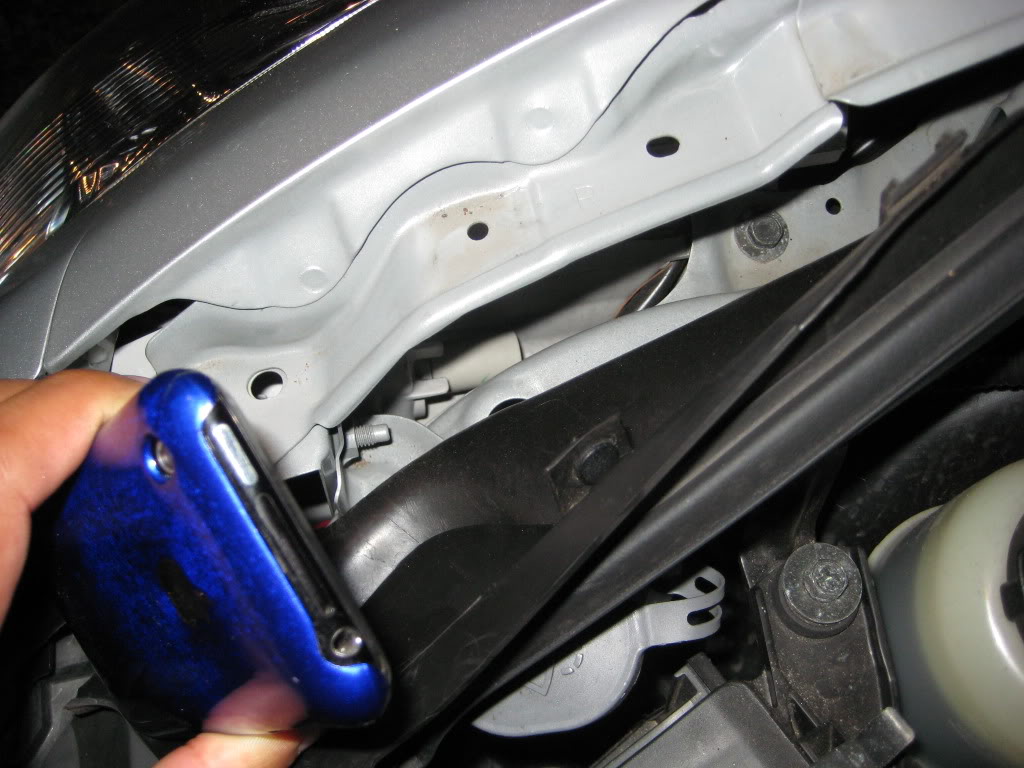
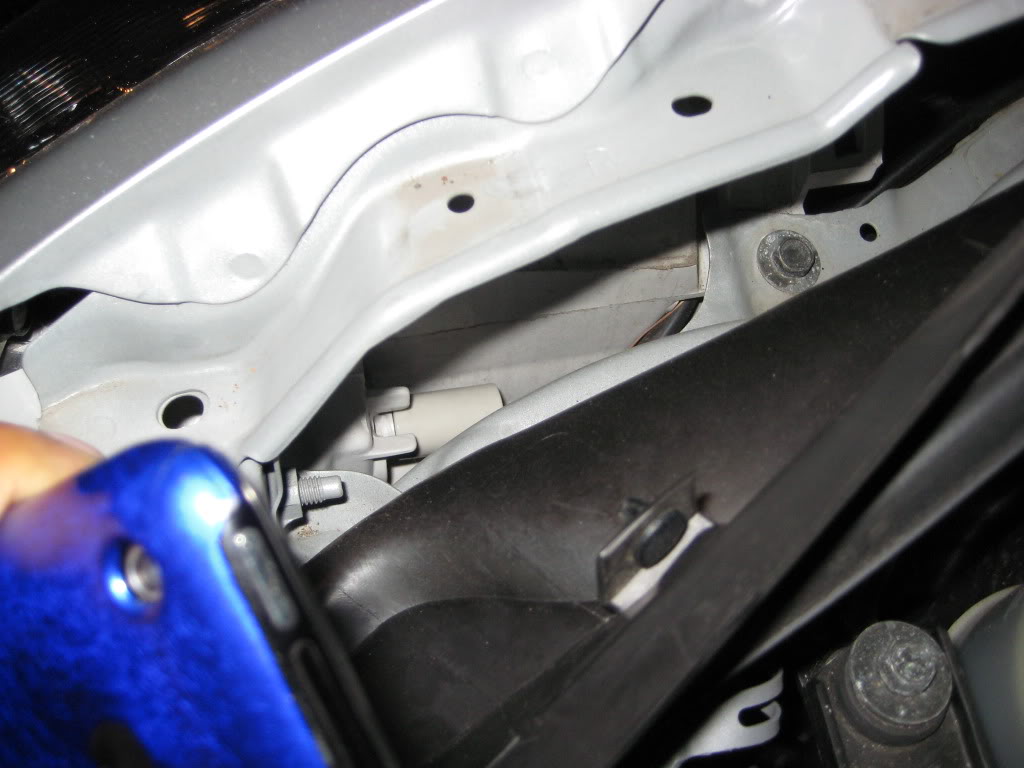
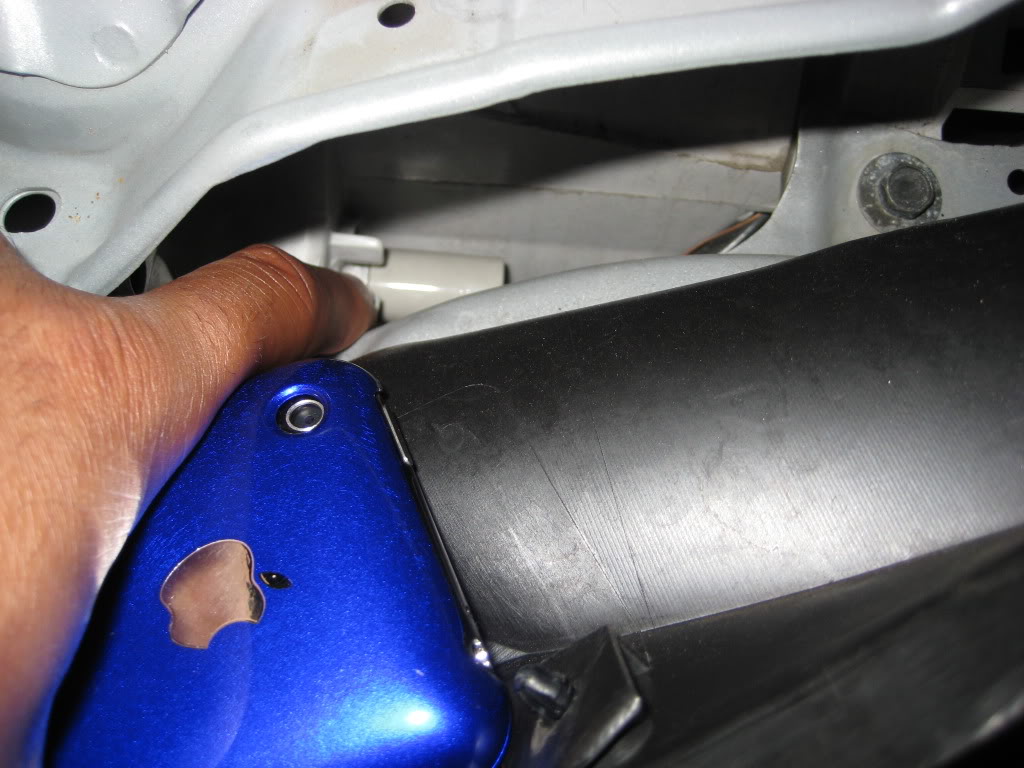
Once you get it off, grab and 8mm ratcheting wrench and turn the adjuster clockwise to raise the projector higher and counter clockwise to lower the projector. If you don't have a ratcheting wrench, there are other was to get in there. You can remove the airbox and go in from the side with a ratchet and socket. Or you can go through the wheel well with a ratchet or Philips head.
Registered User
Joined: Jun 2009
Posts: 28
Likes: 0
From: Toronto - GTA
thanks for posting those pics. Its more clear now for sure.
so i was originally adjusting the wrong screws. Theres this small metal gear directly behind the daytime running lights / fog lights which I was turning, but it did nothing. Is that for the fog light adjustment? Even if i did adjust it, it'd be unnoticable correct? (since the light is scattered and not a projector)
btw, are daytime running lights and fog lights the same thing?
what are the purpose of fog lights? is it so that when it's turned on that oncoming traffic can see you? or is it supposed to allow you to see better in fog?

Day time running lights are not the same as fog lights. Day time running lights are exactly just that, lights running during the day, for more visibility for other drivers to see you. Fog lights penetrate the white fog to light up the road better. Traditional white light will scatter when it hits the white fog, but yellow fogs will penetrate it to light up the road.
__________________
Best Car Insurance | Auto Protection Today | FREE Trade-In Quote
__________________
Best Car Insurance | Auto Protection Today | FREE Trade-In Quote